Setting up Mobile Capture
Setting up Mobile Capture includes the following administrative tasks.
Adding the mobile connector
You can add a mobile connector by using Server Administrator > Connectors after activating the mobile connector license.
To add a mobile connector
-
Start the Server Administrator.
-
Expand the Server Administrator tree, if necessary.
-
Right-click Connectors. The New Connector shortcut menu appears.
-
Select New Connector > Mobile. The Create New Mobile Connector wizard appears.
-
Specify the server address, if necessary.
-
Click Next.
-
Type a mobile connector name in the Name box, if necessary.
-
Click Next. The Congratulations! message appears.
-
Click Finish. The mobile connector appears in the details pane.
Configuring the mobile connector
You can configure the mobile connector by using the Mobile Connector Properties dialog box.
To configure the mobile connector
-
Select Connectors on the Server Administrator tree, if necessary.
-
Double-click the mobile connector in the Connectors details pane. The Mobile Connector Properties dialog box appears.
-
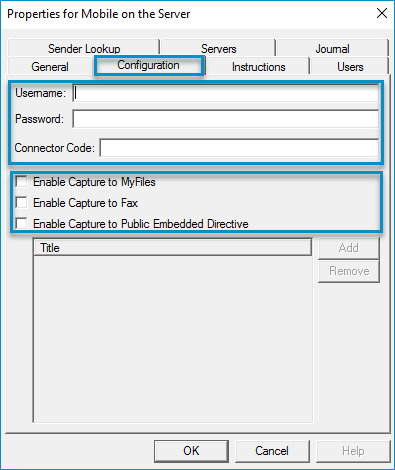
Select the Configuration tab.
See the Mobile Connector Properties > Configuration dialog box example below.
-
Specify the Administrative username and password provided by
-
Specify a connector code in the Connector Code box. The connector code created by an Administrator must be unique and alphanumeric. Alpha characters appear in upper case, but are not case-sensitive to the user community.
Although there is no length
restriction,
Note: Administrators can create multiple mobile connectors. Each connector must have its own unique code. This enables Administrators to group users to a specific connector and document workflow(s). For example, mobile connectors could be set up for different segments of an organization like Sales, Human Resources, Legal, and Finance. This is an optional configuration and is not required. One mobile connector can be used for all mobile users.
-
Select any or all workflow types based on your company’s document capture requirements.
-
-
Enable Capture to MyFiles (Automatically configured with the Server installation, no additional configuration required)
-
Enable Capture to Fax (Requires Fax configuration)
-
Enable Capture to Public Embedded Directives also known as Public Distributions (Requires Embedded Directives configuration)
-
Note: Fax and Embedded Directives configurations must be completed before configuring the mobile connector.
-
If Enable Capture to Fax is selected, complete the following steps (optional) .
-
-
Select the Sender Lookup tab.
-
Add the LDAP properties.
-
Refer to the Help topic related to the type of fax connector you are using for additional information about Sender Lookups; for example, Exchange, SMTP, and HP LAN Fax. There are other connectors that support Sender Lookups.
Note: The Sender Lookup feature is used to look up and apply information about the sender to fax cover pages.
-
If Enable Capture to Public Embedded Directive is selected, complete the following steps.
-
-
Click Add. The Select Embedded Directive dialog box appears.
-
Click Find.
-
-
Use the Criteria check boxes at the top of the Select Embedded Directive dialog box to filter the embedded directives, if necessary.
-
-
Click Select. The Embedded Directive appears in the Title area.
-
-
Continue to Assigning and removing users.
Assigning and removing users
You can assign users to a mobile connector after configuration by using the Mobile Connector Properties > Users tab. Registered users will automatically appear in the Assign Users > Email area. In addition, the Users tab is used to reassign users from one mobile connector to another or remove them, if necessary.
To assign users to a mobile connector
-
Select Connectors on the Server Administrator tree, if necessary.
-
Double-click the appropriate mobile connector in the Connectors details pane. The Mobile Connector Properties dialog box appears.
-
Select the Users tab. Users with assigned connectors; if any, will appear in the Email area.
See the Mobile Connector Properties > Users dialog box example below.

-
Click the Assign button. The Assigned Users dialog box appears.
-
Select the appropriate user.
-
Click OK on the Assign Users dialog box.
-
Click OK on the Mobile Connector Properties dialog box.
Removing users
-
Use the Remove button to remove users from a mobile connector, if necessary.
Enabling mobile capture
You can enable Mobile Capture for your users by using Server Administrator > Configuration > Groups.
To enable mobile capture
-
Select Configuration > Groups on the Server Administrator tree, if necessary. The Groups details pane appears.
-
Choose the appropriate group. The Group Properties dialog box appears.
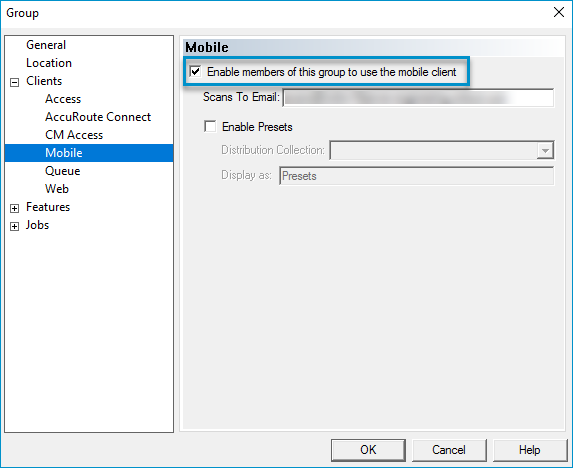
See the Group Properties dialog box example below.
-
Select Clients > Mobile.
-
Select the Enable members of this group to use the mobile client check box.
-
Click OK.
Registering users
-
Registration instructions are available by selecting the Instructions tab on the Mobile Connector Properties dialog box. Use the Copy to Clipboard button to copy and then paste and distribute the instructions as needed.
See also
About Mobile Capture
Mobile Capture Registration
Capture to MyFiles, Fax, and Public Distributions