The
-
Install the printer driver on the server using the standard Windows installation procedure.
-
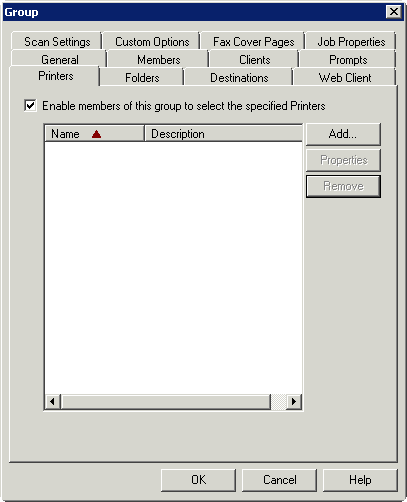
Launch Server Administrator, expand the tree view, and click Configuration > Groups.
-
In the right pane, double-click on the Default group (or applicable group). The Group page is displayed.
-
Click on the Printers tab.
-
Select Enable members of this group to select the specified Printers.
-
Click the Add button. The Add Printer page is displayed.
-
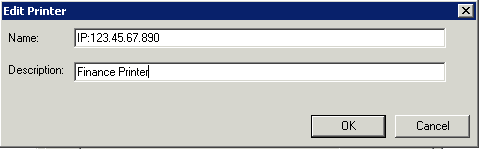
Enter the printer information. For example:
-
Click OK. Click OK again to save the changes. Refer also to Selecting a network printer.
Modifying Network Printer Properties
You can modify the Network Printer properties by using the Server Administrator > Configuration node.
To modify the Network Printer properties
-
Launch the Server Administrator, expand the tree view, and click Configuration > Groups.
-
In the right pane, double-click on the Default group (or applicable group).
-
Click on the Printers tab.
-
Highlight the printer that needs to be modified and click Properties.
-
On the Edit Printer page make all needed changes and, when finished, click OK.
-
Click OK again to close the Group page.
Removing a Network Printer
You can remove a network printer by using the Server Administrator > Configuration node.
To remove a network printer
-
Launch the Server Administrator, expand the tree view, and click Configuration > Groups.
-
In the right pane, double-click on the Default group (or applicable group).
-
Click on the Printers tab.
-
Highlight the printer that needs to be modified and click Remove.
-
Click OK to close the Group page.