You can send scanned documents to an FTP(S) destination on an HP MFP (Multifunction Printer) device by creating an Embedded Directive or creating a button on the MFP.
Creating an Embedded Directive for use with FTP(S)
To create an Embedded Directive
-
Open the Web Client and select Distributions > New.
-
In the New Message dialog, select Network Folder as the Type.
-
In the Select destination drop-down select the FTP folder.
-
Complete all needed fields to send a message, and then send the message to the server.
-
Go to the HP MFP.
-
Select Public Distributions (or Personal Distributions).
-
Select the newly created Embedded Directive that will be using FTP.
-
Scan a document.
Creating a new button on the device using FTP(S) to a network folder
To create a new button
-
From the Web client, create an Embedded Directive that:
-
Is public (published). In this way when it is used, the job will be from the scanning user rather than the Embedded Directive owner.
-
Routes to the Network folder using FTP.
-
-
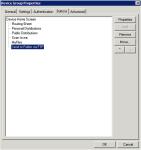
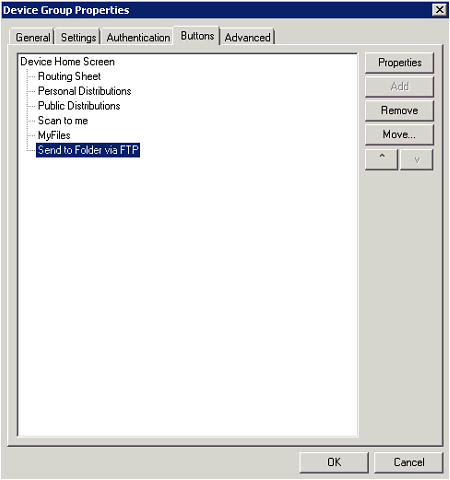
Right-click on the device group and select Properties.
-
Click on the Buttons tab and select Add.
-
In the Add Button dialog, select Scan to Distribution in the Type drop-down.
-
Enter a Name for the button and click OK.

-
In the Device Home Screen tree view, select the new button that was just created and click the Properties button.
-
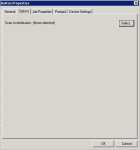
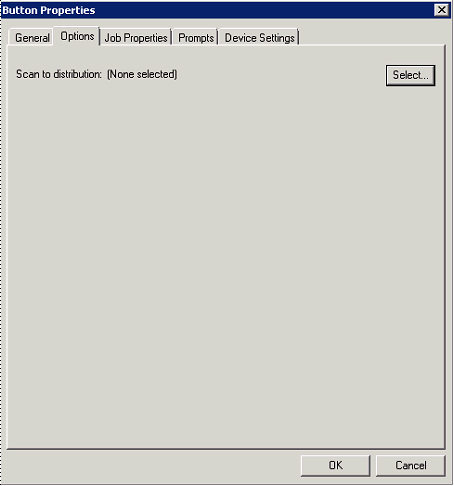
When the Button Properties dialog opens, click the Options tab.
-
To choose a Scan Distribution, click the Select button.
-
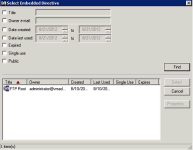
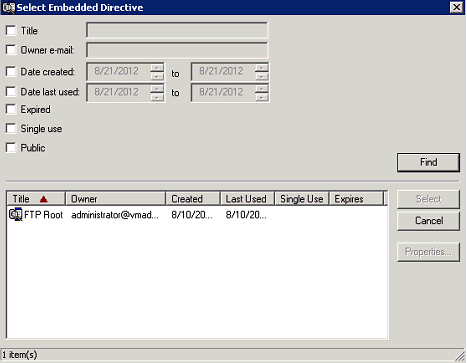
Search for and locate the Embedded Directive that will send via FTP to a network folder. Highlight the Embedded Directive and click Select.
-
Click OK to complete the setup.

A new button will be available on the device that will use FTP to scan to a network folder.