The topics in this section contain instructions on installing and configuring the following Dialogic modem driver. It is written for System Administrators with detailed knowledge of the server and the following modem driver.
- SR140 module (virtual board)
Each topic details the procedure involved in installing and configuring the modem driver. There is also a topic for Testing the Dialogic fax board/module.
Expand to view more information.
Software requirements
- Telco connector (to configure the message server for faxing messages)
Driver requirement
- Brooktrout v6.4.0 or higher
Gateway requirement
For a list of supported gateways, go to the Dialogic Help > Technical Documentation.
Additional Requirements
In addition to meeting the requirements listed above, you need the following:
- Proper T1 fax card on the gateway
- Enough memory to run the desired amount of channels
- Verify that the Modem Manager service is not running.
- Go to the location where you extracted the ZIP file and locate the appropriate directory.
- Double-click Boston6.4.0.msi. The Welcome page opens.
- Click Next. The License Agreement page opens.
- Read the license agreement and, if you agree, select I accept the terms in the license agreement.
- Click Next. The Destination Folder page opens.
- Change the destination location if necessary and click Next.
- Click Install.
- When installation is complete, click Finish.
- Reboot the server.
- After you finish installing the Brooktrout System Software, install the required add-on, Brooktrout 6.4.0_x64.msi.
- Verify that the Model Manager service is not running.
- Go to the location where you extracted the ZIP file and locate the 64 directory.
- Double-click Boston6.4.0_x64.msi. The Welcome page opens.
- Click Next. The License Agreement page opens.
- Read the license agreement and, if you agree, select I accept the terms in the license agreement.
- Click Next. The Destination Folder page opens.
- Modify the destination location if necessary and click Next.
- Click Install.
- When installation is complete, click Finish.
- Reboot the server.
- Click Start >Program Files > Brooktrout License Manager. The BrookTrout License Manager opens.
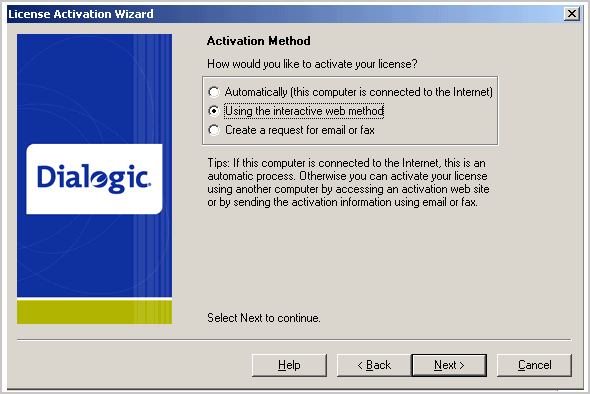
- In the menu bar click License >Activate License. The License Activation wizard opens and you see the Welcome message.
- Click Next. Select Using the interactive web method.

- Click Next. You get the Node Lock value.
- Click the Save the instructions into a file option.
- Click Next.
- Browse and save the file to a known location.
- Go to the location where you saved the file. Open the file.
- The file contains the text similar to what is shown below and gives you the Node Lock value of your system:
- To request a license, please visit our website:
- http://www.dialogic.com/activation
- and follow the instructions provided on the website.
- Dialogic will email the license to you immediately.
- When prompted, supply the following information:
- Node Lock: [Node Lock value]
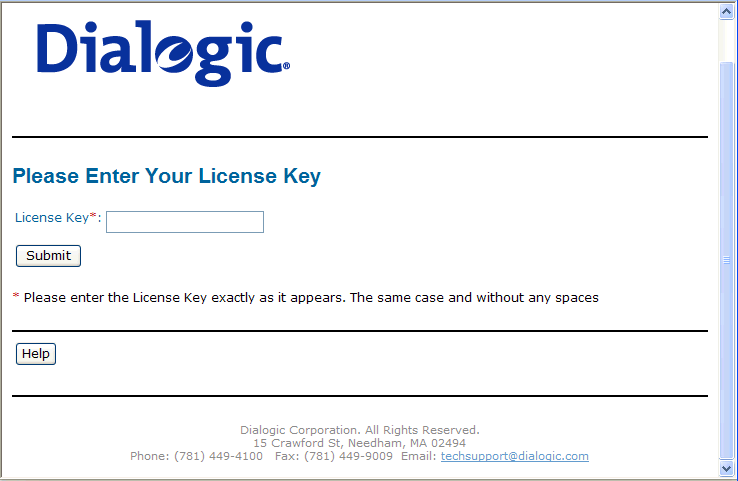
- Open Internet Explorer and go to http://www.dialogic.com/activation.

- In the License Key text box, enter the License key and the Node Lock value of your system.
Note: IMPORTANT! For the license key, contact your software representative.
- Brooktrout sends you the license for your BrookTrout SR140 module.
Note: n This license key will enable the Brooktrout SR140 fax feature on the system the node value was retrieved from. It cannot be transferred without assistance from Cantata.
Save the license file to the local drive of the system.
- Launch the Brooktrout License Manager.
- From the file menu option, select License.
- Select the Install License drop-down.
- Browse to the license file you saved to the system.
- Click Start > Program Files > BrookTrout Configuration Tool. The Configure IP Stack page opens.
- Select the protocol appropriate to your environment. The BrookTrout Configurations Tool opens.

- Expand Call Control Parameters.
- Select Module0x41:SR140.
- In the right pane, click the Parameters option.
- Verify that the IP Call Control Module value is SIP or H.323 (depending on which protocol is configured for your company).
- Continue to Additional SIP configuration or Additional H.323 configuration. You can configure SIP or H.323, but not both.
- Click Start > Program Files > BrookTrout Configuration Tool. The BrookTrout Configurations Tool opens.
- Expand IP Call Control Modules.
- Select SIP.
Image goes here.
- In the right pane, select the IP Parameters option.
- In the SIP_default_gateway add the IP address of your Cisco Gate followed by 5060 in the second field.
- Select the T.38 parameters option.
- Set Media Renegotiate Delay Outbound, msec to -1.
- In Advanced settings, change the Maximum T.38 version from 3 to 0.
- The prompt Parameter Maximum Bit Rate, bps value should not be greater than 14400 when Maximum T.38 version is 0 is displayed.
- Click OK and the Maximum bit rate,bps is automatically reset to 14400.
- Click Start > Program Files > BrookTrout Configuration Tool. The BrookTrout Configurations Tool opens.
- Expand IP Call Control Modules.
- Select H.323.
- In the right pane, select IP Parameters option.
- Add the IP address of your Cisco Gateway in the h323_default_gateway followed by 1720.
- Add the IP address of your Server in the h323_local_ip_address followed by 1720.
- Expand Advanced Settings option.
- Change Called Party Options to 2.
- Change Calling Party Options to 2.
Brooktrout modems have a known problem with sending document with greater than 30 pages. You must change the Maximum Number of Pages property value to 200 in order to send messages greater than 30 pages successfully.
- Click Start > All Programs > BrookTrout > Brooktrout Configuration Tool.
- Select BTCall Parameters (All boards).
- In the Advanced Settings section, go to the Maximum Number of pages option.
- Set the value to 200.
- Save your changes.
- Click Apply to make the Brooktrout server read your changes.
After you have installed and configured the modem drivers, test to see that the Dialogic fax board/module are working properly.
- Stop Modem Manager Service.
- Login to the system running the modem server.
- Navigate to C:\Program Files (x86)\HP\HPCR\Tools\Modem\Tools\BrookTrout\Config.
- Copy fax.exe and test.ips.
- Paste the copied files to C:\Program Files\Brooktrout\Config.
- Send a test fax by completing the following steps.
- Open a command prompt window.
- Change directory to C:\Program Files\Brooktrout\Config.
- Type ..\bin\firmload.bat
- Press Enter.
- Type fax -u 0 -s PhoneNumber test.ips where PhoneNumber is the destination fax number.
- Press Enter. The test fax is delivered to the destination.