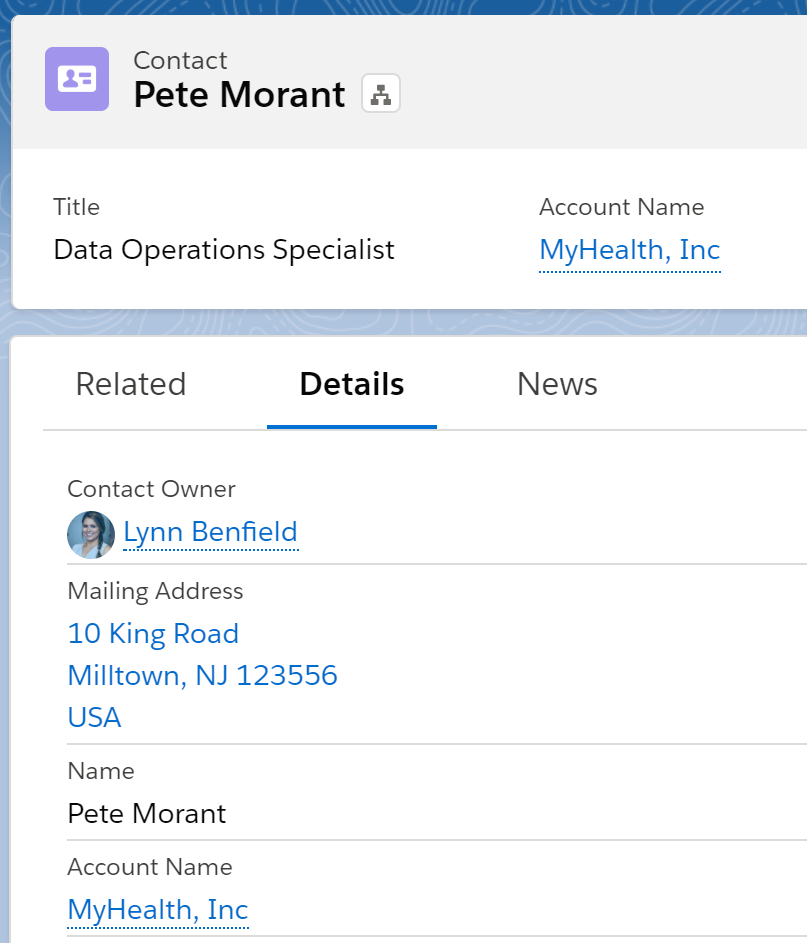
Setting a Contact's Details
Learning Objectives
After completing this topic, you'll be able to:
Edit a contact's details
Add a photo to the contact's card
Go to the contact's page in Salesforce to add further details
- Review a relationship map to understand the levels of support/nonsupport among your contacts
Lynn and her colleagues at Riley Retail Solutions are
She's added everyone to her relationship map
What's next? Well, Lynn wants to make sure that each contact's individual details are right.
She decides to focus on
Lynn knows that
Lynn also knows that he's in the operations department, and his phone number is 555-1234.
And the team has compiled some additional research notes about him.
Add Basic Details
Some of
Lynn notices that
What about
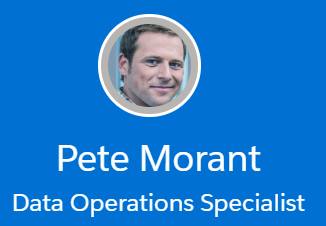
While she's on the details panel, Lynn decides to add
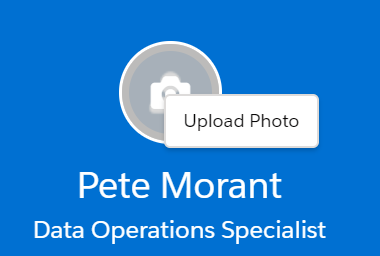
The photo for
A contact's office location isn't normally shown in their contact details on the relationship map.
So Lynn needs to open
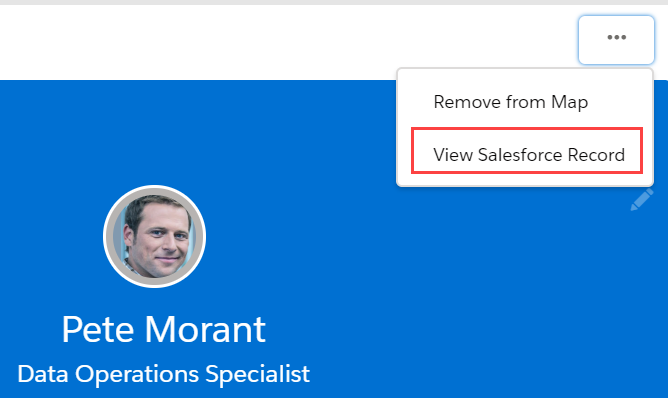
This opens
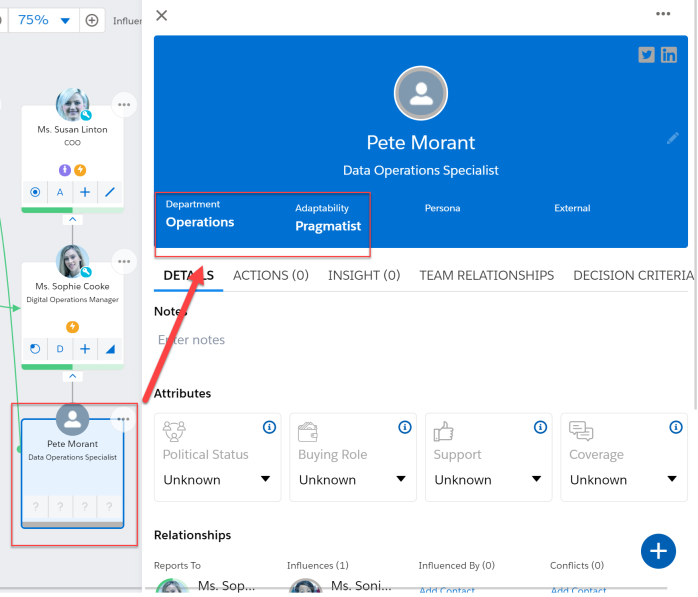
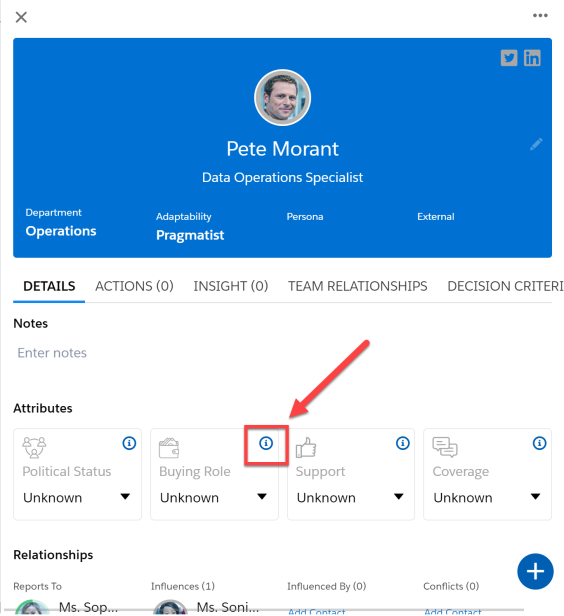
Opportunity-Level Details for a Contact
Some details about Pete apply only to this particular opportunity. These include Notes, and also attributes such as Political Status and .
indicates the part Pete plays in MyHealth's decision-making process for this deal.
Lynn knows that Pete will help to evaluate MyHealth's software options for this opportunity, so she's fairly sure his buying role is Evaluator.
But she's new to relationship maps. Altify can help her make the right choice.
So she clicks the information icon on the panel for guidance.
A short set of questions guide her through the considerations that determine what Pete's buying role is.
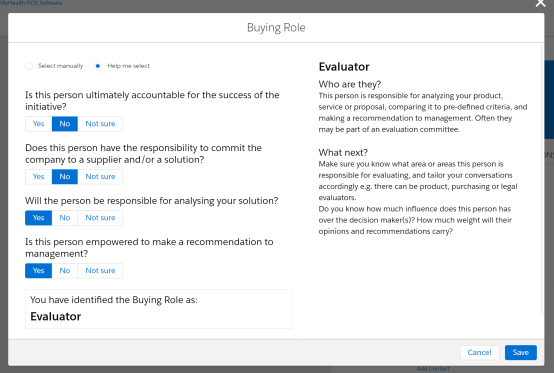
Lynn was right. Pete is definitely an evaluator.
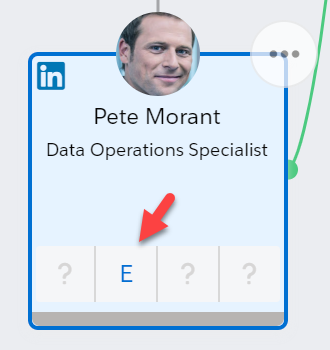
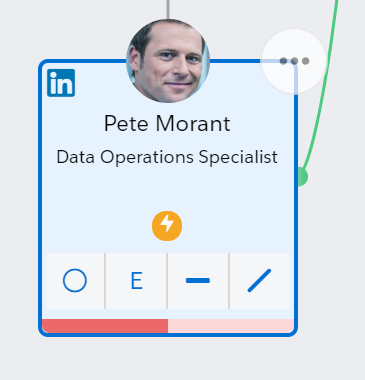
When she sets this, she notices how the buying role icon on Pete's card is updated. 'E' means evaluator.
She can get similar guidance about each of Pete's other relationship attributes.
When she's more familiar with relationship maps, Lynn may feel comfortable selecting indicators without any guidance. But for now it's great to know that advice is there when she needs it.
Plus, whenever Lynn or anyone on her team needs a reminder about what an attribute means, they can always select the information icon in the right-hand panel.
Pete 's Support for Lynn
The color coding on a contact's card tells you whether the person supports you, your competition, or neither. This is based on the support level that has been set on the
The levels of support are:
- Green: Mentor/Supporter
- Red: Enemy/Non-Supporter
- Orange: Neutral
- Gray: The attribute hasn't yet been set.
The color-coding can be a half bar or a full bar. This gives Lynn an idea of the intensity of the contact's support or nonsupport.
Lynn clicks Support and uses Altify’s guidance to get help setting
![]()
Levels of Relationship with Pete
The Team Relationships tab gives Lynn a way of seeing team members' current and desired level of relationship with
The available levels of relationship are:
- Vendor
- Credible source
- Problem solver
- Trusted advisor
The Relationship Level indicator shows each team member's current level of relationship with the contact (the blue circle) and their desired level of relationship (the highest red circle).
So, for example, you can see below that Jane Anderson's current level of relationship with
(To adjust these, Lynn simply clicks Jane's relationship-level indicator and changes the selections. Jane herself could also do this.)
![]()
Lynn (and her fellow team members) can add and remove team members from the list.
Removed team members are moved to the Account Relationships section and their Desired Level of Relationship is set to None. This section allows Lynn to keep track of those outside her team who have a relationship with
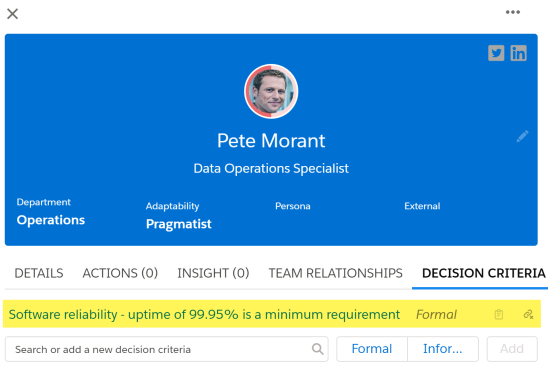
Pete's Decision Criteria
The Decision Criteria tab captures the criteria that are important to the contact when they are making a buying decision. You can record criteria as Formal (tangible, objective and measurable, e.g. 24/7 support) or Informal (based on a contact’s personal experiences and feelings toward your company). Decision Criteria are useful for assessing your organization’s chances of winning the opportunity.
Lynn recalls that Pete places particular importance on reliability when he is assessing software solutions. She contacts him and he confirms that a software uptime of 99.95% is a minimum requirement – so Lynn creates a formal decision criterion.
Now that this new decision criterion has been created, it is available to select for other contacts on the relationship map (and will be automatically set to Formal).
Lynn can record more information by clicking the name of the criterion.
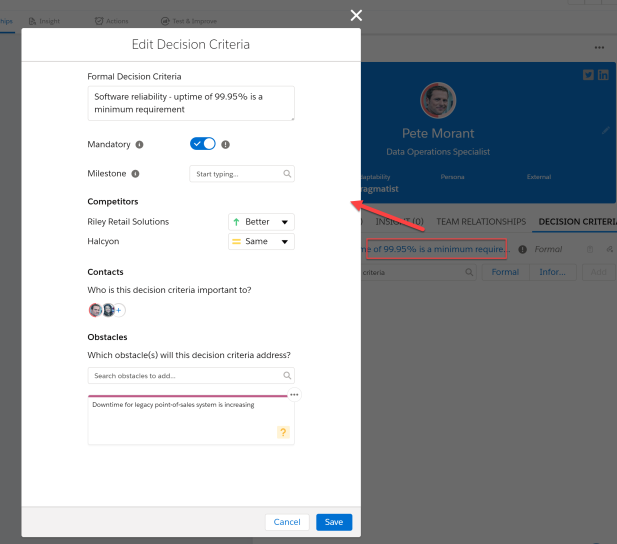
She sets the Mandatory toggle, as the winning solution has to have the required uptime specified by Pete.
Lynn is not aware of a particular stage in MyHealth’s formal buying process that can be linked with the decision criterion and recorded as a Milestone – so she leaves it blank. If it were set to a key step in their decision process, for instance, her team would know that they need to communicate and emphasize the reliability of their solution by this stage.
The Competitors section allows Lynn to capture how the Riley Retail Solutions solution, and the solutions provided by their competitors for the opportunity, measure up against MyHealth’s expectation with regard to this particular criterion. She is confident that Riley Retail Solutions can more than match MyHealth’s expectations in terms of software reliability, so she sets the value to Better. From experience of competing with Halcyon, she knows their solution is reliable, but not to the same standard as the Riley Retail Solutions solution. She sets this value to Same.
Knowing Pete’s influence on Sonia West, the CFO, Lynn decides to add Sonia in the Contacts section as someone for whom the reliability of the software is also an important factor in the buying decision.
Finally, by mapping a relevant obstacle in her insight map to the criterion, Lynn can identify the specific challenges that MyHealth are facing, and explain why reliability is key to their buying decision. She reviews her insight map and quickly spots the obstacle ‘Downtime for legacy point-of-sales system is increasing’. It is clearly relevant to the issue of software reliability. So she proceeds to select it in the Obstacles section.
Satisfied with her initial attempt at capturing Pete’s decision criteria, Lynn clicks Save.
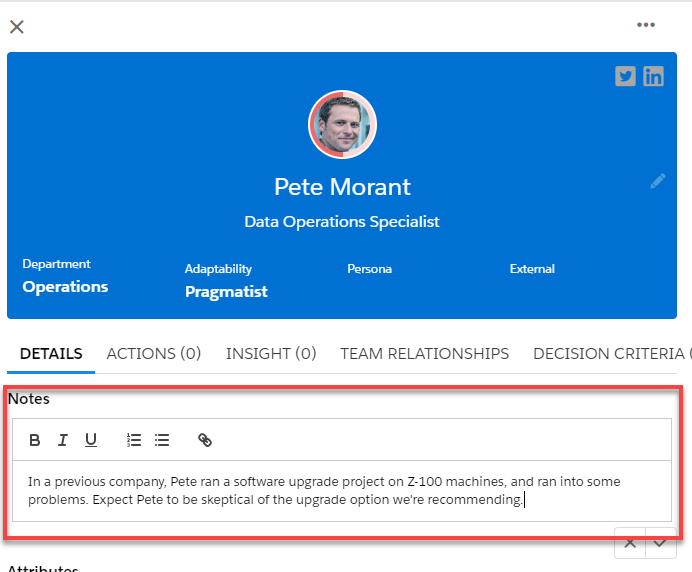
Research Notes about Pete
Lynn turns her attention to the research notes the team has gathered about
She knows that these notes ought to be on the map so they'll be readily available when the team is reviewing their relationship strategies within the account.
She simply enters the research notes into the Notes box.
Lynn has set basic details and
She can do the same for the other contacts on the map.
And, as the team's relationships develop with the contacts on the map and new information is gathered, the map can be updated, ensuring that the whole team has an accurate, shared representation of this
Try It Yourself
You've seen how to add a contact's details to the relationship map. In previous topics, we suggested that you add contacts and relationships in one of your opportunity relationship maps. Why not return to that map now and start adding details to contacts? You can:
- Edit a contact's basic details
- Add a photo to their card
- Go to their contact page to add further details
- Set
- Create and edit a decision criterion on a contact's information panel