Linking to a Custom Page
A quicklink can be configured to link to a custom page that displays data for the selected contact on the relationship map. The following example demonstrates how to configure a quicklink that shows opportunities associated with the contact.
Preparing the custom page
The custom page that displays contact data is a Visualforce page. Configuration is performed in two stages: creating the controller Apex class and then creating the Visualforce page.
Creating the controller Apex class
-
In Setup, go to Apex Classes.
-
Click New.
-
In the Apex Class Edit window, enter the necessary code. See the sample code below for an example
Copypublic class QuickLinkContactOppController {
public Id contactId {get;set;}
public ContactInfo contactInfo {get; set;}
public List<OppInfo> opps {get; set;}
public QuickLinkContactOppController(){
contactId = apexpages.currentpage().getparameters().get('id');
}
public ContactInfo getContactDetails(){
List<Contact> contactDetails = [SELECT Id, Name, Email, Phone,
(SELECT Id, OpportunityId, Opportunity.Name, Opportunity.StageName, Opportunity.Amount, ContactId FROM OpportunityContactRoles)
FROM Contact
Where Id= :contactId
];
ContactInfo contactInfo = null; //new ContactInfo
opps = new List<OppInfo>();
for(Contact c: contactDetails){
for(OpportunityContactRole role: c.OpportunityContactRoles){
opps.add(new OppInfo(role.Opportunity.Name, role.Opportunity.StageName, role.Opportunity.Amount, role.Opportunity.Id));
}
contactInfo = new ContactInfo(c.Name, c.Email, c.Phone, opps);
}
return contactInfo;
}
public Class ContactInfo{
public String name {get; set;}
public String email {get; set;}
public String phone {get; set;}
public List<OppInfo> opps {get; set;}
public ContactInfo(String name, String email, String phone, List<OppInfo> opps){
this.name = name;
this.email = email;
this.phone = phone;
this.opps = opps;
}
}
public Class OppInfo{
public String id {get; set;}
public String name {get; set;}
public String stage {get; set;}
public Decimal amount {get; set;}
public OppInfo(String name, String stage, Decimal amount, String id){
this.name = name;
this.stage = stage;
this.amount = amount;
this.id = id;
}
}
}
-
Click Save.
Once the controller class is created, you can create the Visualforce custom page.
Creating the Visualforce page
The example below outlines how to create a Visualforce page that references the above controller class.
-
In Setup, go to Visualforce Pages.
-
Click New.
-
On the Visualforce Page screen, enter the following information:
-
Label: the label that will be displayed on the custom page.
-
Name: the name by which the Visualforce page will be identified in the quicklink.
We'll call our Visualforce page 'Opportunities'.
-
-
Enter the markup for this page. This references the controller class. See the sample code below for an example.
Copy<apex:page controller="QuickLinkContactOppController" showHeader="false" sidebar="false">
<style>
.tableClass {
border: 1px solid black;
}
.tableClass tr, .tableClass th, .tableClass td {
border: 1px solid black;
}
a {
color: blue;
}
</style>
<div>
</div>
<apex:dataTable value="{!contactDetails.opps}" var="opp" id="contactOppTable" rowClasses="odd,even" styleClass="tableClass">
<apex:facet name="caption">Opportunities for {!contactDetails.name}</apex:facet>
<apex:facet name="header">Opportunity List</apex:facet>
<apex:column >
<apex:facet name="header">Name</apex:facet>
<apex:outputLink value="/{!opp.Id}" target="_blank">{!opp.Name}</apex:outputLink>
</apex:column>
<apex:column >
<apex:facet name="header">Stage</apex:facet>
<apex:outputText value="{!opp.stage}"></apex:outputText>
</apex:column>
<apex:column >
<apex:facet name="header">Amount</apex:facet>
<apex:outputText value="{!opp.amount}"></apex:outputText>
</apex:column>
</apex:dataTable>
</apex:page>
-
Click Save.
You are now ready to create your quicklink.
Creating the quicklink
-
Select the tab Altify Quicklinks.
-
Click the New button.
The following screen is displayed:
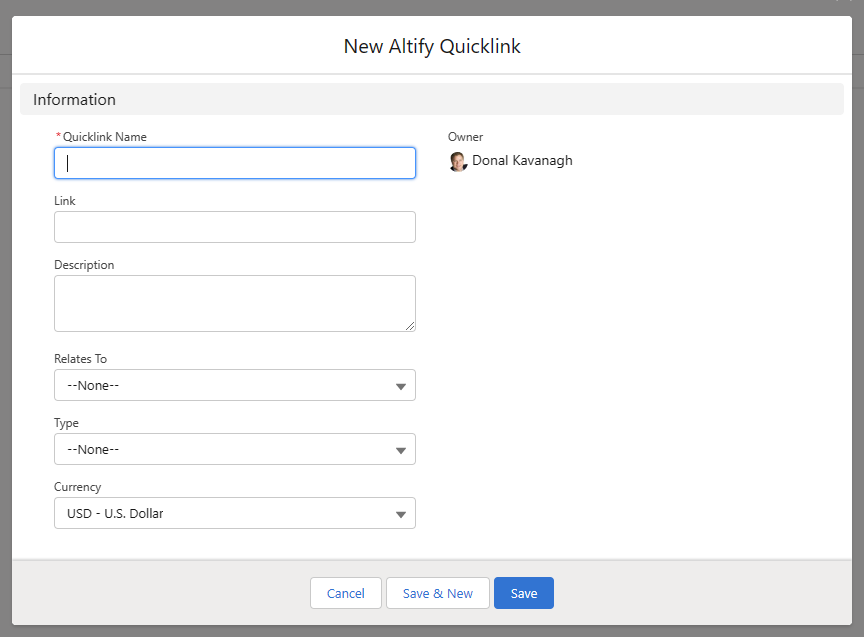
Note: The following fields may need to be added to the page layout: Type, Link, Relates To and Description.
-
Complete the fields as follows:
-
Quicklink Name - name of the link which is displayed in the relationship map.
-
Type - the type of link that is displayed. A specific icon is displayed in the relationship map for each type of link.
-
Relates To - this must be set to 'Contact' for the link to be displayed in relationship maps.
-
Description - enter a description of the resource you are linking to. This text accompanies the link in the relationship map panel.
-
Link - the link address that the quicklink points to. When you are entering the URL address in the Link field, apply the following structure:
/apex/c__VFPageName?id=${contactId}The part
VFPageNameneeds to be replaced with the Name of the Visualforce page you created. So, our example will look something like this:/apex/c__Opportunities?id=${contactId}The
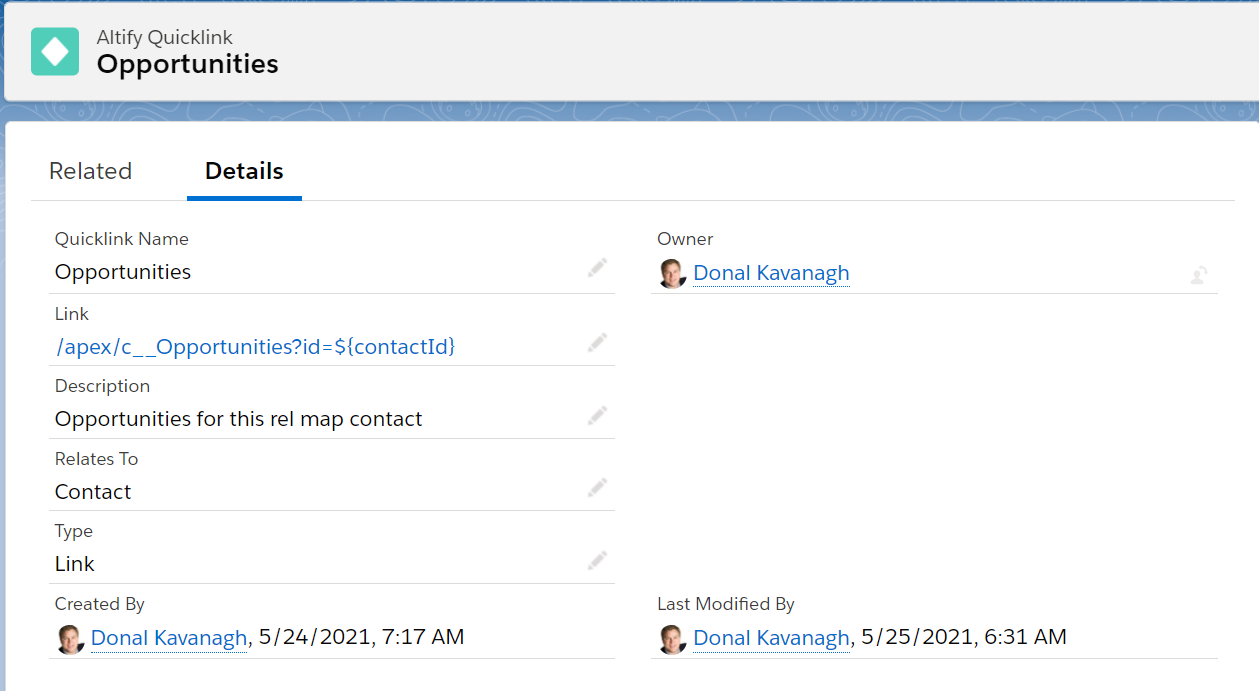
${contactId}part identifies the specific contact whose opportunities are displayed.Your quicklink record should look something like this:
-
-
Click Save.
Accessing the quicklink
Once the quicklink is saved, it is displayed on the details panel for all contacts on all relationship maps (account and opportunity).
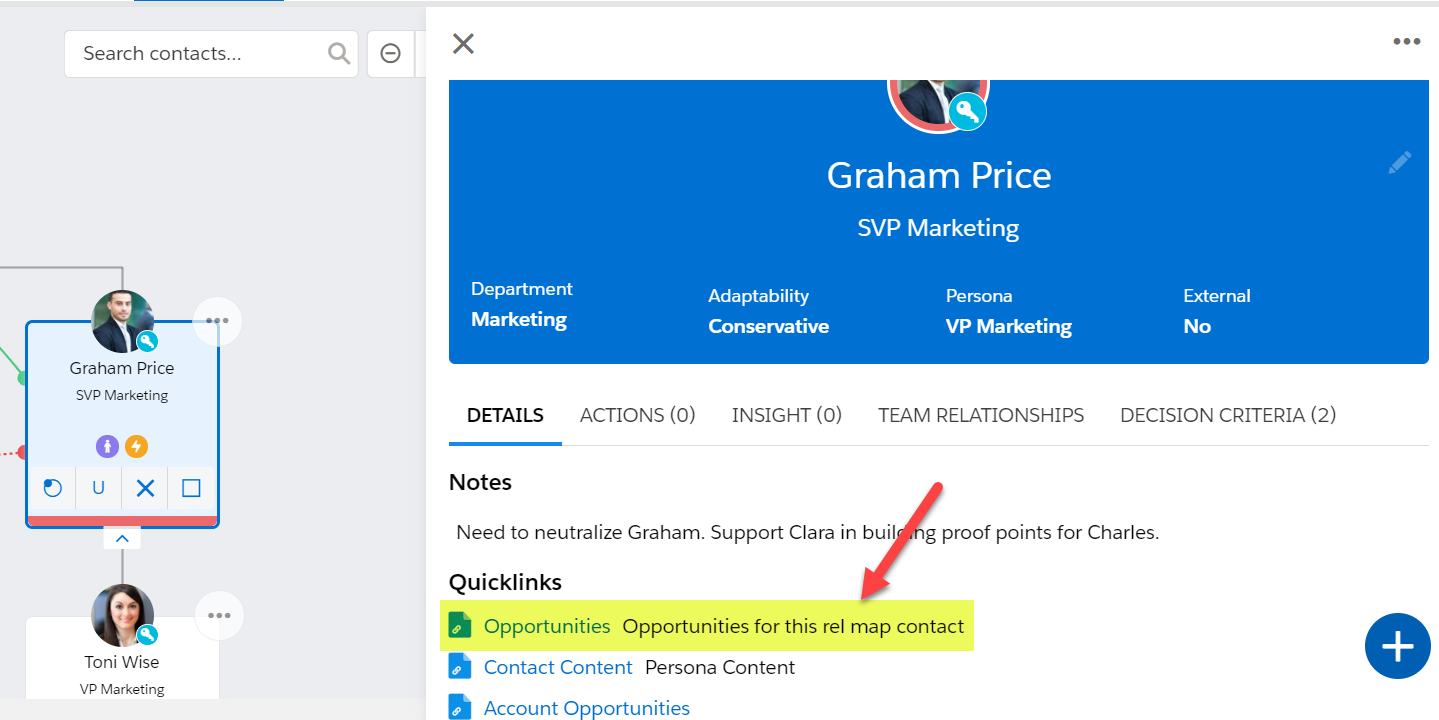
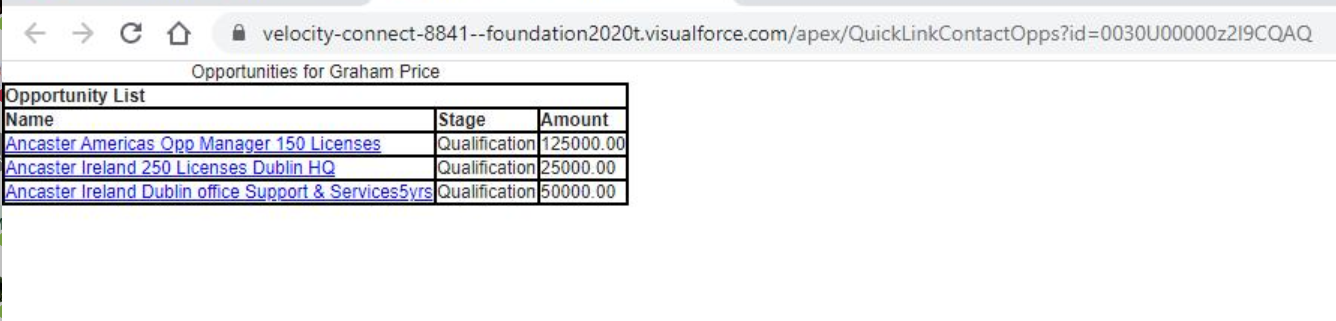
Clicking on the quicklink opens the example Visualforce page created above. It displays the opportunities associated with the selected contact.
Note: If your organization has Clickjack protection enabled, you will need to take the following step to ensure access to your Visualforce page: Ensuring Access with Clickjack Protection or API Access Control Enabled.