A quicklink can be configured to link to a filtered Salesforce report that displays data for the contact selected on the relationship map.
The following example demonstrates how to create a report that shows a contact's attributes on every relationship map (account or opportunity) they are currently added to, and how that report can be made available as a quicklink.
Create the report type
-
In Setup, go to Report Types.
-
Click New Custom Report Type.
-
In Step 1. Define the Custom Report Type, set the Primary Object to Contacts.
-
Complete the remaining fields as required and click Next.
-
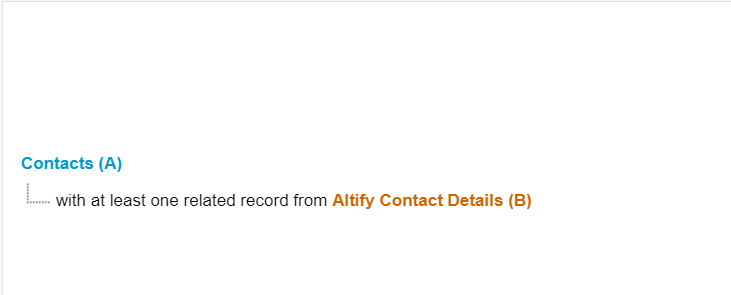
In Step 2. Define Report Records Set, select Altify Contact Details as the secondary object ('B') and select the following relationship option: Each "A" record must have at least one related "B" record.
-
Click Save - the Object Relationships should appear as follows:
-
In the section Fields Available for Reports (below Object Relationships), click Edit Layout.
-
Change the Display Name of two fields by selecting the field and clicking Edit Properties:
-
Change Account Name (in Contacts section) to 'Contact's Account'.
-
Change Account (in Altify Contact Details section) to 'Rel Map Account'.
-
-
Click Save.
Preparing the report
-
In Reports, click New Report.
-
In the Create Report modal, find and select the report type you created.
-
Click Start Report.
-
In the Columns section, set the list of columns as follows:
-
Full Name [associated with Contacts]
-
Contact's Account [associated with Contacts]
-
Rel Map Account [associated with Altify Contact Details]
-
Opportunity: Opportunity Name [associated with Altify Contact Details]
-
Decision Orientation [associated with Altify Contact Details]
-
Buyer Role [associated with Altify Contact Details]
-
Coverage [associated with Altify Contact Details]
-
Political Status [associated with Altify Contact Details]
-
Support [associated with Altify Contact Details]
-
-
Sort the report by Rel Map Account.
Your columns should look like this:

-
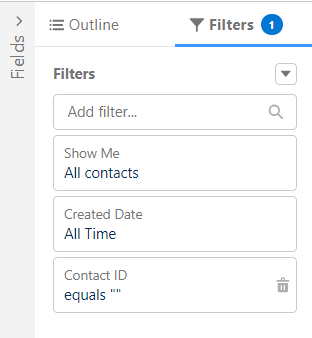
Click Filters and configure the following:
-
Show Me All Contacts
-
Created Date All Time
-
Contact ID equals ""
The filters should appear as follows:
-
-
Click Save.
When the report is ready, copy or make a note of the report ID from the URL - as highlighted in the example below:

You are now ready to create the quicklink that will be displayed in your relationship maps.
Creating the quicklink
-
Select the tab Altify Quicklinks.
-
Click the New button.
The following screen is displayed:
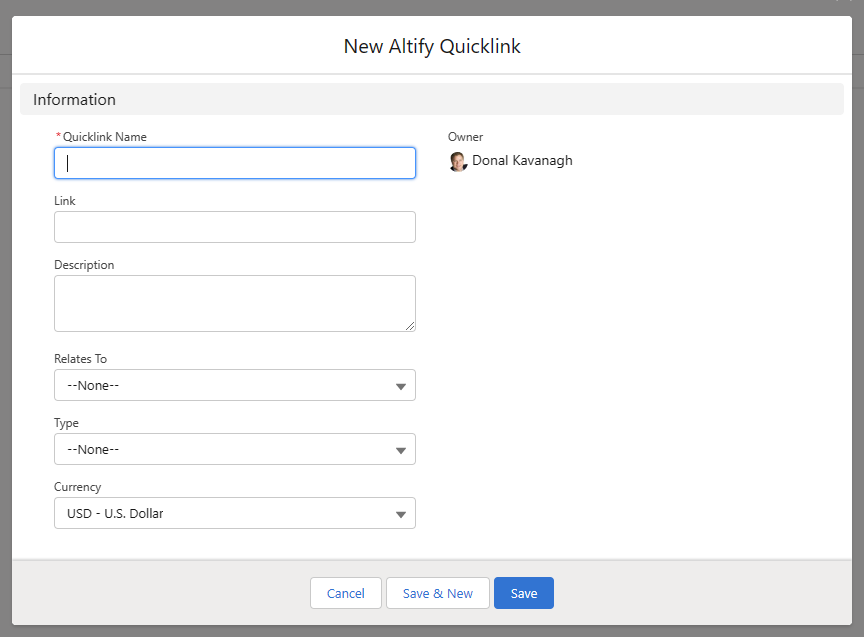
Note: The following fields may need to be added to the page layout: Type, Link, Relates To and Description.
-
Complete the fields as follows:
-
Quicklink Name - name of the link which is displayed in a contact's information panel on a relationship map.
-
Type - the type of link that is displayed. A specific icon is displayed in the relationship map for each type of link.
-
Relates To - this must be set to 'Contact' for the link to be displayed in relationship maps.
-
Description - enter a description of the resource you are linking to. This text accompanies the link in the relationship map panel.
-
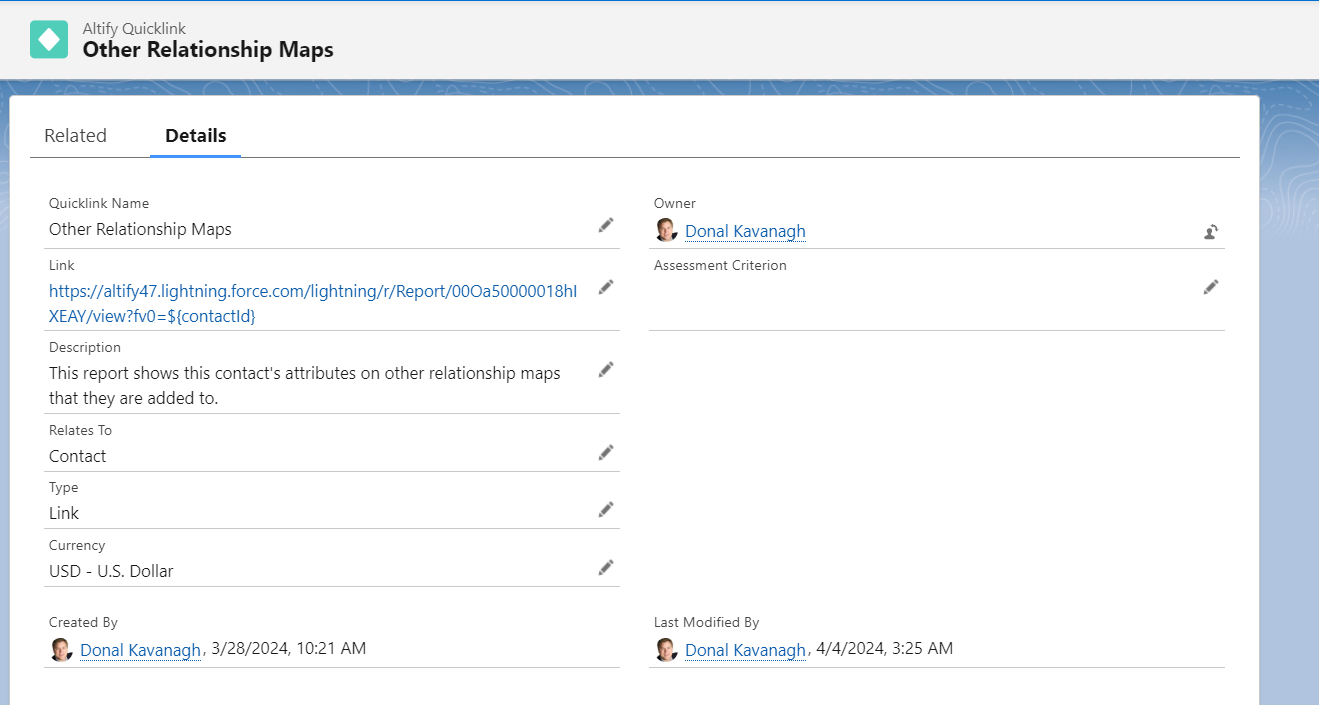
Link - the link address that the quicklink points to. To link to your Salesforce report, you need to apply the following format:
https://YourSalesforceDomain/lightning/r/Report/YourReportID/view?fv0=${contactId}The part
YourSalesforceDomainneeds to be replaced with your current Salesforce domain, and the part YourReportID needs to be replaced with the report ID you noted above - as shown in the example of a completed link below:https://altify22.lightning.force.com/lightning/r/Report/00ODm000000FOwmMAG/view?fv0=${contactId}Your quicklink record should look something like this:
-
-
Click Save.
Your quicklink will now appear on the contact's details panel and will bring your users to the report for the selected contact. Pictured below is an example of the quicklink described above:
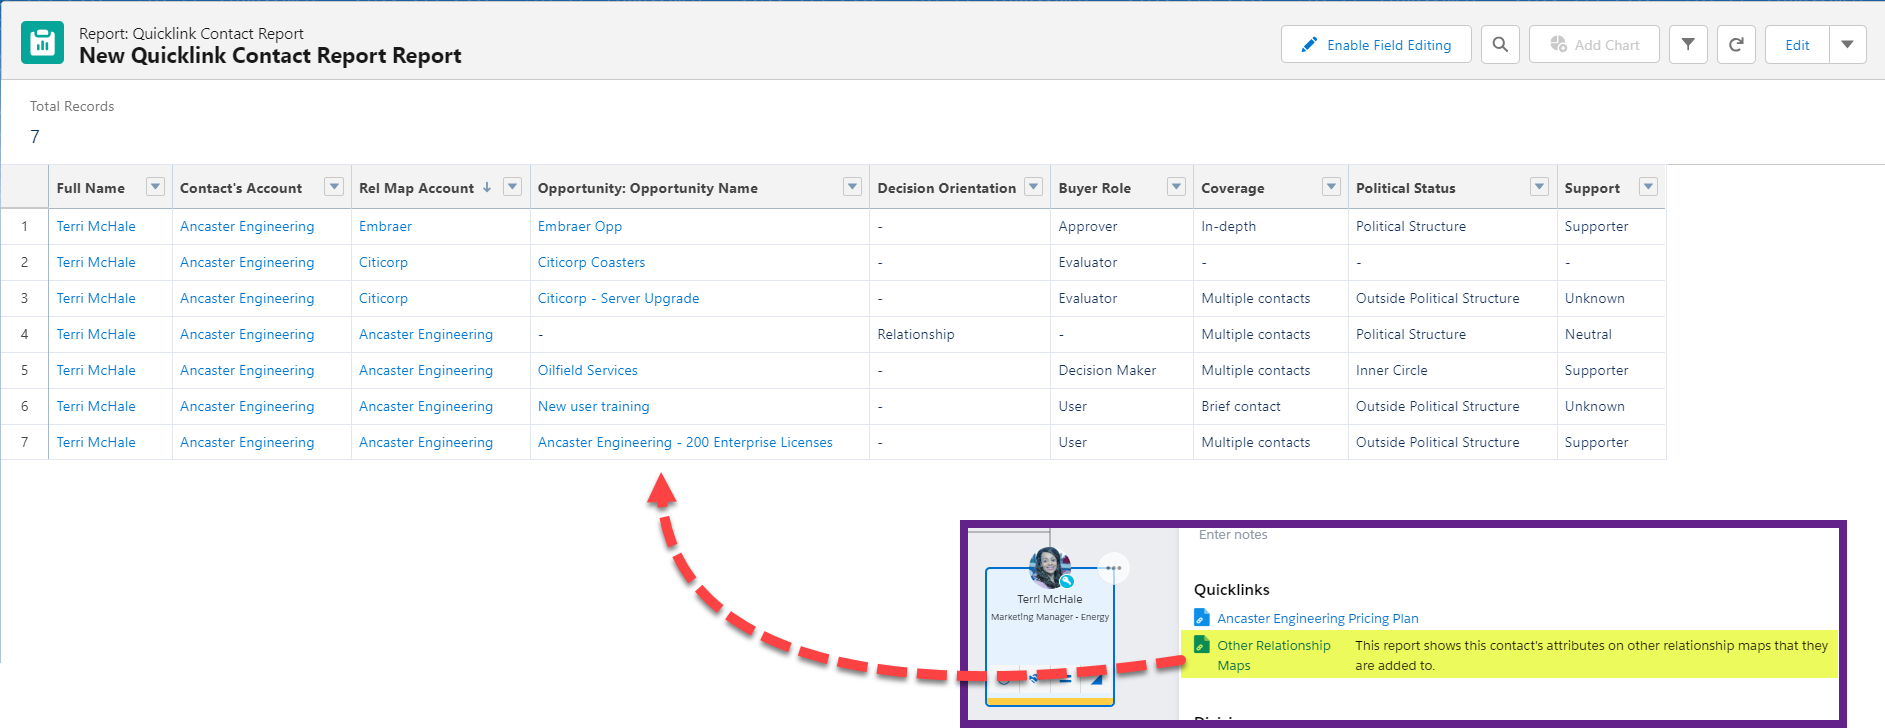
An account relationship map is identifiable as the Opportunity: Opportunity Name and the Buyer Role will always be blank, and a Decision Orientation might be specified.
For an opportunity relationship map, the Opportunity: Opportunity Name will always be specified and the Decision Orientation will always be blank.