Export a dashboard
You can export dashboard data at the dashboard level and the widget level. At the dashboard level, you can only export it to a zip file.
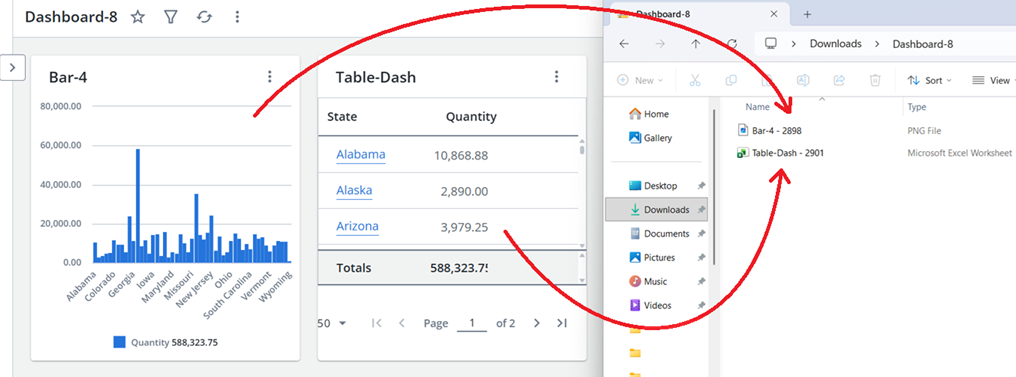
Note: the zip file will contain images as PNG files and data tables as Excel files.
Export the whole Dashboard
From an existing dashboard:
-
Open the See more menu (three dots icon
 ).
). -
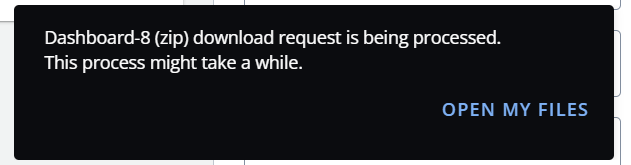
Select Export (ZIP). A popup will confirm that your dashboard is being processed with a link to open My Files.
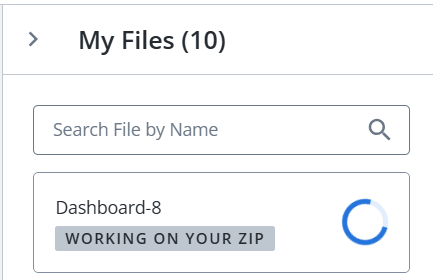
If you go to My Files (either by following the link or by using the folder icon in the main menu) you will see the status of the download.
-
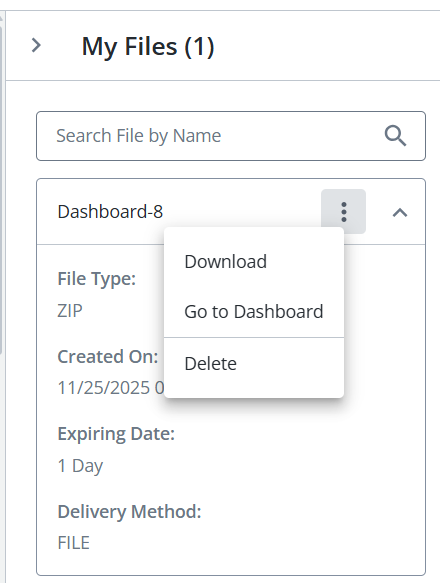
When the file is ready, you will receive a popup to prompt you to complete the download.

Follow the link to download your widget.
Tip: the downloaded file will typically show in your browser's downloads and appear in your designated download location, e.g. the Downloads folder in Windows.
-
If you miss the popup or choose not to follow the link at the time the popup is present, open My Files using the folder icon in the main menu to access your file.
-
Expand the See More menu and select download next to the desired file to complete the download.
Note: processing times for downloads may vary depending on the complexity of the file and its position in the global processing queue.
Export a Widget
To export a specific widget’s data (as opposed to the whole dashboard above):
-
Open the See more menu on the widget.
-
Select Export to open the export window.
-
Select the file format:
-
Image (graphs/chart only)
-
CSV
-
XLS
-
PDF
Tip: when exporting a chart, the underlying data is downloaded in table format.
Using the Image option for exporting charts allows you to easily copy the image into a PowerPoint presentation or PDF.
-
-
Press the Export button. A popup will confirm that your widget is being processed with a link to open My Files.
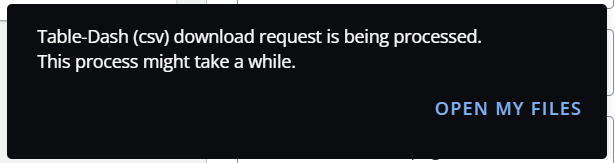
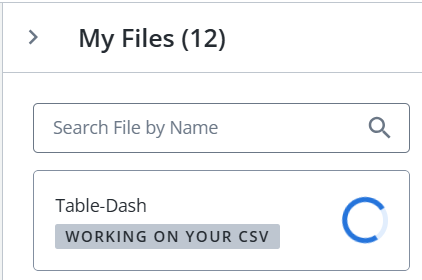
If you go to My Files (either by following the link or by using the folder icon in the main menu) you will see the status of the download.
-
When the file is ready, you will receive a popup to prompt you to complete the download.

Follow the link to download your widget.
Tip: the downloaded file will typically show in your browser's downloads and appear in your designated download location, e.g. the Downloads folder in Windows.
-
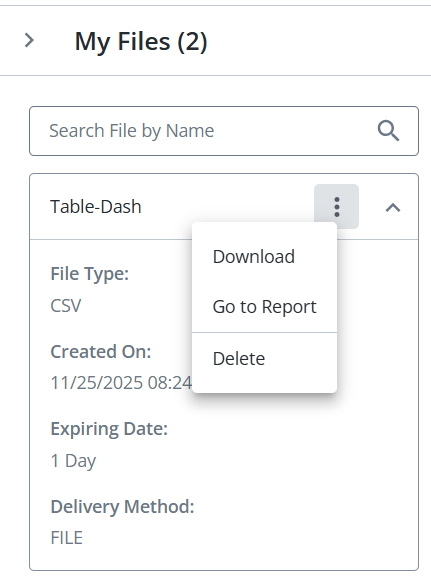
If you miss the popup or choose not to follow the link at the time the popup is present, open My Files using the folder icon in the main menu to access your file.
-
Expand the See More menu and select download next to the desired file to complete the download.
Note: processing times for downloads may vary depending on the complexity of the file and its position in the global processing queue.