AppBus Flow
AppBus Flow Overview
AppBus Flow is a tool that can be used to graphically connect API endpoints together.
- These endpoints can be those that are created and hosted in AppBus or API endpoints available via third party services.
- As an example, AppBus flows can be used to drive business process execution by:
- Extracting data from one API created within AppBus Studio
- Transforming the returned data in a meaningful way
- Then passing that data or extracting additional data from a separate API or other web service, database, etc. until the business process has been completed
- As an example, AppBus flows can be used to drive business process execution by:
- Programming in AppBus Flow involves connecting activity Nodes in a visual flowchart.
- Data is passed between these nodes as part of the
msgobject:
How to Create an AppBus Flow Worker
The following can be done to create an AppBus Flow Worker:
- Right-click theFlow workersfolder within your project.
- SelectAdd new worker.
- TheAdd new workerdialog will appear.
- Enter a name for your worker in the field labeledName.
- ClickOK.
How to Create an AppBus Flow
Once a worker has been created, a Flow can be created via the following steps:
- Right-click a Flow Worker.
- SelectAdd new flow.
- ClickOK.
- Your flow will appear in the Workflow Canvas which is located in the central pane.

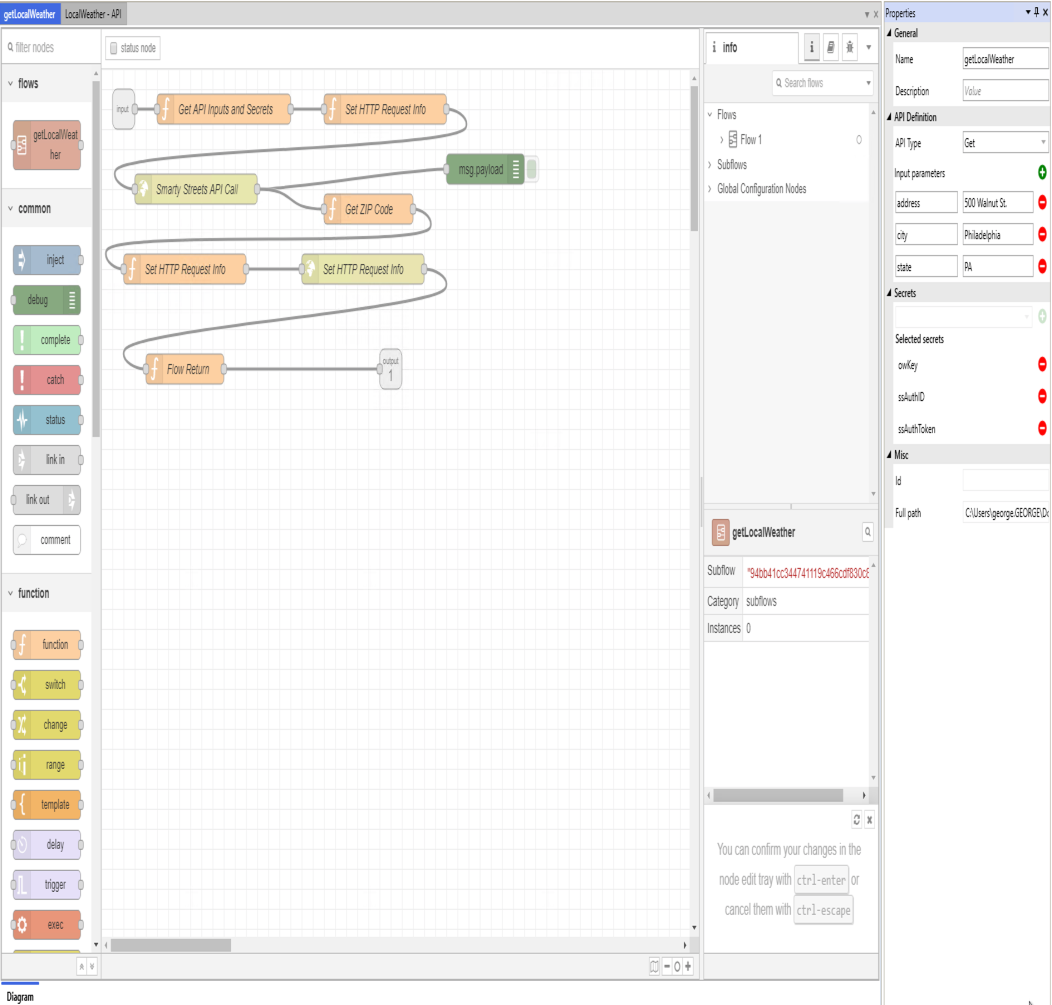
The Workflow Canvas has the following sections
- Node palette: The Node palette contains the nodes that are available to your flow.
- More information on these nodes can be found inAppBus Flow Nodes.
- Design Canvas: The design canvas is where you actually design your flows.
- By default, each flow is created with and input and an output node.
- Info Panel: The info panel provides information on your flow or selected node.
- Additionally, users can select other options via the
- Info- (
 ) - Info is the default option.
- When selected, the Info Panel will provide details on the node selected or, if no node is selected, the flow.
- You can add parameters for your node by using the info option.
- Help- (
 ) - Help provides usage information about the node selected and general information on AppBus Flow.
 - Debug- (
 ) - When you are running a flow, you can use debug to view the information that is returned via Debug Nodes.
- Info- (
- Additionally, users can select other options via the
AppBus Flow Properties
The right side of the screen contains property information for your flow.
AppBus flow properties are similar to the properties of API Workers.
General
- Name- The name of the AppBus Flow.
- Description- (optional) - A description for the AppBus Flow.
API Definition
These parameters define the API endpoint used in triggering this AppBus Flow
- API Type
- The type of API requests that the workflow supports.
- Valid options areGET,POSTandMultipart POST
- Query Parameters- (optional)
- Parameters that are passed to the workflow when it is being called.
- These parameters will be shown in the swagger documentation created for the API.
- Input parameters are made available inside a workflow by using the
msg.AppBus.input.parameters.<parameterName>object for the parameter. - For example, if you added a Query Parameter named
searchText, you would access it in your workflow usingmsg.AppBus.input.parameters.searchText.
- Body Parameters - (optional, only available with POST and Multipart POST)
- Parameters that are passed to the workflow when it is being called.
- These parameters will be shown in the swagger documentation created for the API.
- Input parameters are made available inside a workflow by using the
msg.AppBus.input.parameters.<parameterName>object for the parameter. - For example, if you added a Query Parameter named
searchText, you would access it in your workflow usingmsg.AppBus.input.parameters.searchText.
- Attachments- (optional, only available with Multipart POST)
- Files that are passed to the workflow when it is being called.
- These attachments will be shown in the swagger documentation created for the API.
- Attachments are made available inside a workflow by using the
msg.AppBus.input.attachmentsarray.- For example, if you added an Attachment named
file1, you would access it in your workflow using[
{ "name": "file1", "path": "/tmp/multipart17840632116332369776/file1", "size": 10 },
{ "name": "file2", "path": "/tmp/multipart17840632116332369776/file2", "size": 1344 }
]
var pathToFile = AppBus.input.attachments.find(x => x.name === "file1").path
- For example, if you added an Attachment named
- Headers- (optional)
- HTTP Headers that are passed to the workflow when it is being called.
- These parameters will be shown in the swagger documentation created for the API.
- Headers are made available inside a workflow by using the
msg.AppBus.input.headers[headersName]ormsg.AppBus.input.headers.<headersName>object for the parameter.- For example, if you added a Header named
API-KEYorClientId, you would access it in your workflow using:msg.AppBus.input.headers['Api-Key']
ormsg.AppBus.input.headers.ClientId
- For example, if you added a Header named
Secrets
Secretsfrom your project are assigned at the flow level.
Misc
Misc properties show details for the flow such as the path to the flow’s files and the system ID for the flow.
These properties cannot be modified within the AppBus Studio.