Configure the Teams Connector
All BA Insight connectors share a number of common configuration options.
This section describes only settings specific to this particular connector.
For step-by-step instructions on how to configure a connector, please refer to Connectivity Hub or Connector Framework online help.
Required Configuration Settings
-
Open the Connectivity Hub administration site.
-
Edit the Teams web service connector to configure it with the values specified below.
-
The connector Web service URL has the following form:
http://<YourMachineName>:2547/dataconnector.asmx
Note: If you changed the port during connector set up, use the value you specified instead. -
Enter connector login credentials into the Certificate and Password fields.
The connector supports certificate authentication only.-
Certificate field should contain certificate distinguished name.
-
Example:
CN=myserver.mydomain.local, CN=BA Insight Teams Connector
INFO:
You must ensure you enter your certificate information in the same way it's stored in the certificate:
- For self-signed certificates generated by script provided by BA Insight:
- Use Subject value from the script output exactly as it's formatted
- For other certificates (or if the script output is lost):
- Follow the rules listed in the section How to Determine the Certificate Distinguished Name
Note: Extra (or missing) spaces in this field may cause the connector to fail finding the certificate.
-
-
Password field should contain Azure application ID.
-
Example:
80884187-a95a-4559-8b69-6b59faa0e52d
-
-
-
Office 365 Tenant: put your Office 365 tenant URL into this field.
-
Example: https://mytenant.sharepoint.com
-
-
Content Owner: An account in the format supported by the target directory configured
-
Example (for AD):
MYDOMAIN\MyUser
-
Optional Configuration Settings
-
Teams Visibility Filter:
-
Specify what types of Teams you want to crawl:
-
Only public
-
Only private
-
Both
-
-
-
Message Conversion XSLT:
-
Specify an XSLT transformation which is used to convert a chat message (with replies) to HTML format.
-
The transformation operates on the following XML documents:
Copy<Message>
<Body><![CDATA[Message body in HTML or TEXT format]]></Body>
<Replies>
<Message>
<Body><![CDATA[First message reply body in HTML or TEXT format]]></Body>
<Attachments>
<Attachment>
<contentUrl>...</contentUrl>
<name>...</name>
...
</Attachment>
...
</Attachments>
</Message>
...
<Message>
<Body><![CDATA[Last message reply body in HTML or TEXT format]]></Body>
<Attachments>...</Attachments>
</Message>
</Replies>
</Message>Content of Attachment XML element is an XML representation of chatMessageAttachment resource type in Graph API.
-
-
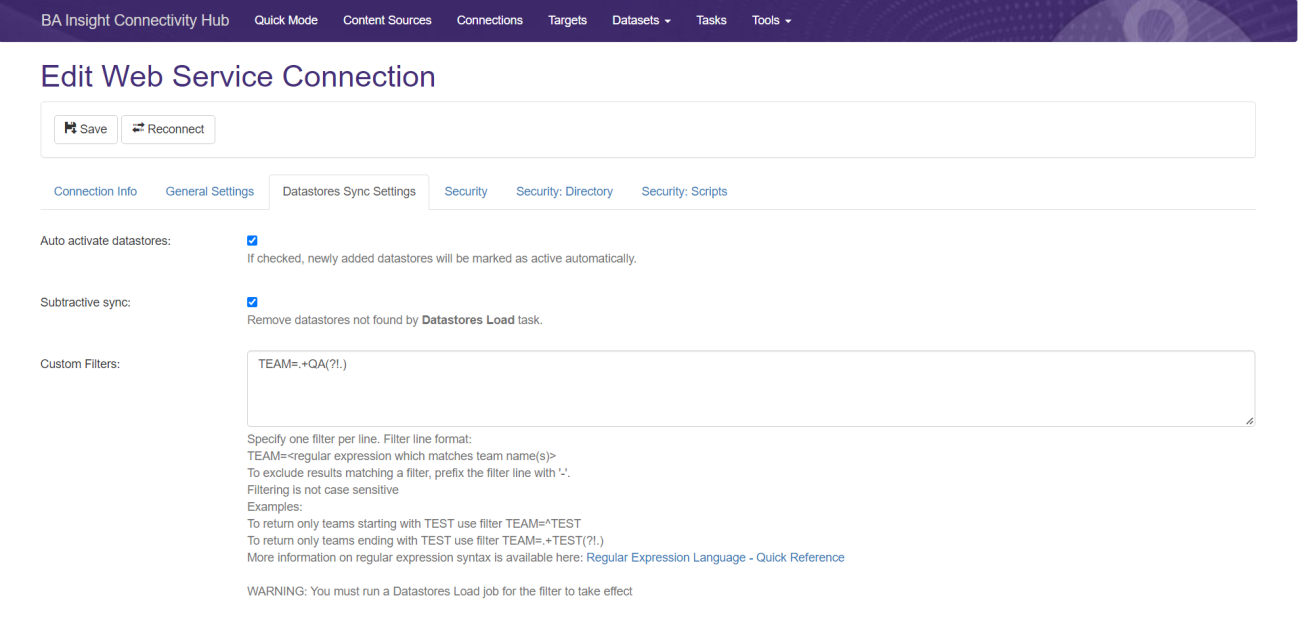
Custom Filters:
-
Specify filters for the teams to include.
-
Every line defines one filter
Filter line format:TEAM=<regular expression which matches team name(s)>
Note: Full Crawl is required if this filter is changed.
-
-
To exclude results matching a filter, prefix the filter line with a dash ('-').
-
Filtering is not case sensitive
-
More information on regular expression syntax is available here: Regular Expression Language - Quick Reference
Note: A Full Crawl is required if this filter is changed: you must run a Datastore Types Load job.
Note: You must run a Datastores Load job for the custom filter to take effect.