Create and Configure the Azure Application
Create New Application Registration
- Go to https://portal.azure.com/ and login with Azure Global Admin user credentials.
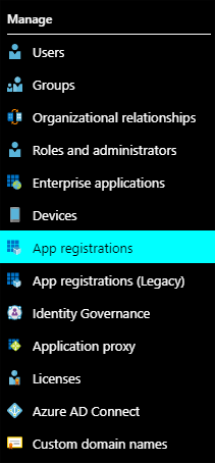
- Click Azure Active Directory and click on the desired directory.
- From the menu select App Registrations.
- Click New registration to register a new app.

- Name: Enter a name for your app.
- Application type: Select Web app/API app.
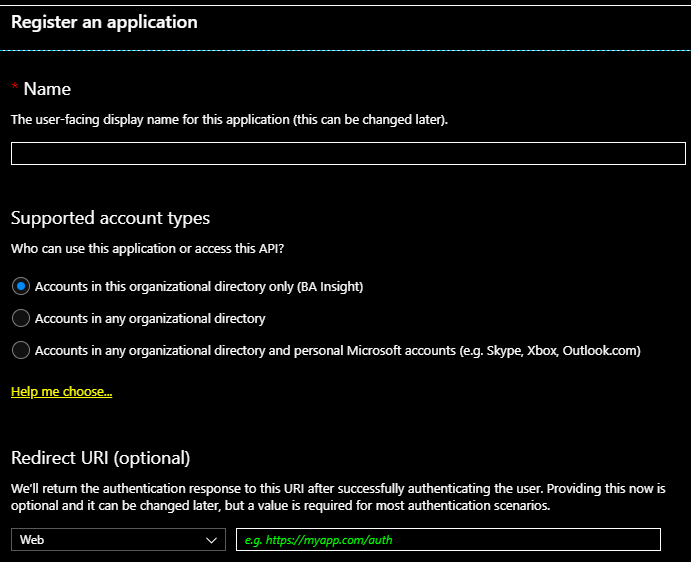
- Redirect URL: Enter a URL of your choosing. (The URL is not used in the SharePoint Online Authorization mechanism)
- Click Register at the bottom of the page.
Configure Application Permissions
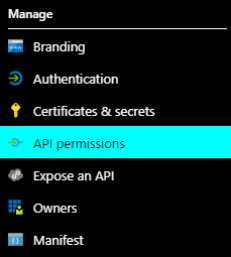
- Within the app, go to Manage.
-
Under API Permissions, click Add a permission > Microsoft Graph.
-
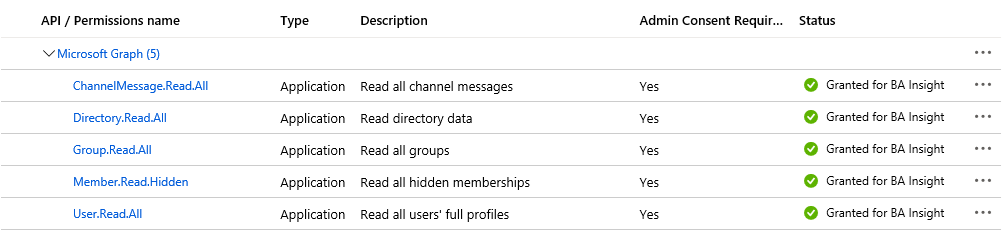
Select the following permissions for the app:
APPLICATION PERMISSIONS > Select the following permissions:
- ChannelMessage.Read.All
- Directory.Read.All
- Group.Read.All
- Member.Read.Hidden
- User.Read.All
- Click Grant consent to grant the selected permissions.

- Verify that the list of the application permissions looks like on the screenshot below:
Enable Access to Microsoft Teams Protected API
-
The application should be granted to use Microsoft Teams Protected API on the tenant.
-
This is a manual process which is described in this article: https://docs.microsoft.com/en-us/graph/teams-protected-apis
-
This process may take up to a week.
Configure the Azure App to Use Certificate Authentication
Export the Certificate
There are multiple methods that can be used to create a certificate.
BA Insight recommends the following instructions to create a certificate: Create and Configure Certificate.
If you use another program, such as IIS, when you export the certificate, ensure you do not mark the key as exportable: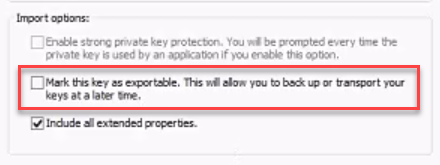
Also, when exporting your certificate using IIS, note that it MUST BE Base-64 encoded: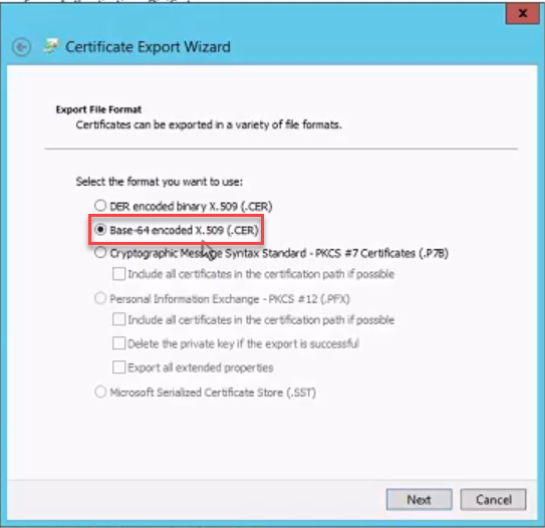
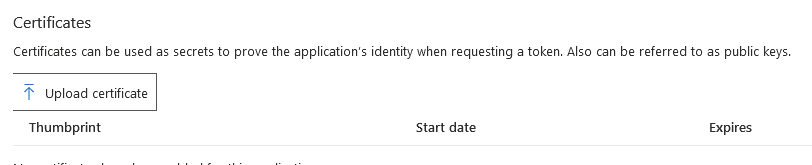
Upload the Certificate to Azure App
- Open the Azure app you created in the previous steps and go to Certificates and secrets.
- Upload your newly created certificate.