How to Set Up and Configure the Adobe Experience Manager Connector
All BA Insight connectors can be downloaded from Right Answers under Knowledge > BA Insight > Product Downloads > Connectors.
This connector is installed with the same generic steps as any BA Insight connector.
Satisfy the Prerequisites for your connector before installing.
Configuration specifics are detailed below.
Create Connection
- Open Connectivity Hub in a local browser. If you are using the server Connectivity Hub is installed on, the address is:
- https://localhost:port
- 55001 is the default local port
- Navigate to the Connections page.
- Edit your connection settings.
- If you do not have an Adobe Experience Manager connection, create one by a creating a new Web Service connection.
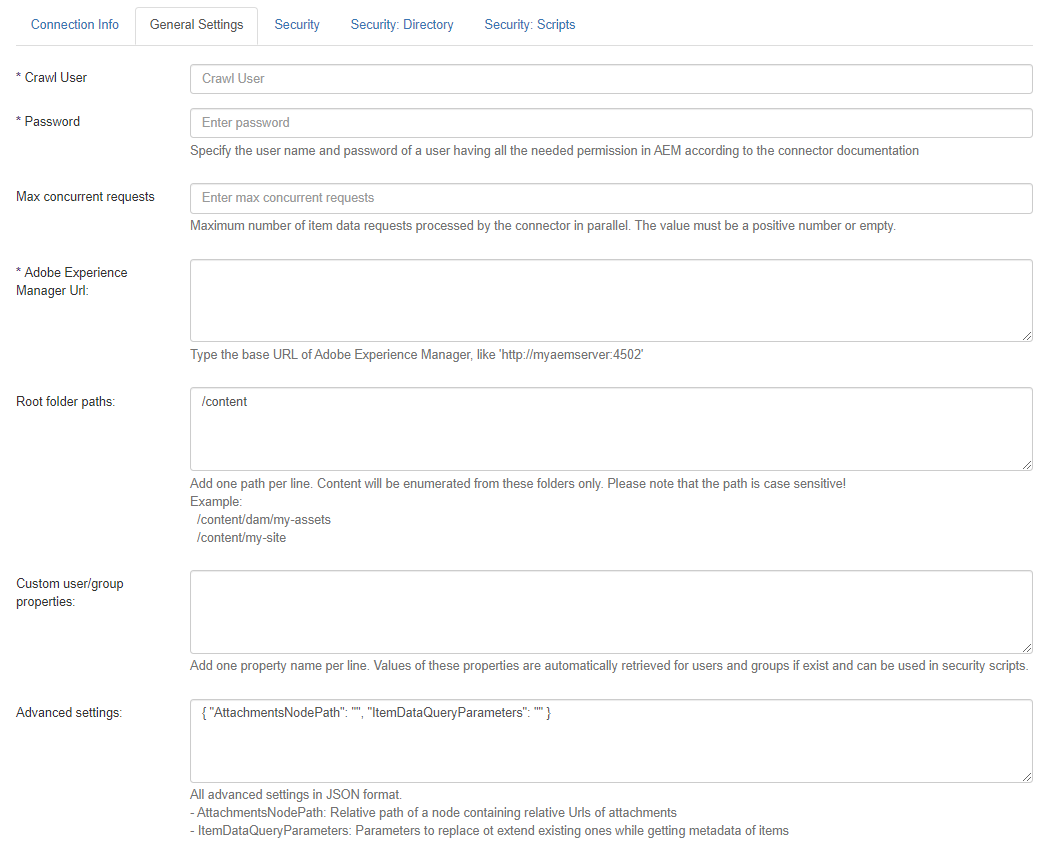
- Read and enter values (or enter check mark) into all available fields.
- Crawl User:
- Name of the user created to crawl the content
- User must have all required permissions
- Password:
- Password of the crawl user
- Adobe Experience Manager Url:
- URL Adobe Experience Manager can be reached over the network
- Root Folder Paths:
- Paths of nodes in the repository
- One path per line
- Content is crawled under the folders of sites specified here
- Paths of nodes in the repository
- Custom User/Group Properties:
- Repository may contain additional information about users and groups, as synchronized by the Adobe Experience Manager.
- Properties specified here are retrieved during the security sync job, and can be used in security scripts to match to users and groups in the Target directory.
- Advanced Settings:
Use this parameter to provide:
The path to the AEM property containing the various assets to include as part of the entity indexed.
Example:
jcr:content/jcr:attachments
Any additional parameter you wish to send to AEM when retrieving metadata for the entity indexed.
Example:
p.nodedepth=-1
- Crawl User:
- Click the Save button at the top of the page.
- Navigate to Content Sources.
- Select New>Web service content using the drop-down menu.
- The Wizard appears.
- Follow the wizard to configure your Connection and Target.
Content Configuration Specifics
In content type the specified filter can be set to crawl digital assets, sites or both.
Custom filters support the syntax of Query Builder API documented here: