How to Set Up and Configure the Confluence Cloud Connector
After running the MSI installation wizard, complete your installation using the manual steps for your type of Confluence connector below.
All BA Insight connectors can be downloaded from Right Answers under Knowledge > BA Insight > Product Downloads > Connectors
This connector is installed with the same generic steps as any BA Insight connector.
Satisfy the Prerequisites for your connector before installing.
Configuration specifics are detailed below.
Selecting Appropriate Sub-Connector
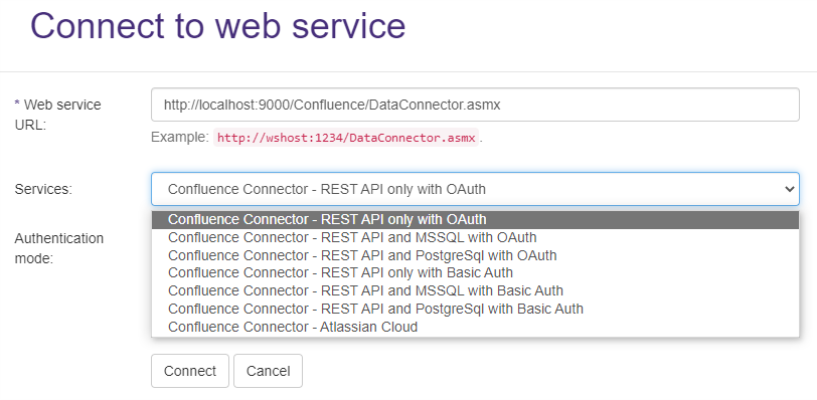
While the connection is created, a sub-connector must be selected. If Confluence is running in Atlassian cloud, then there is one option only. Sub-connector must be selected using the following considerations otherwise:
- Connector can use the REST API only to get content from Confluence, but it has some limitations. (See earlier chapters.) To avoid those limitations, direct database access configuration is needed according to the database type used by Confluence.
- Confluence Server below version 7.17 supports both OAuth and Basic authentication. Version 7.18 and above however can be used by basic authentication only.
Configuring Confluence Connector for the On-Premise version of Confluence with OAuth
Install and Deploy the Confluence Add-On
The Confluence connector uses a Confluence add-on to help gather the data that is necessary for crawling. This add-on is provided by BA Insight as part of the installation package.
- Log in to Confluence as a System Administrator.
- Click the gear icon and select Add-ons
- Click the Upload Add-on button.

- Upload the BAInsightAddIn.jar file that is provided with the Confluence Connector zip file. This file is deployed by the installer to the Addin subfolder of installation target location.
- Click Logging and Profiling from the left side menu.
- Class/Package Name: Type BAInsightConnector in this field.
- Add entry: Click the Add entry button.
Note: Note: Steps 5 through 7 are required because the add-on writes messages to the Confluence log file.
Generate the Authorization Token
In Connector Framework, navigate to the Connection settings.
If the Crawl content as anonymous setting is set, then no authorization is needed and this section can be skipped.
For more information, see How to Deploy the Confluence Connector.
To create an authorization token that enables the Confluence Connector to access Confluence while crawling, follow these steps:
- On the server where the Connector is installed, navigate to:
http://<host>:<port number>/OAuth.aspx- <host>: This is the FQDN, Host name, or IP of the server where the Connector is installed
- <port number>: This is the port number that you selected during the Connector installation (by default, 2401)
- Follow the instructions in the configuration page opened in previous step.
- Read the notes carefully, because the Confluence user interface is not straightforward.
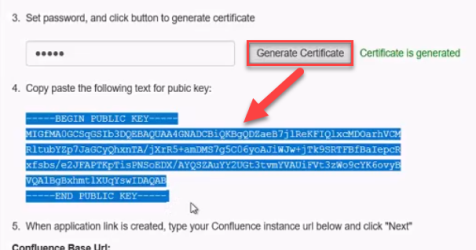
Note the password because you need it at a later time. - Click Next.
-
Follow the on-screen prompts to log in using the credentials of the crawling user account (see Confluence Connector Prerequisites).
- When the authorization process is complete, an access token is displayed on the screen.
- Copy and save this token. It is used later in the topic "Create and Register the Application Link in Confluence," step 12, below.
- Copy and save this token. It is used later in the topic "Create and Register the Application Link in Confluence," step 12, below.
Create and Register the Application Link in Confluence
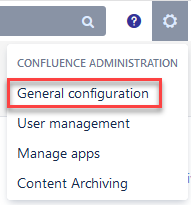
- From within Confluence, click the "sprocket" icon in the top left corner and select the General configuration page:
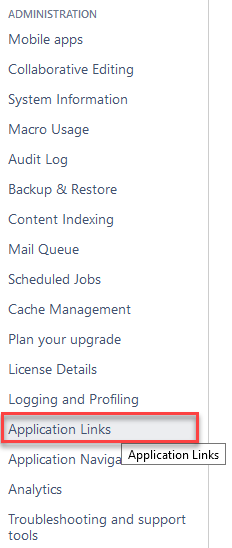
- Select Application Links from the left-side navigation under ADMINISTRATION.
- Name your application link and click the "Create new link" button.
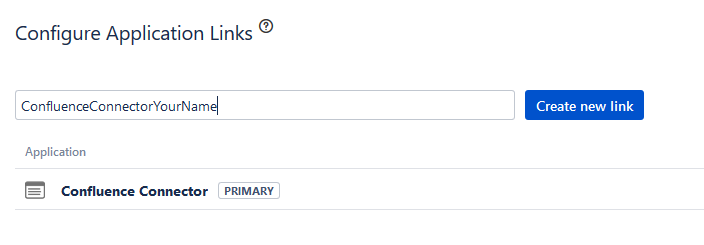
- The Configure Application URL page appears, as shown below. Ignore any displayed errors.
- Note the URL shown in the field New URL. Click Continue and follow the instructions below:

- Click Continue on the dialog box. You see a form like the one shown here:
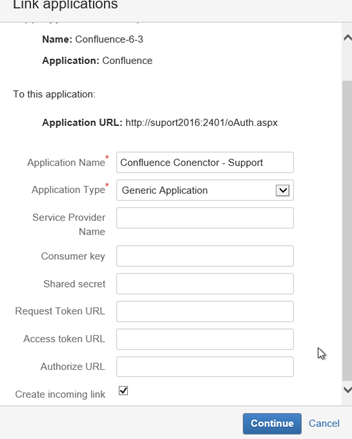
- Enter an Application Name that Confluence administrators will recognize as the connector application link. This can be the same name as your Application link, entered above.
Do not enter values in the other fields. - Set Application Type as "Generic Application."
- Check the box labeled Create Incoming Link at the bottom of the form.
- Click Continue.
- The “Link applications” page appears.
- Provide the following (required) values:
- ConsumerKey: Always set it to ConfluenceConnector
- Consumer Name: Always set it to Confluence Connector
- Public Key: Copy the key generated in the Generate the Authorization Token step and enter it in this field.
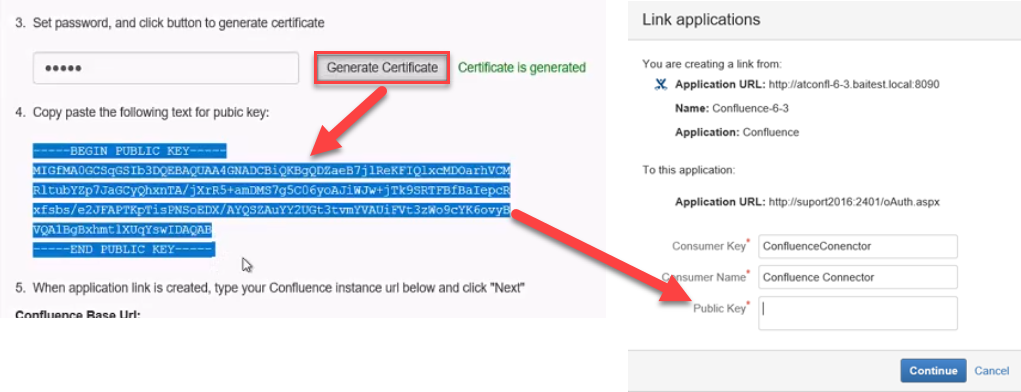
- Click Continue.
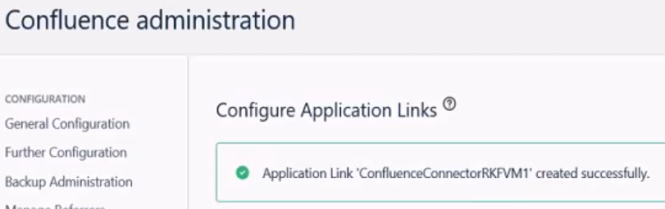
- The Application link is now created.
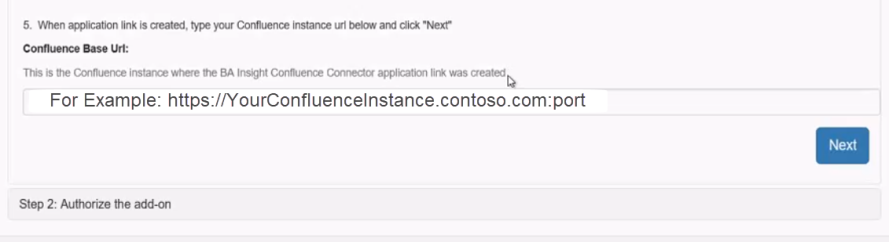
- Continue with the instructions provided in Confluence, which includes entering your Confluence base URL, including port.
- Ensure you are using the correct protocol in your URL:
- http or https
- http or https
- Ensure you are using the correct protocol in your URL:
- Click Next.
- Read the instructions that appear and click the URL link shown on the screen.
LEAVE THIS TAB OPEN. Do not click Finish.
- Click Allow in the tab that opens.
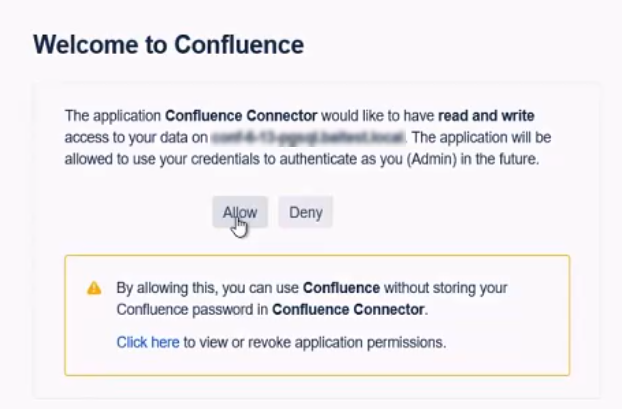
- An Access Approved tab opens.

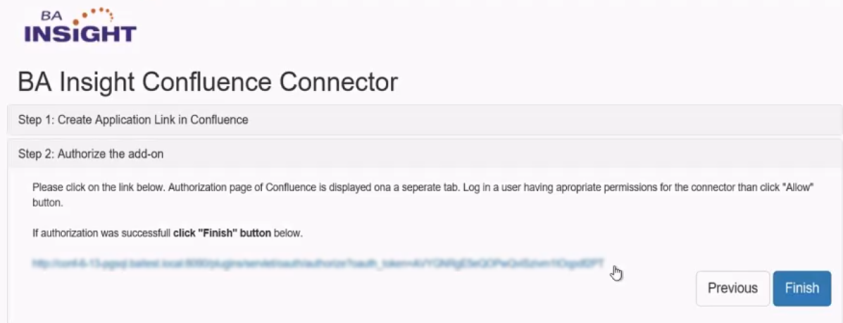
- Close the browser window.
- Go back to the Confluence connector tab and click the Finish button.
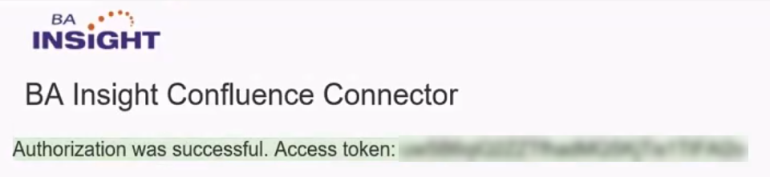
- The Authorization succeeds and the Access token appears on screen.
- Open ConnectivityHub in a local browser. If you are using the server ConnectivityHub is installed on, the address is https://localhost:port. (55001 is the default local port).
- Navigate to the Connections page.
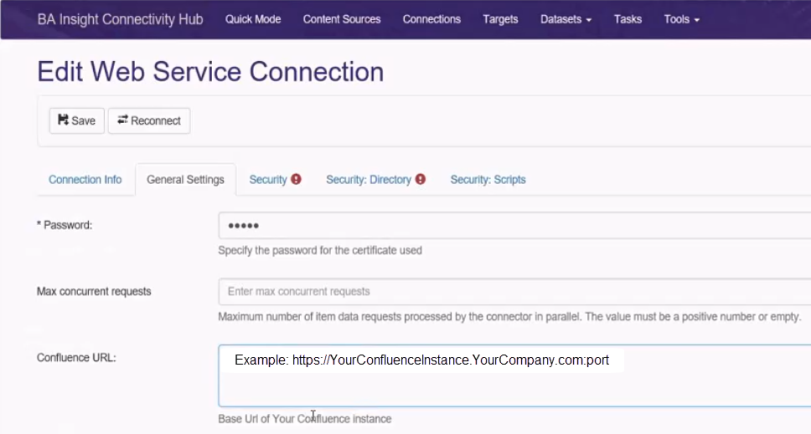
- Edit your Confluence connector.
- If you do not have a Confluence connector, create one by a creating a new Web Service connection.
- Read and enter values (or enter checkmark) into all available fields:
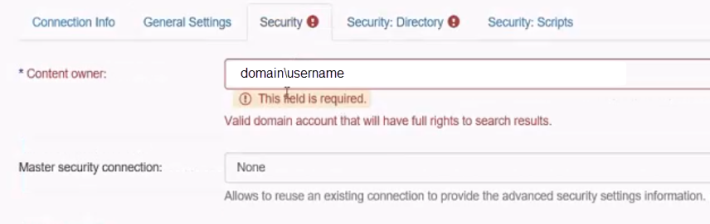
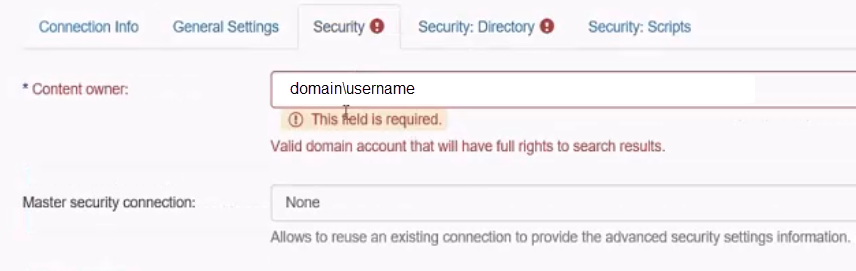
- Select the Security tab.
- In the Content owner field, enter your domain\username.
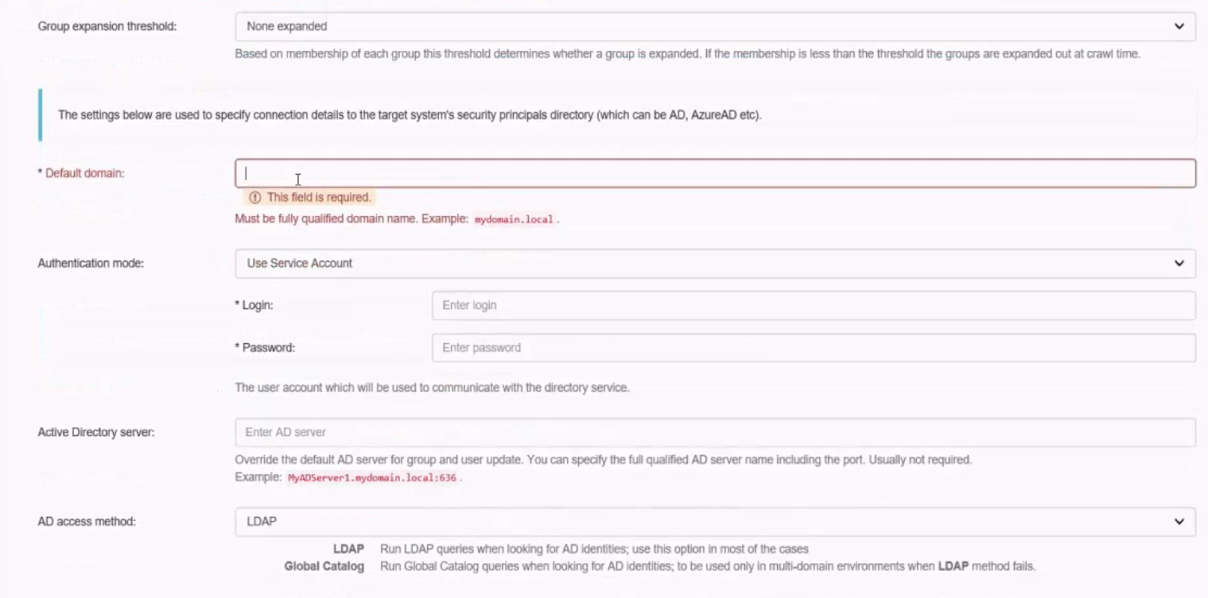
- Select the Security: Directory tab.
- Enter your fully qualified domain name in the Default domain field.
- Click the Save button at the top of the page.
- Navigate to Content Sources.
- Select New>Web service content using the drop-down menu.
- The Wizard appears.
- Follow the wizard to configure your Connection and Target.
Configuring Confluence Connector for the On-Premise version of Confluence with Basic Authentication
- Open Connectivity Hub in a local browser.
- If you are using the server Connectivity Hub is installed on, the address is https://localhost:port. (55001 is the default local port).
- If you are using the server Connectivity Hub is installed on, the address is https://localhost:port. (55001 is the default local port).
- Navigate to the Connections page.
- Edit your Confluence connector.
- If you do not have a Confluence connector, create one by a creating a new Web Service connection.
- Read and enter values (or check mark) into all available fields:
- Select the Security tab.
- In the Content owner field, enter your domain\username.
- Select the Security: Directory tab.
- Enter your fully qualified domain name in the Default domain field.

- Click the Save button at the top of the page.
- Navigate to Content Sources.
- Select New>Web service content using the drop-down menu.
- The Wizard appears.
- Follow the wizard to configure your Connection and Target.
Configuring Confluence Connector for Confluence in Atlassian Cloud
The Confluence Cloud connector uses the REST API which has the following limitations:
- DOES NOT enumerate all content from a space which the admin user doesn't have access.
Create an API token
The connector needs an API token to authenticate to the Atlassian cloud.
A Token can be generated using the following steps:
- Log in to https://id.atlassian.com/manage/api-tokens as an administrator.
- Click Create API token.
- From the dialog that appears, enter a memorable and concise label for your token and clickCreate.
- Click Copy to clipboard, then save it somewhere. It is needed later in connection settings.
Create an Admin API key
The connector is based on REST API, which doesn't return user email addresses for privacy reasons.
The API returns the names of users only, which is not suitable for user mapping.
- An optional but recommended feature of the connector is to use the Atlassian Admin API
- This requires the following authentication steps:
- From your organization at admin.atlassian.com, selectSettings > API keys.
- Click Create API key in the top right corner.
- Enter a name that you’ll remember to identify the API key.
- By default, the key expires one week from today.
- To change the expiration date, pick a new date under "Expires on."
- You cannot select a date longer than a year from the date of creation.
- Click "Create" to save the API key.
- Copy the generated key. You need it later on when creating your connection settings.
Create Connection
- Open ConnectivityHub in a local browser. If you are using the server ConnectivityHub is installed on, the address is https://localhost:port. (55001 is the default local port).
- Navigate to the Connectionspage.
- Edit your connection settings.
- If you do not have a Confluence connection, create a connection by a creating a new Web Service connection.
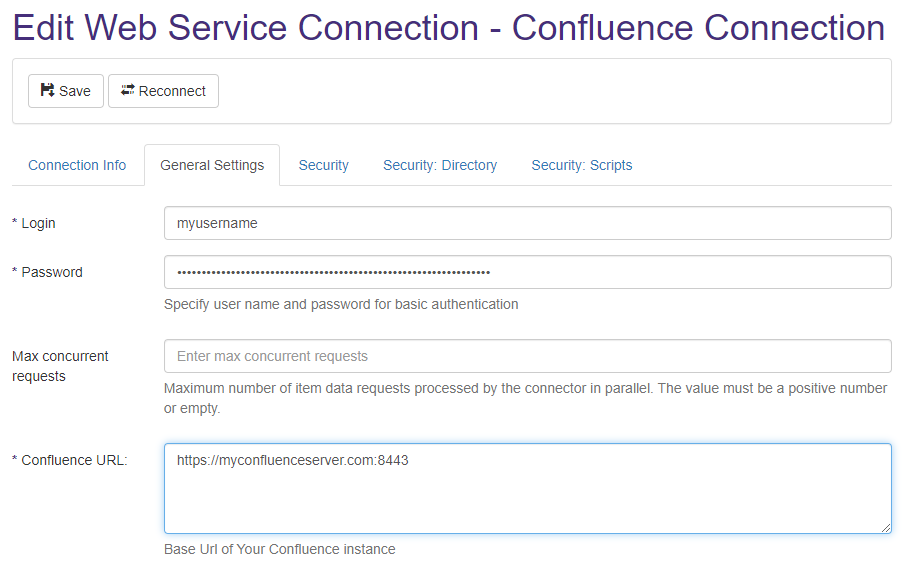
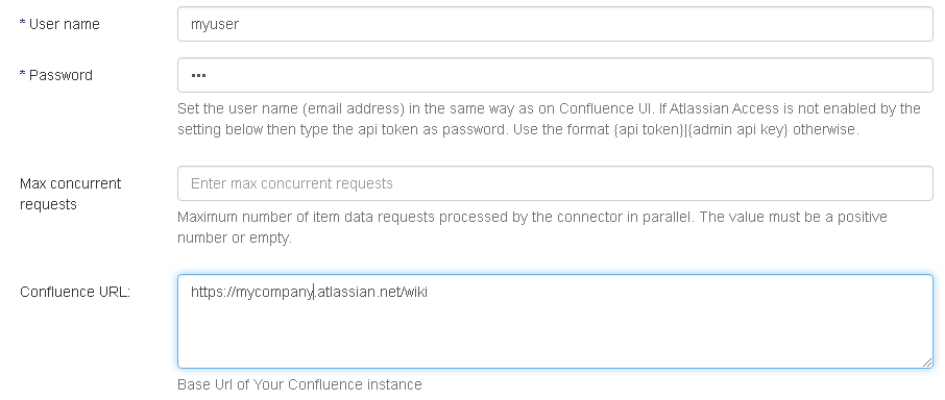
- Enter values (or check) into all available fields.
- User name:
- Login name of the administrator who generated the API token.
- Password:
- API token or API token and admin key based to the checkbox at the end.
- Token and key can be generated as described in previous sections.
- Confluence URL:
- Use this URL in Web browsers to reach the Confluence UI.
- Use this URL in Web browsers to reach the Confluence UI.
- User name:
- Click the Save button at the top of the page.
- Navigate to Content Sources.
- Select New>Web service content using the drop-down menu.
- The Wizard appears.
- Follow the wizard to configure your Connection and Target.