Microsoft Search Drive Items
About
Microsoft Search Drive Items backend uses the Graph APIto:
- Send search queries to Microsoft 365
- Receive files stored in SharePoint or OneDrive
Set Azure Active Directory Authentication
Set authentication to Azure Active Directory in SmartHub as described here: Azure Active Directory Authentication.
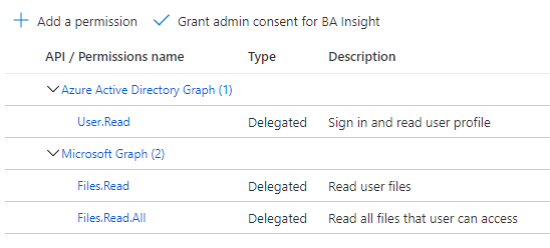
Application Permissions
The Client ID specified in Azure Active Directory Authentication must belong to an application with the following permissions:
- Azure Active Directory Graph
- User.Read
- Microsoft Graph
- Files.Read
- Files.Read.All
How to Add the Microsoft Search Drive Items Backend to SmartHub
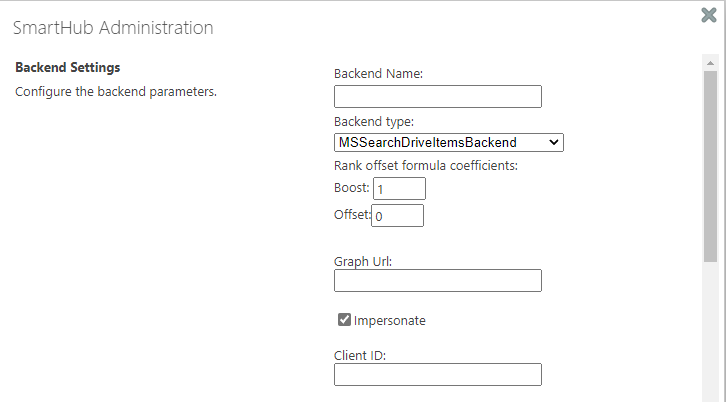
Use the following instructions to add the Microsoft Search Drive Items backend to SmartHub:
- Navigate to the SmartHub Administration page:http(s)://[web-app-url]/_admin
- ClickAdd New Backend.
- The backend dialogue box appears.
- Backend Name: Enter a backend name.
- Backend type: Select the backend type "MSSearchDriveItemsBackend".
- Graph Url:
- Example:https://graph.microsoft.com/
- Example:https://graph.microsoft.com/
- Authentication
- Impersonate set to enabled
- Security trims the results using the current user running the search
- Impersonate set to disabled
- Client Id: Enter the Application ID from Azure App Registrations.
- Client Secret: Enter the Key's value from Azure App Registrations.
- Microsoft Login Endpoint: Example:https://login.microsoftonline.com
- Access Token: Enter the access token from SmartHub's OAuth page.
- Refresh Token: Enter the refresh token from SmartHub's OAuth page.
- Impersonate set to enabled
Note: To get the Access and Refresh tokens, the "Authorize" button must be clicked, but all the above fields must be completed (GraphUrl, ClientId, ClientSecret, MicrosoftLoginEndpoint).
8. Click OK.
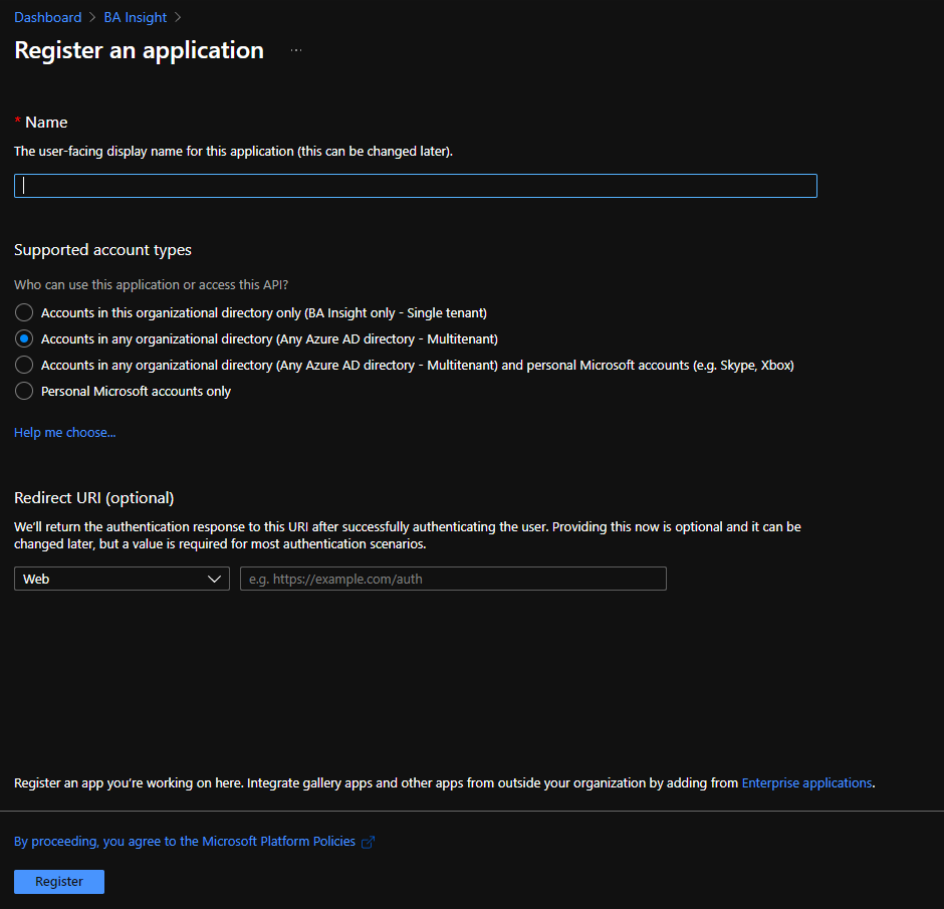
How to Register an App in Azure and Configure It
If you use SmartHub with Azure Active Directory authentication you can reuse the same App and jump to step 5.
- Navigate to portal.azure.comand log in.
- From the left side menu go to Azure Active Directory → App registrations → New registration
- Name: Enter the name of the application.
- Application type: Select Web app / API.
- Sign-on URL: Enter the SmartHub's URL.
- Select API Permissions to open the settings menu panel.
- Click Add a Permission.
- Select APIs my organization uses and add the following permissions (as you type the name, it appears):
- Azure Active Directory Graph
- User.Read
- Microsoft Graph
- Calendars.Read.All
- Files.Read.All
- Files.ReadWrite.All
- Sites.Read.All
- Sites.ReadWrite.All
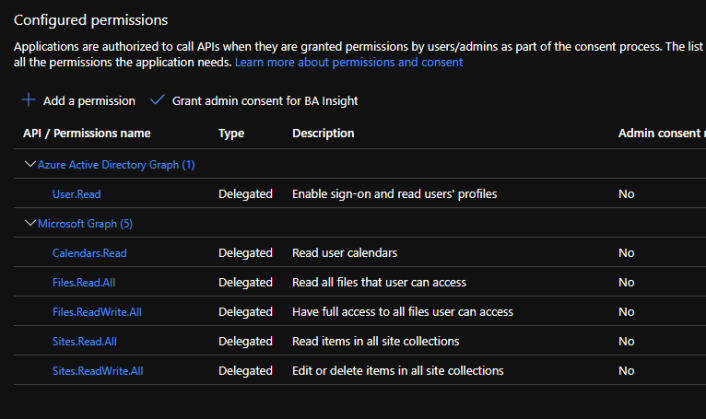
- Azure Active Directory Graph
- Click Certificates & secrets>New client secret to generate a client secret key.
- In the window that appears (shown below) enter the following information.
- Description: Enter a name for the client secret. (Note: The name is your client secret).
- Expires: Select the period until expires
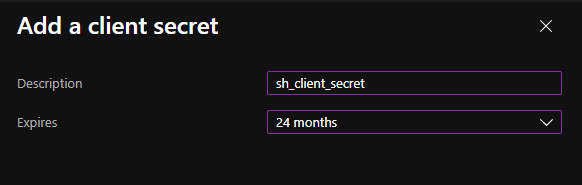
- A Value is generated after you clickAdd.

Metadata
The following metadata is available for your results:
- rank
- summary
- @odata.type
- lastModifiedDateTime
- createdDateTime
- webUrl
- createdBy
- name
- size
- lastModifiedBy
Note: For some types, not all metadata is available
Limitations
Date refiners are not supported by the Microsoft Search Drive Items backend