How to Test Your Logic
About Logic Testing
Testing your logic requires the Recorder component.
The Recorder component lets you capture and store data that passes through it.
- This component is very useful for development and testing purposes.
- When you make a change to your crawl logic, you can rerun your pipeline and the recorder captures the resulting new data, revealing how your logic change impacts your crawl.
- The stored location of the recorded data depends on the configuration and custom script.
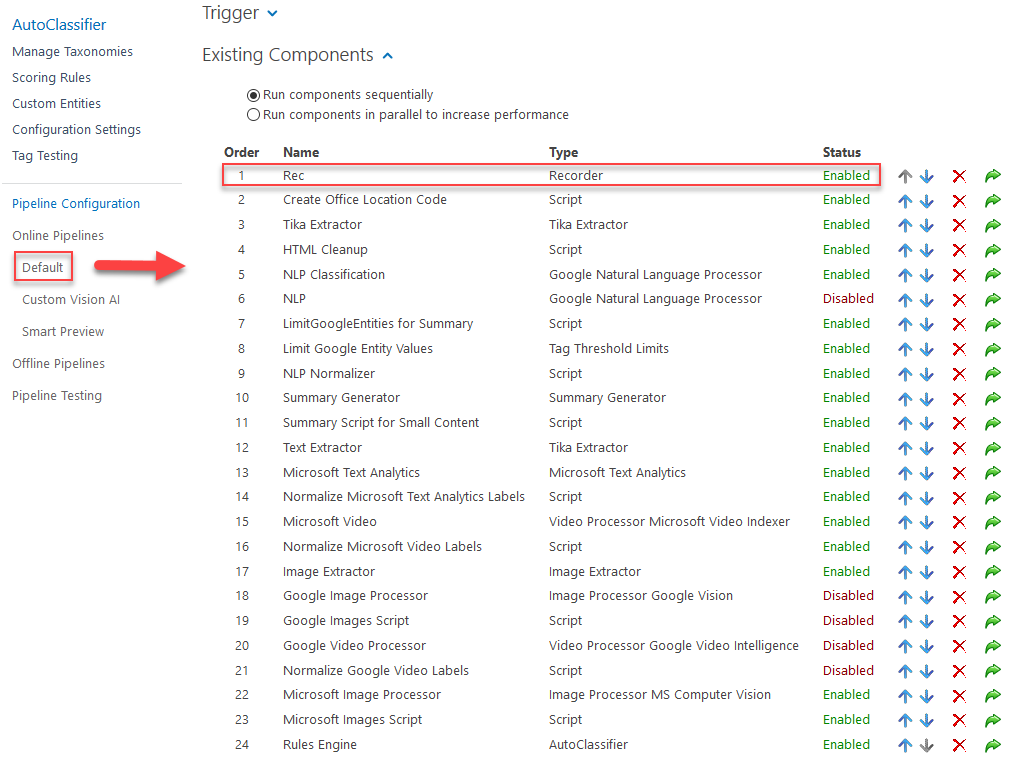
Note the Recorder in the following screenshot, a capture of the default Online pipeline.
- The Recorder (Rec) is set in the 1st place in order (Status: Disabled), and therefore runs first.
- All data that is captured by the components in the pipeline are captured by the recorder and stored in a location on the filesystem.
- This enables you to examine the contents of the data captured by the recorder to see the effect of a change in crawl logic.

Using Multiple Recorder Components
You can insert multiple Recorder components into your pipeline.
When to Use Multiple Recorder Components
If you a specific component in your pipeline is not behaving as you expect, and/or is not collecting the right data, use an additional Recorder component to capture the issue:
- Insert a Recorder component immediately after the suspected problem component in your pipeline order
- This captures the behavior of the suspected component by examining the output created by the suspected component (configured to be deposited in your file system).
Note: You can also place a Recorder component at the very end of your pipeline to complete the beginning-middle-end model of data capture.
How to Configure the Recorder Component
To configure the Recorder component, use the following steps.
Note: If you choose to add the Content Enrichment web service, you must specify the Recorder Path location.
- Make sure that you have specified the URL.
- Add the Component.
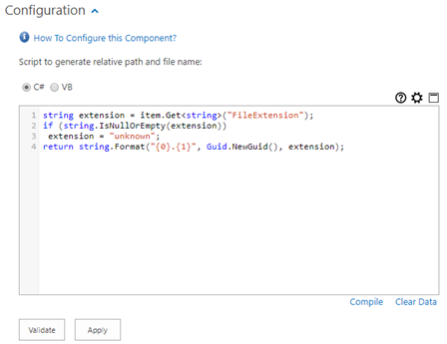
- Existing Components: Click the named link for this component to see the Configuration section:

-
To use the scripting pane:
-
 : Click to show scripting help
 -
 : Click to open the script settings window.
 -
 : Click to maximize the script editor.
-
- Compile: Click to compile your script.
-
To configure:
-
C#/VB: Use the default C# or select VB scripting.
-
Change default script to generate a relative path and file name
-
This step is optional.
-
-
-
Input Properties: Based on configuration.
-
Output Properties: Based on configuration.