How to Install the Add-In App Across Multiple Site Collections
About
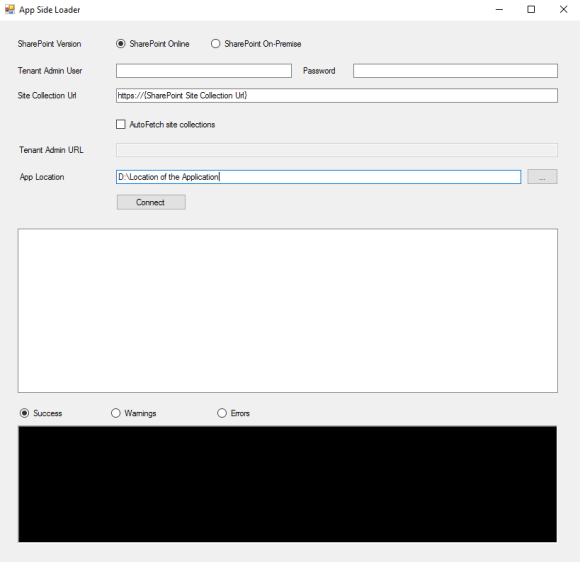
The App Side Loader application facilitates the deploy of valid Add-Ins App through a site collection in SharePoint Online or SharePoint On-Premise.

The tool can be found in the download package:

Requirements
- The Add-In App must exist in the App Catalog
- Must be run by a Tenant Admin / Site Collection Admin
How to Install the Add-in App
- Download a copy of the Add-In App from the App Catalog, if not already available.
- Launch the Side Loader Application.
- Select the SharePoint version.
- Enter a Tenant Admin user for SharePoint Online or a Site Collection Admin user for SharePoint On-Premise.
- Enter the password.
- Enter a site collection URL.
-
If AutoFetch Site Collections option is enabled, provide the SharePoint Online tenant admin URL.
Note: The AutoFetch Site Collections option is available only for the SharePoint Online version.
- Enter the location of the Add-In App.
- Click Connect.
- After the sites are loaded, select the sites that you want to modify.
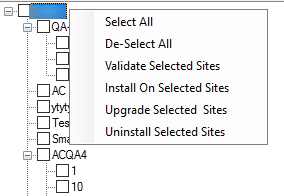
- Right-click in the tree section.
- The menu from the image below appears.
- Select the action you want to perform.

Note:
If the AutoClassifier App appears as successfully added on your site it does not mean that the full installation is completed.
To avoid the O365 30 seconds install limit, the AutoClassifier app installation process continues to run in the background.
To know that all installation background process is completed, in the log files you have check that no more entries like Installing Actions for List Id: List_GUID List Name:Calendar List continue to appear.