How to Configure Your Elasticsearch Target
Elasticsearch Support
ConnectivityHub v2.x supports only v7.x of Elasticsearch.
Ensure you have the Ingest-AttachmentsElastic plug-in installed before proceeding. More information here.
If you upgraded from Connectivity Hub v2.x to Connectivity Hub v2.2, you must reconfigure you elastic target, because the settings were lost.
Add the Target
Before you can add your Target, you must install BA Insight Connectivity Hub.
- A Target is a set of configuration options used by your Content Source (that identify which search engine content is written to).
- Multiple Content Sources can point to the same Target
- Add at least 1 Target per search engine
- If you use the same crawl options across Content Sources, you use 1 Target per search engine
- If you use various crawl options across Content Sources, you must use multiple Targets per search engine
- If you use Elasticsearch, your Target points to the entire elastic cluster
- 1 Content Source = 1 index in your search engine (Elastic, MS Search, etc.)
- You can not map 2 Content Sources to the same index
- ConnectivityHub automatically names the indices based on the Content Source names
To add the Elasticsearch Integration target, follow these steps:
- Go to the Connectivity Hub Target page.
- Select New>Target.
- The Load Target page appears.
- Select the generic Elastic Target.
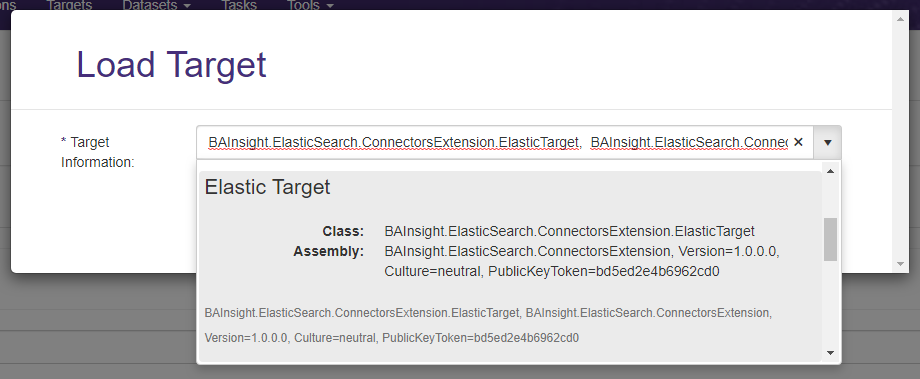
- Select the Target Info tab. Enter the following information:
- Title (required): Specify a name.
- Target Information (required): Autopopulates. Enter BAInsight.ElasticSearch.ConnectorsExtension.ElasticTarget.

-
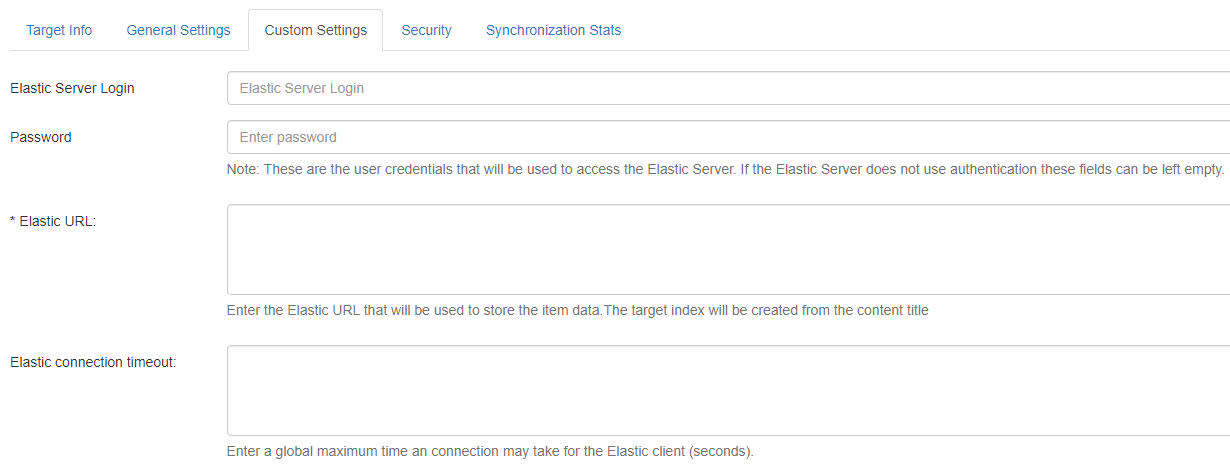
Select the Custom Settings tab.
-
Elastic index URL (required): Enter your URL in the format:
http(s)://[server_name]:[port_number].-
Connectivity Hub attempts to connect to the index in this address [index_name]. If the index does not exist, Connectivity Hub creates it.
- The Elastic schema is created automatically.
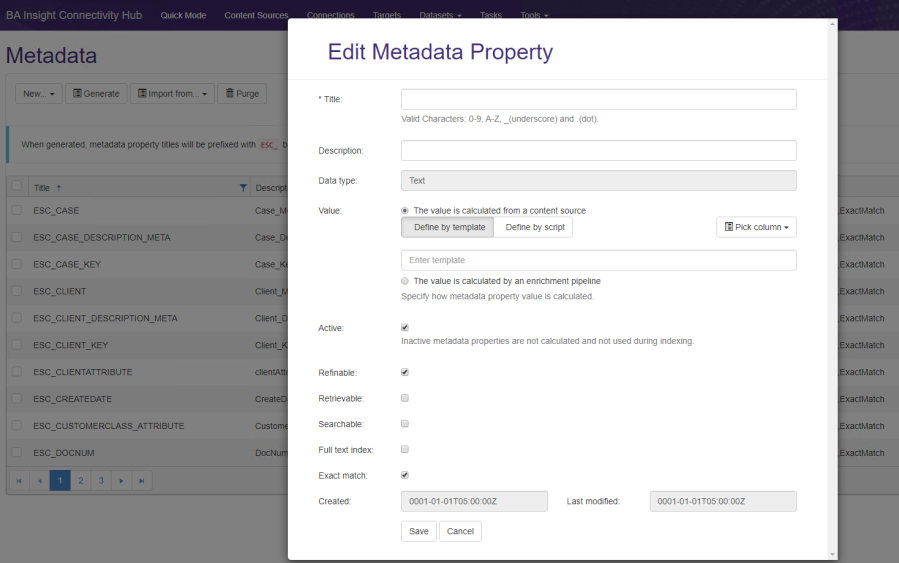
- To define thefields you want to see in your index use the Metadata page and set the Active, Refinable, Searchable, and Exact match settings for your metadata.
-
The fields are automatically created in your index, based on these settings.
- If you need to query against the specific property, mark it as Active and Seachable
- If you need to use the property as a refiner mark it as Active and refinable
- If you only care about the value of the property and only need to query againt the content of the property, then mark is Active and Full text indexable
-
-
- Click Save.
- Click Connect.
-
When executing a Target Content Reset job, the existing Elastic index is deleted! Using this option causes the loss of data in your existing index. Use with caution!
How to Group All Non-refinable/Non-searchable Properties
You can group all non-refinable/non-searchable properties from ConnectivityHub in a bulk property in Elastic by setting the Active and Full text index property on your metadata:

After indexing, all values are found under the ElasticBulkValues property.

How to Run a Full Target Update Job
After you add a target, you must run a Full Target Update job. To update the target after you have run a Full Target Update job, run a Incremental Target Update job.
To run a Full Target Update job, follow these steps:
- Go to the ConnectivityHub Tasks page.
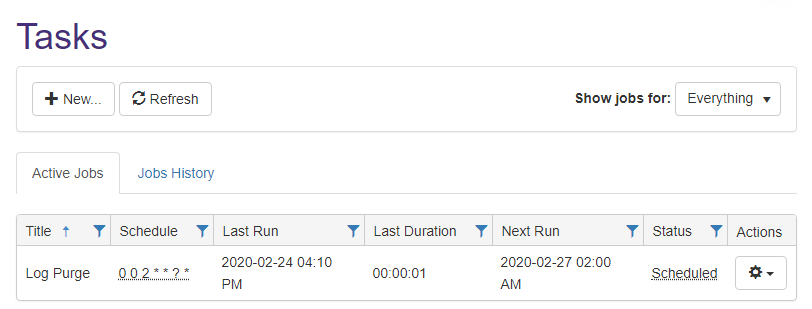
- Click New and the Edit Job page appears.
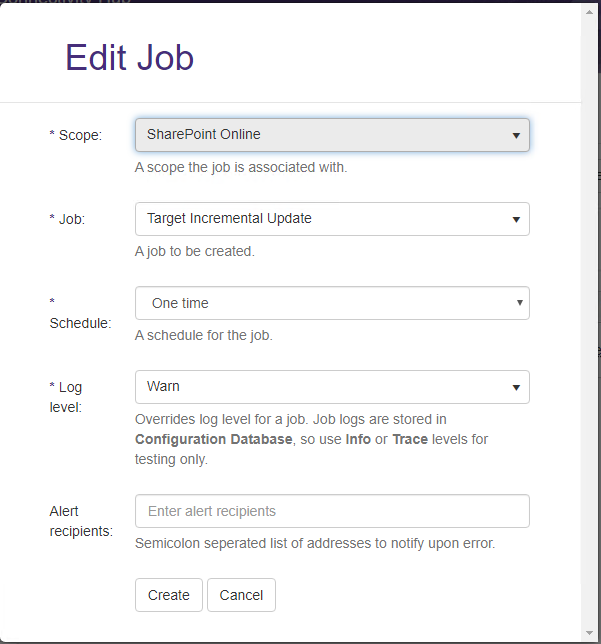
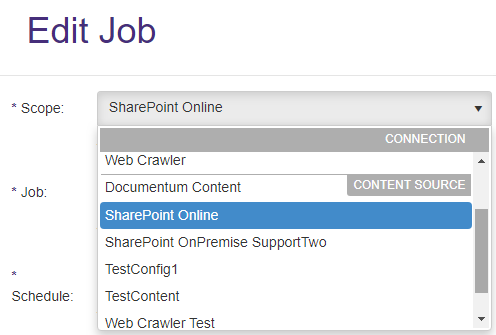
- In the Scope drop-down field, select the Content Source for which to run the full target update.
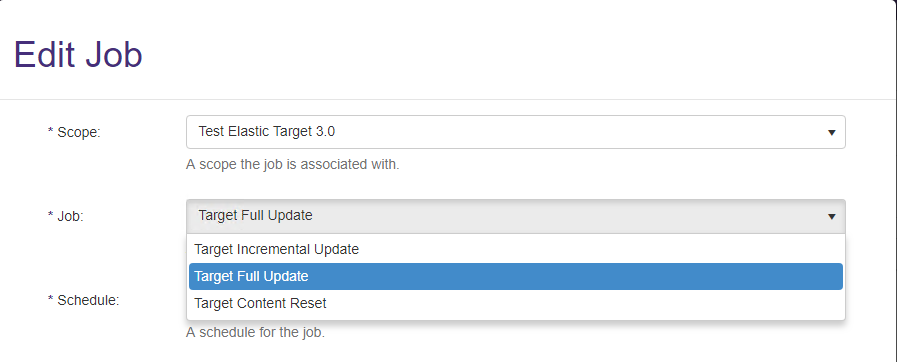
- Select Target Full Update from the Job drop-down list.
-
Click Create.
-
Logs - See these logs after you run a job such as a Full, or Incremental, Target Update job.