Run a Security Synch/Purge Operation
Use the following steps to run a security synchronization operation.
Run a security purge operation by selecting Security Purge in step 3 below.
- Tasks > New: Click to see the Edit Job window.
- Scope (required): Use the drop-down to make a different CONNECTION selection.
- Job (required): Select Security Synch/Security Purge.
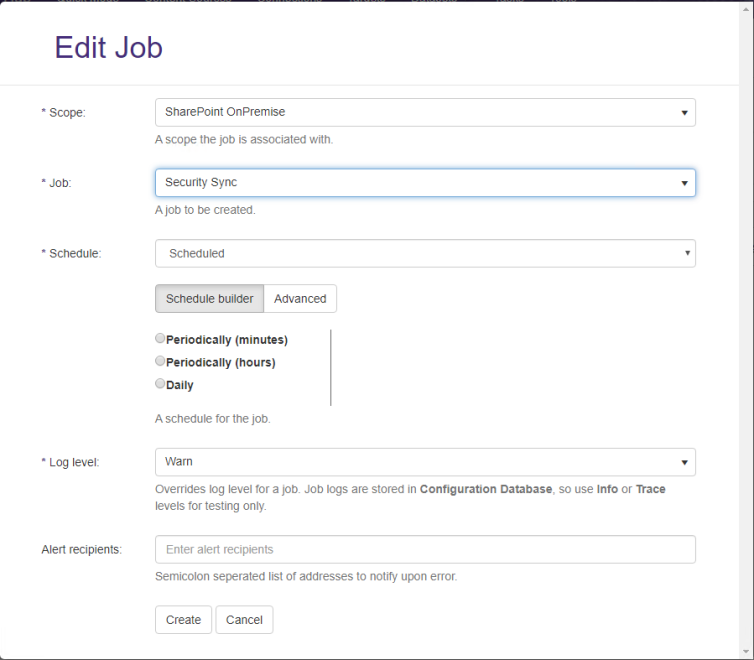
- Schedule (required):
- One Time
- Scheduled: Choose one of the following options.
- Schedule builder: Use the UI to make your selections.

- Advanced: Schedule the job in
Cronformat.
- Schedule builder: Use the UI to make your selections.
- Log level (required): Select/Leave the default:
- Warn (Default)
- Error
- Info/Trace: Select only for testing purposes.
- Alert recipients:
- Enter email address separated by semicolons (;).
- These users are notified when/if an error occurs.
- Create:
- Save and run your job.
- You can see your job status for the Connection that you select using the Show jobs for drop-down.
- For a scheduled job: See your job status on the Active Jobs page:

- Filter from many jobs:
- Click
 and select your Security Sync job:
- Filter: Click and see your results:

- Click
- See all of the job results:

For a one-time job: See your job status on the Jobs History page:
If you have run many jobs: - For a scheduled job: See your job status on the Active Jobs page:
Note: If you do not see your jobs, click Refresh.