Security Mapping: Users and Groups
Security mapping recreates the security in your content source system within the Active Directory (AD) and Connectivity Hub .
When you specify security mapping, you manage and validate the security for specific users and groups.
Use the security mapping page to:
- Add or edit an individual user (the users that appear on the Security Mapping page are present in the source system).
-
Identify an AD user for each user in the source system
Note: It is not unusual to have some users that do not map directly to the AD.
Mapping Features
The Connectivity Hub lets you select from a number of mapping features.
These features are explained below.
The steps to access these features in the user interface are also listed where appropriate:
- User mapping:
- Load the user list and mapping from the source system to the AD accounts.
- Use the tools that are provided to make corrections and use advanced scripting to customize the mapping algorithm.
- Naming convention:
- Specify the naming format for each new group.
- Flexible group management screens:
- Filter, sort, and make corrections through the Connectivity Hub Admin Console or pages.
- Group mapping:
- Load the group list from the source system.
- Source system groups that have a existing match in AD are automatically mapped.
- Otherwise the groups will be flagged as Native and a copy of it is created and maintained by Connectivity Hub.
- Use the tools that are provided to make corrections and use advanced scripting to customize the mapping algorithm.
Add or Edit User Security Mappings
Note: Changes do not become effective until you run a security synch operation.
- From the Connections page, for the <name of your Connector>, click
 > Security mappings.
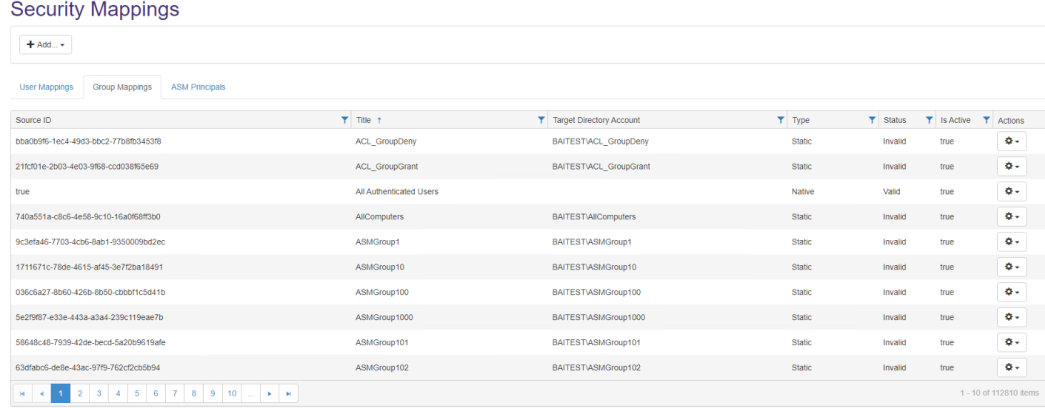
- The Security Mappings page appears.

- Add: Click the Add... button to open the Edit User Mapping window.
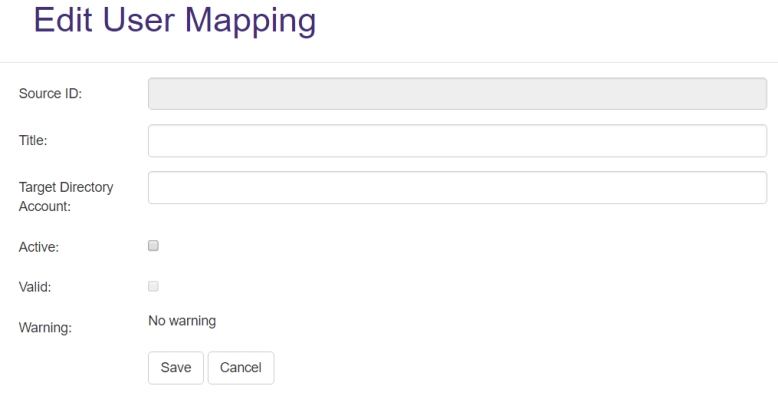
- Source ID: See/Enter the unique name of the user in the source system.
- Title: Specify a unique name.
- Target Directory Account:
- Update the Target Directory Account as needed.
- Specify the full domain path
mydomain.local\groupnameor user name
- Active: Click if the user has either not been activated in the source system, or has not been created in Active Directory.
-
Valid: Click if the user is validated.
Note: A user cannot gain group membership until this user has a valid status.
- Warning: See if there are any alerts associated with this user.
- Save: Click to see the list of users.
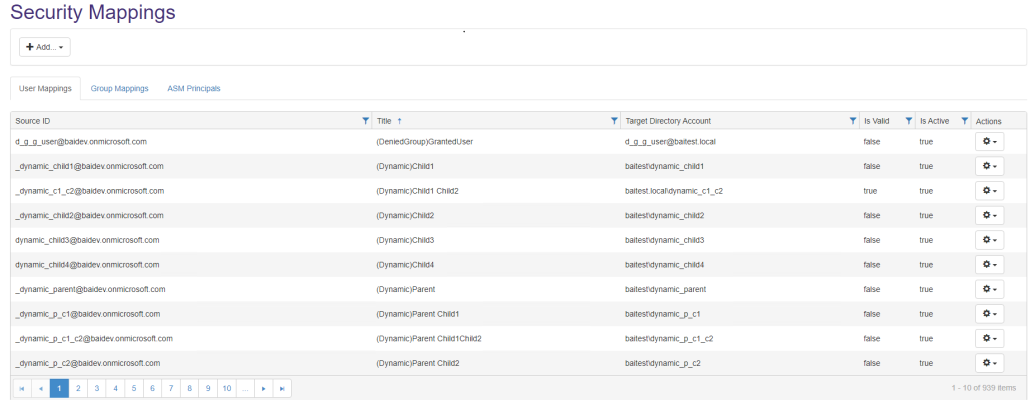
- Individual users: Click <user> > > Edit/Delete/Deactivate.
- All users: Purge: Click Purge to remove all security mappings.
Add or Edit Group Security Mappings
Note: Changes do not become effective until you run a security synch operation.
- Connections > <name of your Connector> > > Security mappings.

- The Security Mappings page appears.

- Group Mappings:
- Add: Click Add to see the Edit User Mapping window.
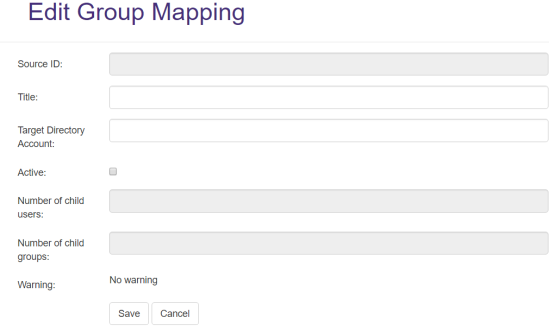
- Source ID: Enter the unique name of the user in the source system.
- Title: Specify a unique name.
- Target Directory Account: Update the Target Directory Account as needed. Specify the full domain path
mydomain.local\groupnameor username - Active: Check if the user has either not been activated in the source system, or has not been created in Active Directory.
Number of child users: Number of members for this group.
- Number of child groups: Number of groups within the parent group.
- Warning: Displays any alerts associated with this group.
- Click Save to see the list of groups.
- Add: Click Add to see the Edit User Mapping window.
- Individual groups: Click <group> > > Edit/Delete/Deactivate.
- All groups: Purge: Click Purge to remove all security mappings.