Adding AI Search capabilities to your Azure AI Search content
This section is only applicable if vector fields and document chunking are required in order to leverage Microsoft Azure AI Vector Search capabilities. If you plan to use vector fields and document chunking in your index, you must satisfy the following prerequisites and note any limitations.
Using AutoClassifier components to enhance metadata
BA Insight AutoClassifier allows you to enhance the metadata of your indexed content with specific functionality. Refer to the following to see how you can implement AutoClassifier functionality in Connectivity Hub:
-
Connect Connectivity Hub to AutoClassifier to generate vector embeddings using scripts
-
Connect Connectivity Hub to AutoClassifier to index document chunks
Additionally, you can apply vector embeddings to your document chunks by configuring both of these components in your AutoClassifier pipelines. For more information, see Generate vector embeddings for chunked content in the AutoClassifier documentation.
For more information, see How to Integrate AutoClassifier with Connectivity Hub or Connector Framework.
Connect Connectivity Hub to AutoClassifier to generate vector embeddings using scripts
Refer to How to Generate Vector Embeddings via Scripting in the AutoClassifier documentation and ensure that you have configured the component.
Prerequisites
-
If you want to return a vector field as metadata on the results page, you need to specify that the vector field is retrievable when creating it.
-
The AutoClassifier Engine must be installed and configured.
Limitations
-
When Creating vector metadata in Connectivity Hub, the vector field must be Searchable. If it is not, the vector field will not be created in the index.
-
Settings that are from an index with vector metadata fields that was previously created in the Microsoft Azure AI Search administration portal will not be reflected when you create vector metadata in Connectivity Hub.
-
Changes to the vector metadata fields in the Microsoft Azure AI Search administration portal will not be reflected in Connectivity Hub.
-
Only the Collection Byte field type supports the hamming distance metric. Collection SByte, Collection Single, Collection Half, and Collection Int field types do not support hamming distance metric.
-
After creating your vector metadata, only the retrievable field can be updated.
-
Any updates made to the Target Specific settings creating your vector metadata will not be reflected in the Azure index.
-
All vector metadata must be numeric. Warnings will display if they are not.
Procedure
To populate vector fields into the Azure index when running Connectivity Hub tasks, do the following:
-
In Connectivity Hub, navigate to the Content Sources page.
-
Create a content source with the same name as the Azure index that uses the Microsoft Azure target.
-
Configure AutoClassifier to generate vector embeddings via scripting.
-
Configure the enrichment pipeline integration on the content source.
-
Delete the automatically created metadata that corresponds to the Output properties that were configured on the Microsoft Azure content source in step 5.
Output properties have the following format:ESC_<OutputPropertyName>. You will have to manually delete the automatically created meta data properties each time you generate them.
Configure the enrichment pipeline integration on the content source
-
In Connectivity Hub, navigate to the Content Sources page.
-
Edit the content source that corresponds to your Microsoft Azure index.
-
Select the Advanced tab.
-
Scroll down to the Enrichment pipeline integration section.
-
Select the Enrichment web API option and specify the following:
-
Service URL: Enter the URL of the enrichment web service.
-
Authentication Mode: Select your authentication mode from the drop-down list.
-
Properties returned: Provide a list with the output properties in the following format: PropertyName,PropertyType,IsMultiValue. You must use a semicolon to separate list items.
-
PropertyName: The name of the property that was set in the AutoClassifier pipeline stage.
-
PropertyType: Decimal
-
IsMultiValue: true
-
Create vector metadata in Connectivity Hub
-
In Connectivity Hub, navigate to the Content Sources page.
-
Click the Actions button for the content source that corresponds to your Microsoft Azure index and select Metadata.
-
On the Metadata page, click New.
-
From the drop-down list, select Numeric metadata.
-
In the modal window, provide the details for the following fields:
- Title: Enter the name of the vector field. The name is case-sensitive and must be the same as the one that you configured in the Microsoft Azure index schema.
- Description: Enter a short description of the vector field.
- Value:
Select The value is calculated by an enrichment pipeline.
From the drop-down list, select your property.
- Active: Checked
- Searchable: Checked
- Multiple values: Checked
Since Microsoft Azure does not support changing existing fields, you will need to run a Target Content Reset task each time you change your vector metadata. The vector metadata must only be active and support multiple values.
-
Click Save. Your new vector metadata will appear in the metadata list.
-
Select your newly created metadata.
-
Click the Target Specific tab.
-
Click the Index as Vector Field checkbox. Enabling this field allows you to specify vector fields in your Azure index. Complete the following fields that display:
-
In the Field Type field, select the type of vector field you want to index from the drop-down menu. For more information on these data types, see the Microsoft documentation. By default, this field is set to Collection(Edm.Single).
-
In the Dimensions field, specify the floating point value length of the vector that will be returned by the model. By default this is set to 1536, which is the size of the embeddings generated by the Azure OpenAI text-embedding-ada-002 model.
-
In the Vector Algorithm field, select the algorithm you want to use for your vector search from the drop-down menu. Currently, only Hierarchical Navigable Small world (HNSW) and Exhaustive K-Nearest Neighbor (KNN) algorithms are supported.
-
To provide customizable advanced settings to your vector embeddings, click the Enable Advanced Settings checkbox. A text box will appear, where you can specify your advanced settings, refer to the following snippets for more information:
HNSW settings
hnsw {'m':4, 'efConstruction':400, 'efSearch':500, 'metric':'cosine'}KNN settings
knn {'metric': 'cosine'}if you do not select Enable Advanced Settings, the values shown in the snippet above will be used as the default during indexing.-
m: This specifies the bi-directional link count. The accepted range for this value is 4 to 10. Lower values will return less noise in the search results.
-
efConstruction: This specifies the number of nearest neighbors used during indexing.
-
efSearch: This specifies the number of nearest neighbors used during search.
-
metric: This value should be cosine when using Azure Open AI.
-
-
-
Run a Target Full Update job to populate the index with your vector embeddings.
Validate the implementation
To validate your implementation, you can do one of the following:
-
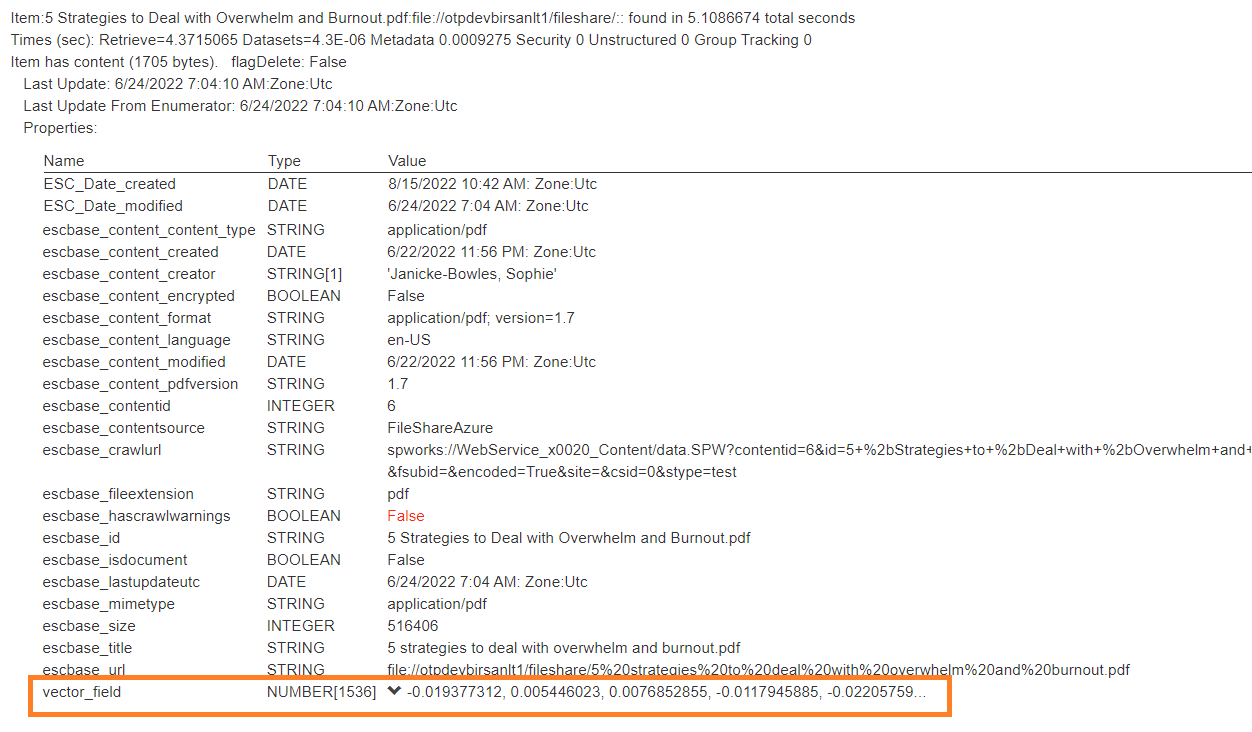
Run a Test Bench and validate that your vector field contains an array of float numbers. Verify that the dimension of the array matches the dimension of the vector field that you specified in step 9b above.
-
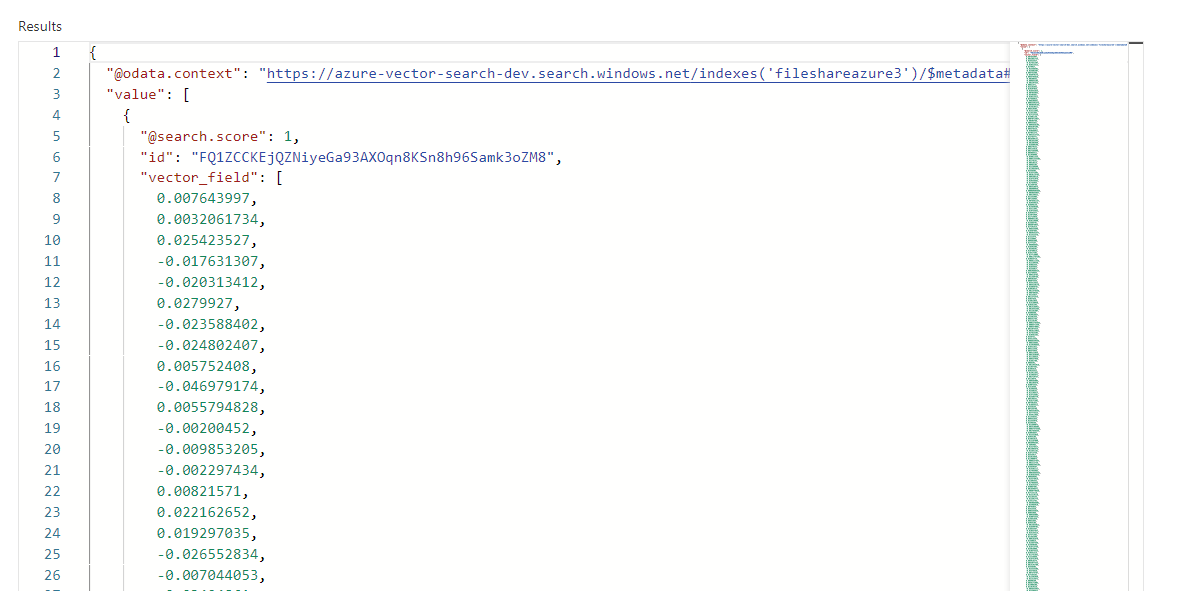
In the Microsoft Azure portal, select your index and verify that the vector field is populated in the index and that the name of your vector field is include in the Fields tab.
Connect Connectivity Hub to AutoClassifier to index document chunks
In AutoClassifier, you can use the Document Chunker component to break a document into smaller, more manageable segments, in order to surface search results that are more accurate and relevant to the user search query. For more information, see Configure the document chunker component in the AutoClassifier documentation.
Configure the enrichment pipeline integration on the content source
-
In Connectivity Hub, navigate to the Content Sources page.
-
Edit the content source that corresponds to your Microsoft Azure index.
-
Select the Advanced tab.
-
Scroll down to the Enrichment pipeline integration section.
Select the Enrichment web API option and specify the following:
-
Service URL: Enter the URL of the enrichment API endpoint.
-
Authentication Mode: Select your authentication mode from the drop-down list.
-
Properties returned: Provide a list with the output properties in the following format: PropertyName,PropertyType,IsMultiValue. You must use a semicolon to separate list items.
-
PropertyName: The name of the chunk body property that was set in the AutoClassifier Document Chunker stage.
-
PropertyType: Text
-
IsMultiValue: False
-
Validate the implementation
To validate your implementation, you can do one of the following:
-
Run a Test Bench on the content source and validate that you can see the number of child items. This appears as in the Name column with the text "Item has x child items.". You can click on this text to expand each child item to view the property that you specified in the PropertyName field when you configured your enrichment pipeline and any additional properties that you specified in a script (see Alter chunks with a script component). Test Bench will show the top 10 child items if more than 10 child items exist.

-
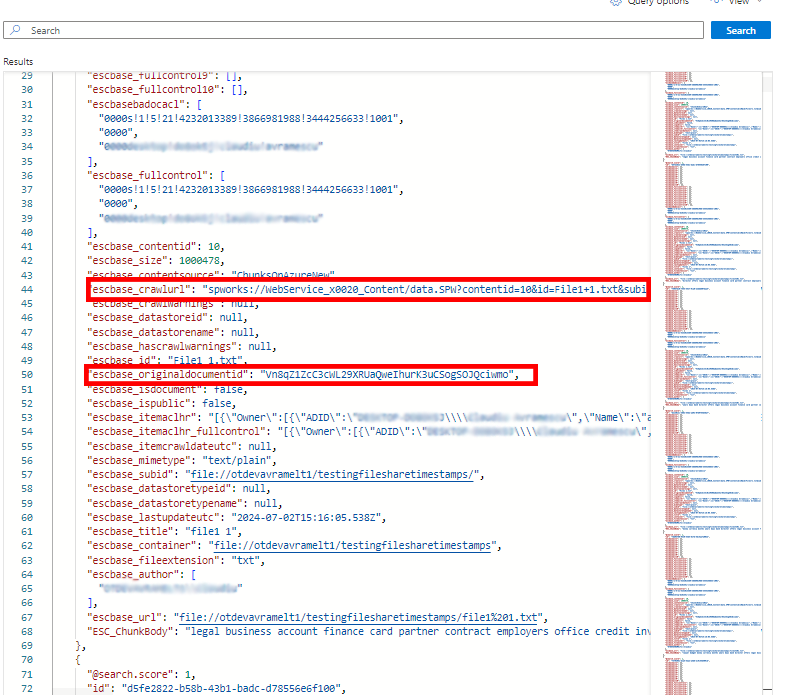
In the Microsoft Azure portal, verify that the properties that you specified in the PropertyName field when you configured your enrichment pipeline are present. Additionally, you can verify that the following properties maintain information about the parent document:
-
escbase_crawlurl: This is the url to the parent document.
-
escbase_originaldocumentid: This is the document id of the parent document.
-