Certificate-based Authentication in SharePoint Online O365 connector
The SharePoint Online O365 connector registers as an Azure AD An identity and access management solution from Microsoft that helps organizations secure and manage identities for hybrid and multicloud environments. application with certificate authentication.
Application Permissions
The Azure application must be granted the following SharePoint API permission (see the topic below):
- “Full control of all site collections”
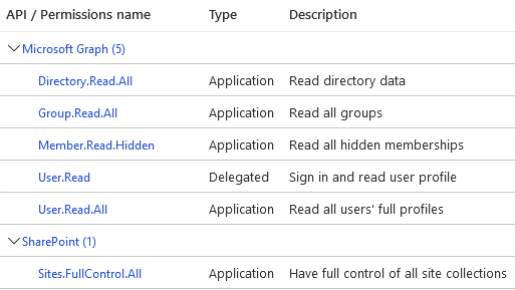
The Azure application must be granted the following Graph API permissions:
- Read all hidden memberships:
- Member.Read.Hidden
- Read all groups:
- Group.Read.All
- Read directory data:
- Directory.Read.All
- Read all users' full profiles:
- User.Read.All
Certificate Requirements
For the following topics you need the signed certificate in PFX and CER formats (created here) as well as the password for the PFX certificate.
Register the Azure Application
- Go to https://portal.azure.com/ and login with Azure Global Admin user credentials.
- Click Azure Active Directory An identity and access management solution from Microsoft that helps organizations secure and manage identities for hybrid and multicloud environments. and click on the desired directory.
- From the menu select App Registrations.
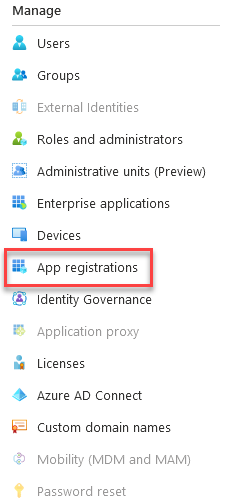
- Click New registration to register a new app.

- Name: Enter a name for your app.
- Application type: Select Web app/API app.
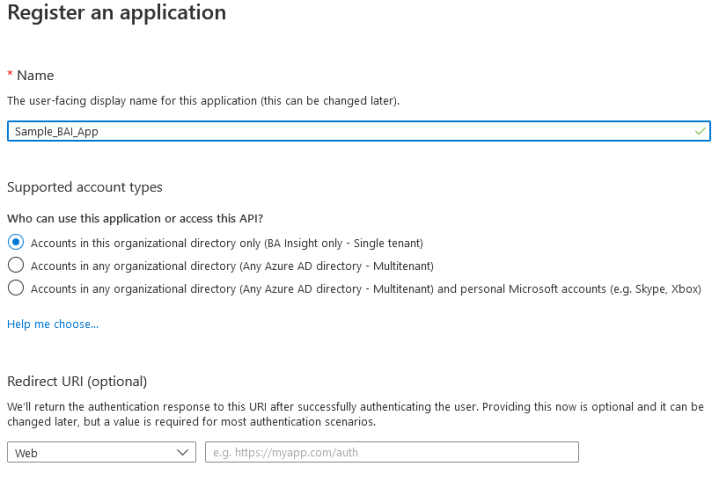
- Redirect URI:
- Enter a URI of your choosing.
- (The URI is not used in the SharePoint Online Authorization mechanism)
- Click Register at the bottom of the page.
- Within the app, go to API Permissions.
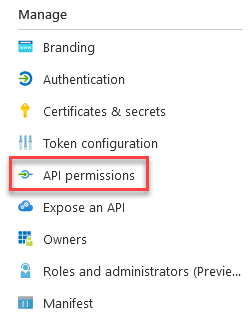
- Under API Permissions > Add a permission > Sharepoint.
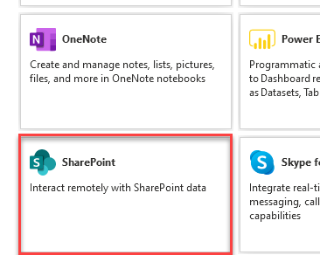
- Select the following permissions for the app depending on the Authentication mechanism used:
- Application permissions> "Sites.FullControl.All"
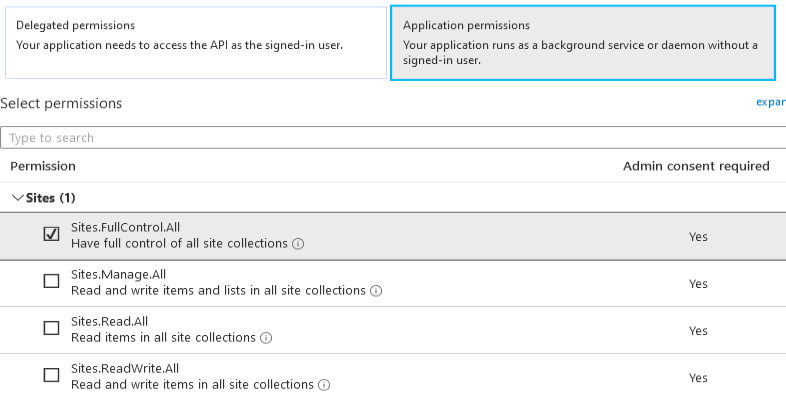
- Application permissions> "Sites.FullControl.All"
- Click the Add Permissions button at the bottom of the screen.
- Back in the "Configured permissions" menu, select the Sites.FullControlAll permission and click the Grant admin consent.. button to grant the selected permissions (requires admin rights).

- Repeat this process (Steps 9 through 13)for each of the followingMicrosoft GraphAPIs - Application permissions:
- Open the Azure app you created in the previous steps, above.
Under "Manage" click Certificates and secrets -
Add your newly created certificate.

There are multiple methods that can be used to create a certificate.
BA Insight recommends the following instructions to create a certificate:How to Create a Self-Signed Certificate.If you use another program, such as IIS, when you export the certificate, ensure you do not mark the key as exportable:
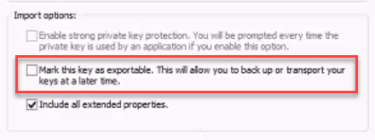
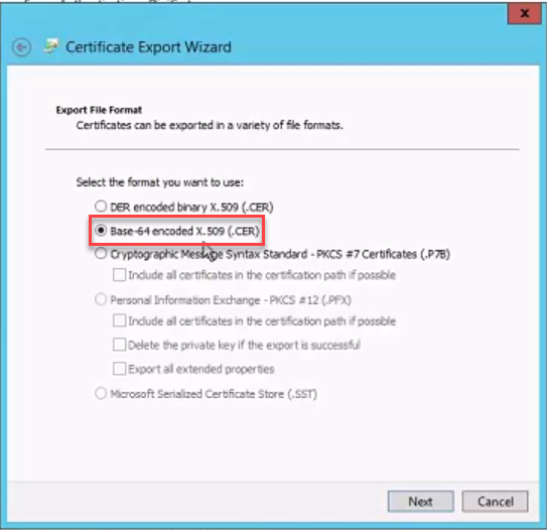
Also, when exporting your certificate using IIS, note that it MUST BE Base-64 encoded:
Install the PFX Certificate on the Server Where the Connector Is Installed
- Run the Microsoft Management Console (MMC) as an Administrator.
- Add the Certificates Snap-in.
- Expand the tree to the Trusted Root Certification Authority.
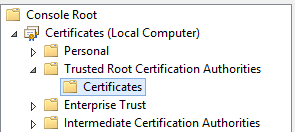
- Use the Actions menu to import your PFX certificate.
How to Determine the Certificate Distinguished Name
- Run the Microsoft Management Console (MMC) as an Administrator.
- Add the Certificates Snap-in.
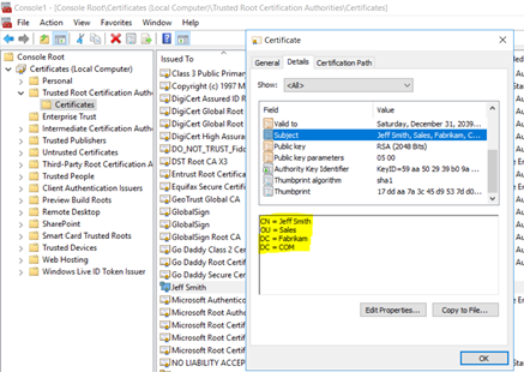
- Locate the certificate in the Trusted Root Certification Authority and double-click the certificate name.
- From the pop-up window select theDetailstab.
- Locate the “Subject” field and click on it.
- Identify in the text box below all the distinguished name components.
-
Build the distinguished name based on all the components separated by comma and space characters.
For example: CN=Jeff Smith, OU=Sales, DC=Fabrikam, DC=COMIf you copy your certificate details, as shown below, you must ensure you use syntaxwithout a spaceor your certificate will not work.
CORRECT SYNTAX Example: "CN=Jeff Smith"
INCORRECT SYNTAX Example: "CN = Jeff Smith"