Set Up Configure Oracle Web Center Content Connector
All BA Insight connectors can be downloaded from the Upland Right Answers Portal under Knowledge > BA Insight > Product Downloads > Connectors. This connector is installed with the same generic steps as any BA Insight connector. You must satisfy the Prerequisites for your connector before installing. The configuration specifics are detailed below.
Procedure:
-
Download the BA Insight Oracle UCM APIs to the location of your choice on an indexing server.
-
Run the installer.
-
Accept the default port, or enter a new port number, for the web service.
Save the port number. This information is required in later steps. -
After the install is complete, click Close.
Configuration
Connection Settings
-
Open Connectivity Hub.
-
-
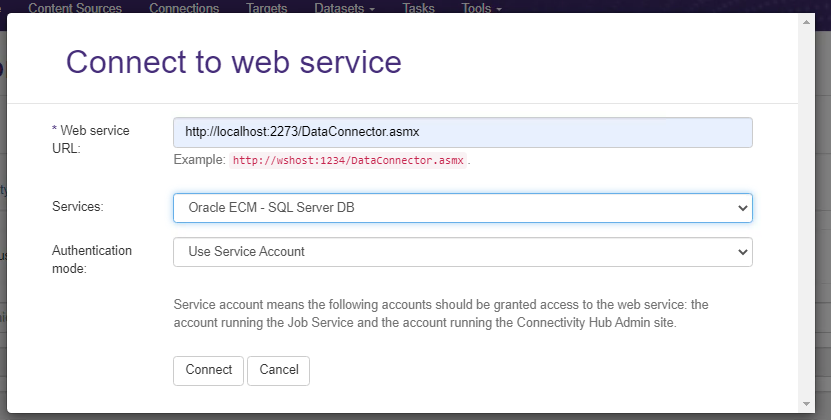
Enter Web service URL using the port number, saved earlier.
-
-
Click Connect.
-
Additional fields appear.

-
Select the Service Account authentication mode, unless other authentication has been configured.
-
Click Connect.
-
The web service connection page appears
-
Enter a title for the connector
-
Select the General Settings tab.
-
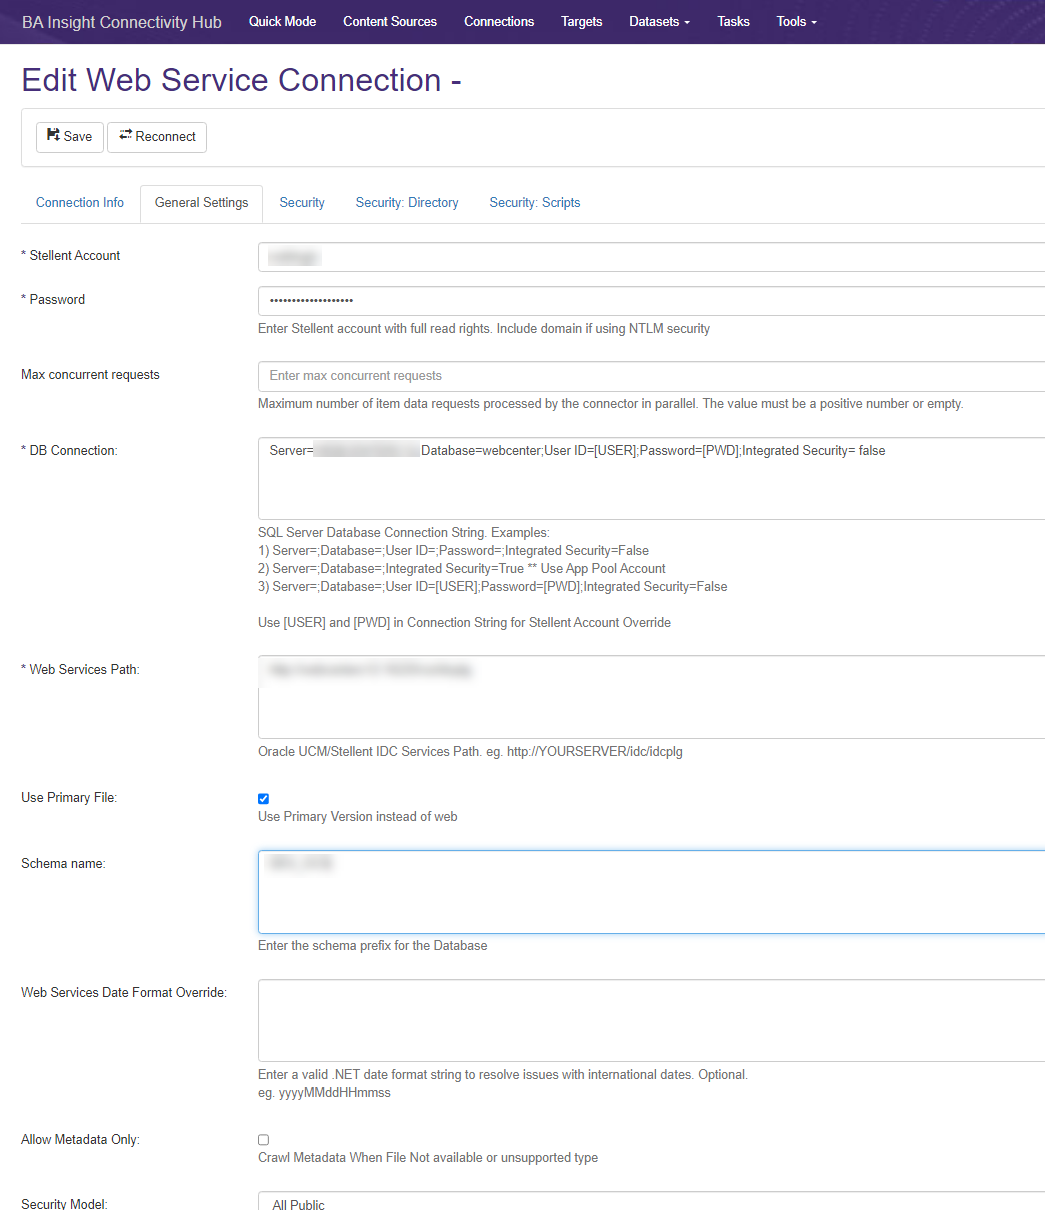
Complete the fields with the information for your Oracle database, including:
-
User account: Enter an account and the password of an account that has full rights to all the content.
-
Database connection string: Use the syntax: Server=SERVERORIP;PORT=1521;SID=samples;User Id=USERID;Password=PASSWORD;
-
Web services path: Specify the URL of the IDC web services
-
Schema name: Enter the schema prefix of the database
-
-
Allow Metadata Provides context with details such as the source, type, owner, and relationships to other data sets. Metadata provides details around the item being crawled by Connectivity Hub. Only: This setting determines whether to index files, records or everything.
-
Security Model: Stellent Web Center Content has a security model that does not translate well to Active Directory A directory service for Windows domain networks. A hierarchical structure that stores information about objects on the network. Used to manage permissions and control access to critical network resources..
-
In Stellent, security can be based on a user belonging to both a group and an account.
-
This dynamic security model is not supported in AD A directory service for Windows domain networks. A hierarchical structure that stores information about objects on the network. Used to manage permissions and control access to critical network resources., so this Connector expands all the possible combinations of groups and accounts into new groups that are tracked with crawls.
-
When either an account or group membership changes this Connector updates only the documents that are affected by that change.
-
If you utilize Group and Account security, select this option.
-

Content Source Settings
-
Select the Content Sources link from the top navigation menu.
-
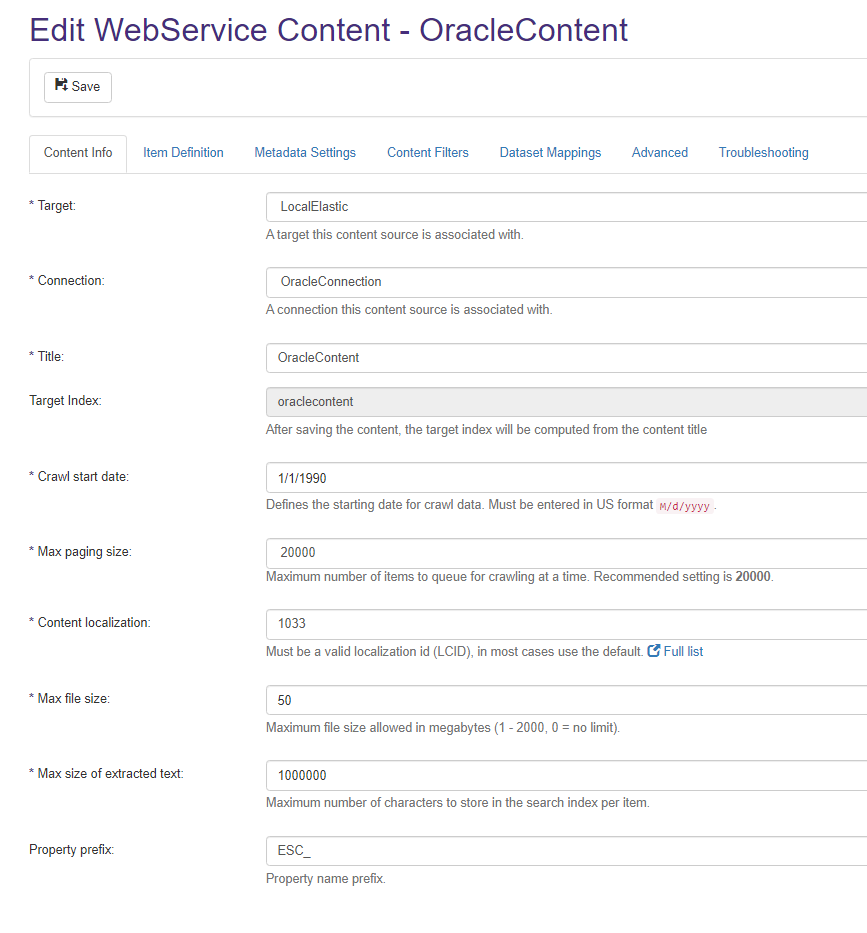
Ensure all the required fields are completed. See the image below.

Verify Connection
Procedure:
-
Run the Datastore Types Load Collects the types of data from your source system. Runs on a set schedule. Requires a log level which logs information job (under Task menu) for this Connection.
-
Click Tasks next to your Connection entry on the "Connections" list page
-
Verify that this task successfully completes.
-
Run the Security Sync Loads User and Group tables and executes the mapping based on the connector configuration. task for this Connection.
-
Click Tasks next to your Connection entry on the "Connections" list page
-
Verify that this task successfully completes