oAuth Setup Example
This example explains steps to set up oAuth Specifies a process for resource owners to authorize third-party access to their server resources without providing credentials. authentication on Okta
-
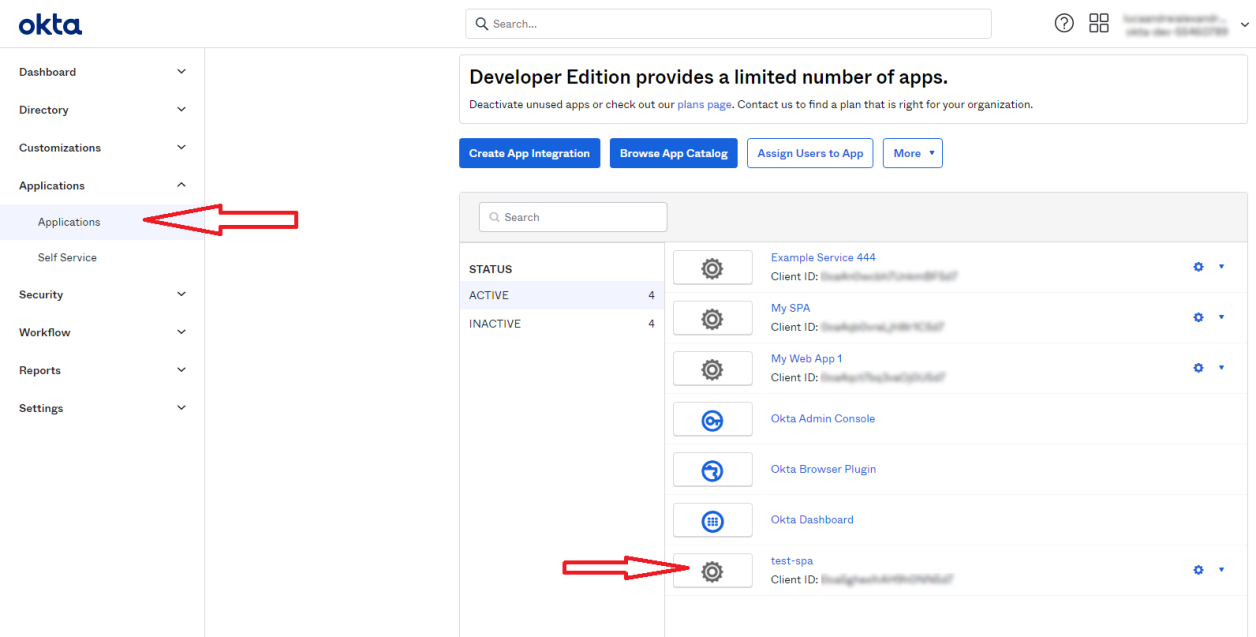
Go to the Okta site, and select your application under the Applications menu.
-
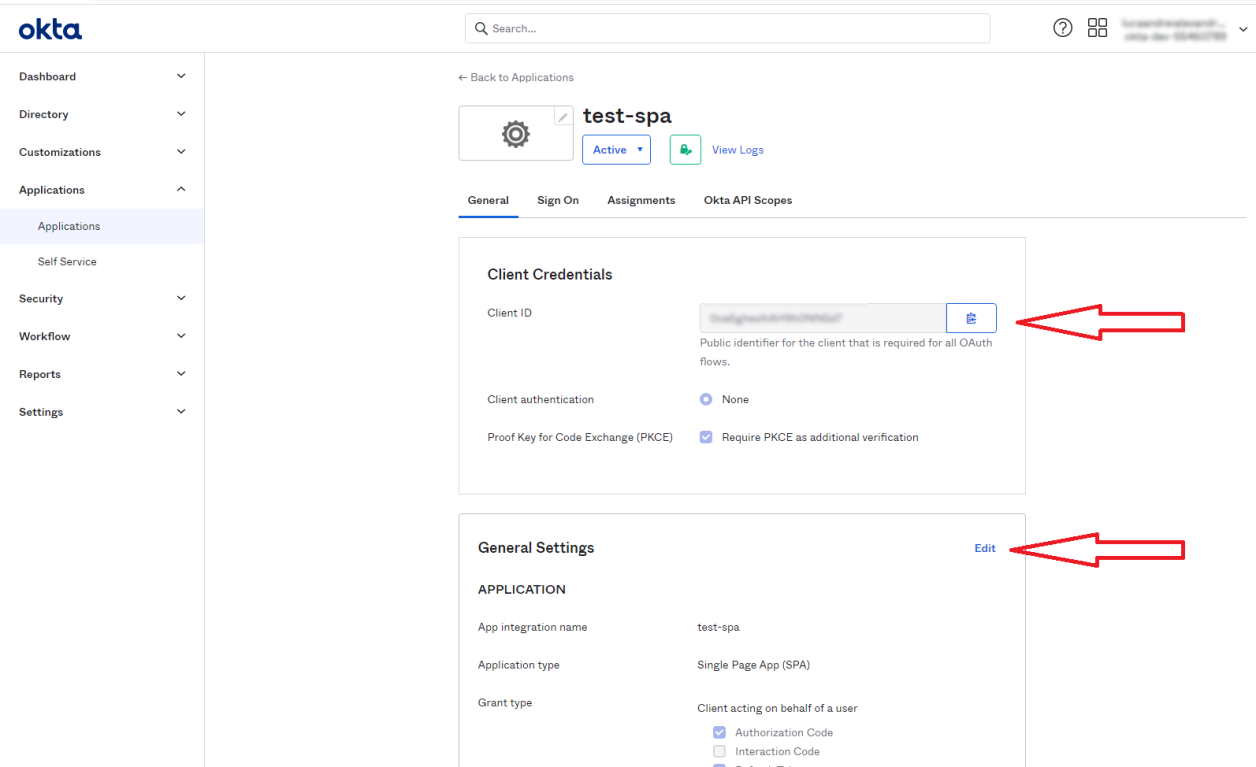
Save your client ID and continue to Edit settings.
-
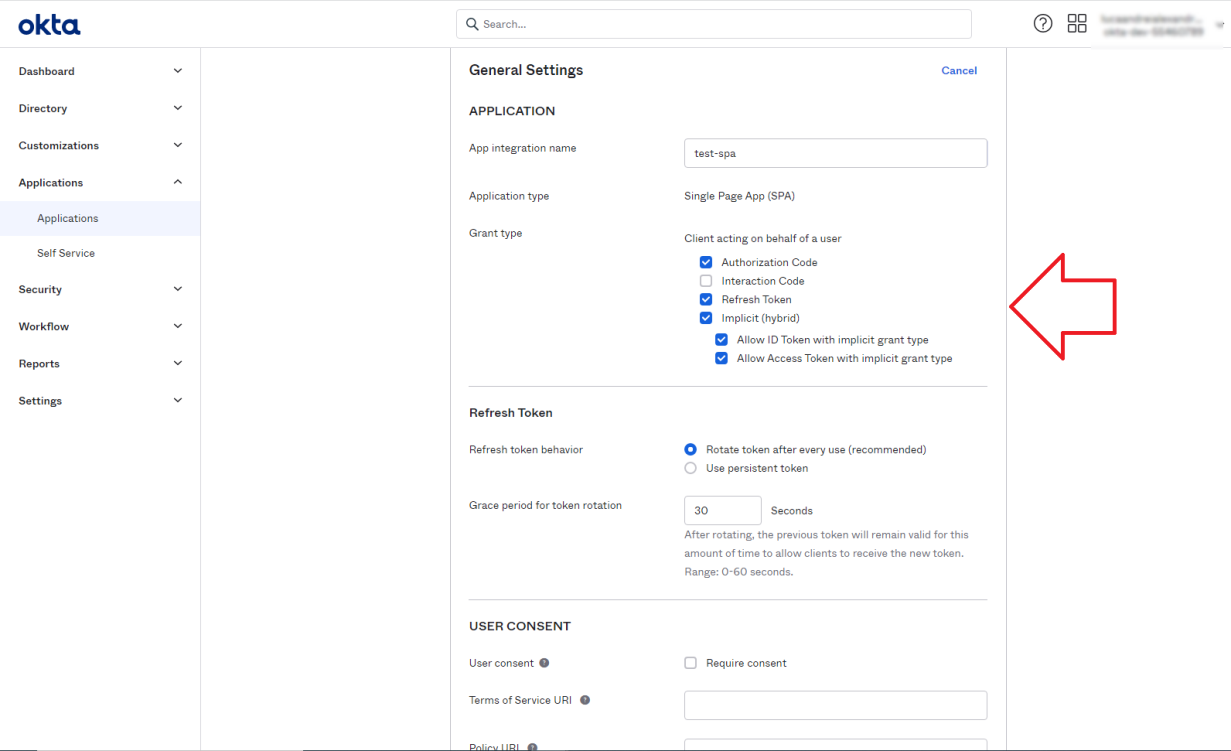
Grant type
-
Select all of the following options:
-
Refresh token
-
Allow ID Token with implicit grant type
-
Allow Access Token with implicit grant type
-
-
-
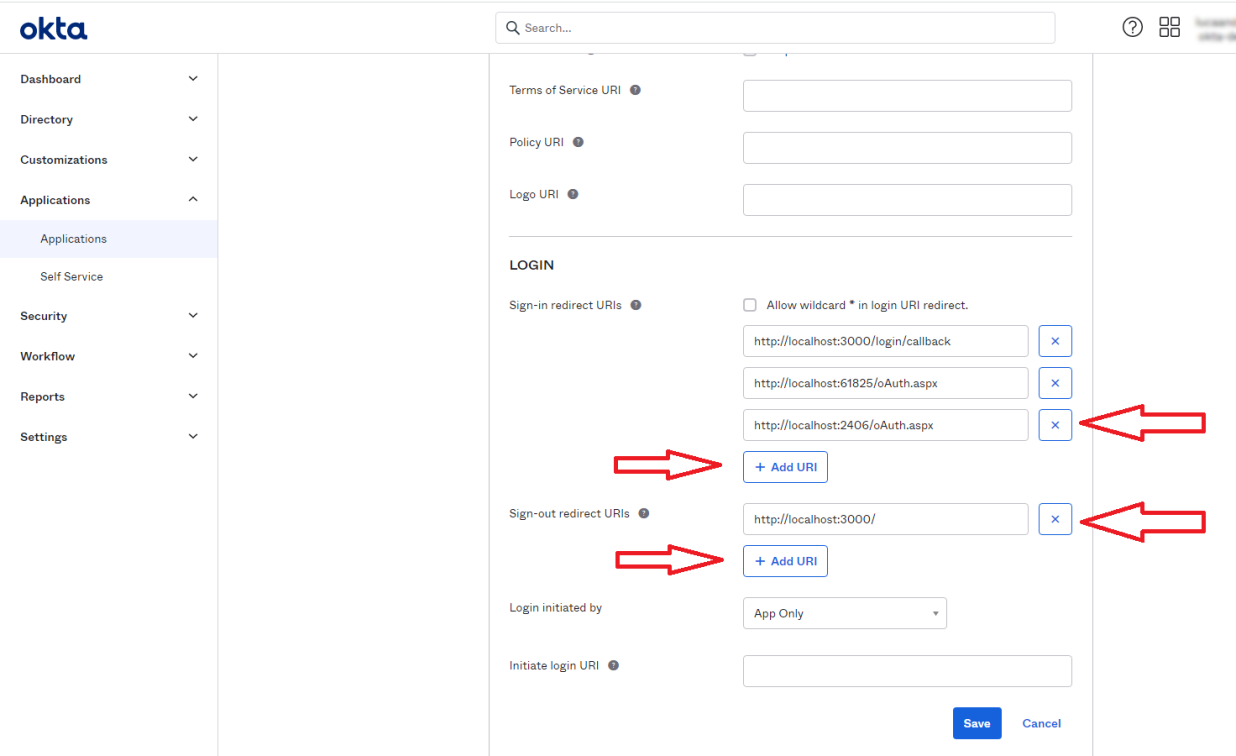
Add the sign-in redirect URL:
-
http://locahost:{connector port}/oAuth.aspx
-
-
Add sign-out redirect URL.
-
Click Save.
-
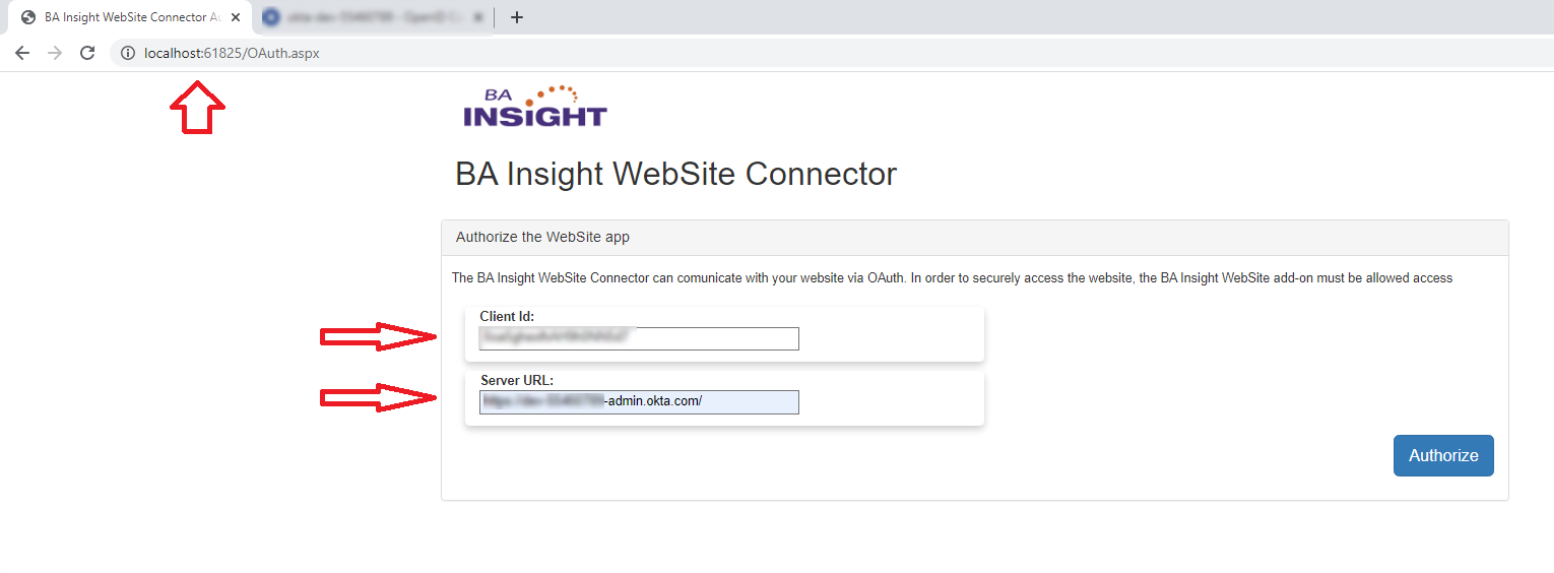
Go to http://localhost:{connector port}/OAuth.aspx
-
Client Id: Set your Client ID
-
Server URL: Set your server URL: Enter the URL of your Okta server
-
Example: https://my.local.okta.server-admin.okta.com/
-
-
Click Authorize.
-
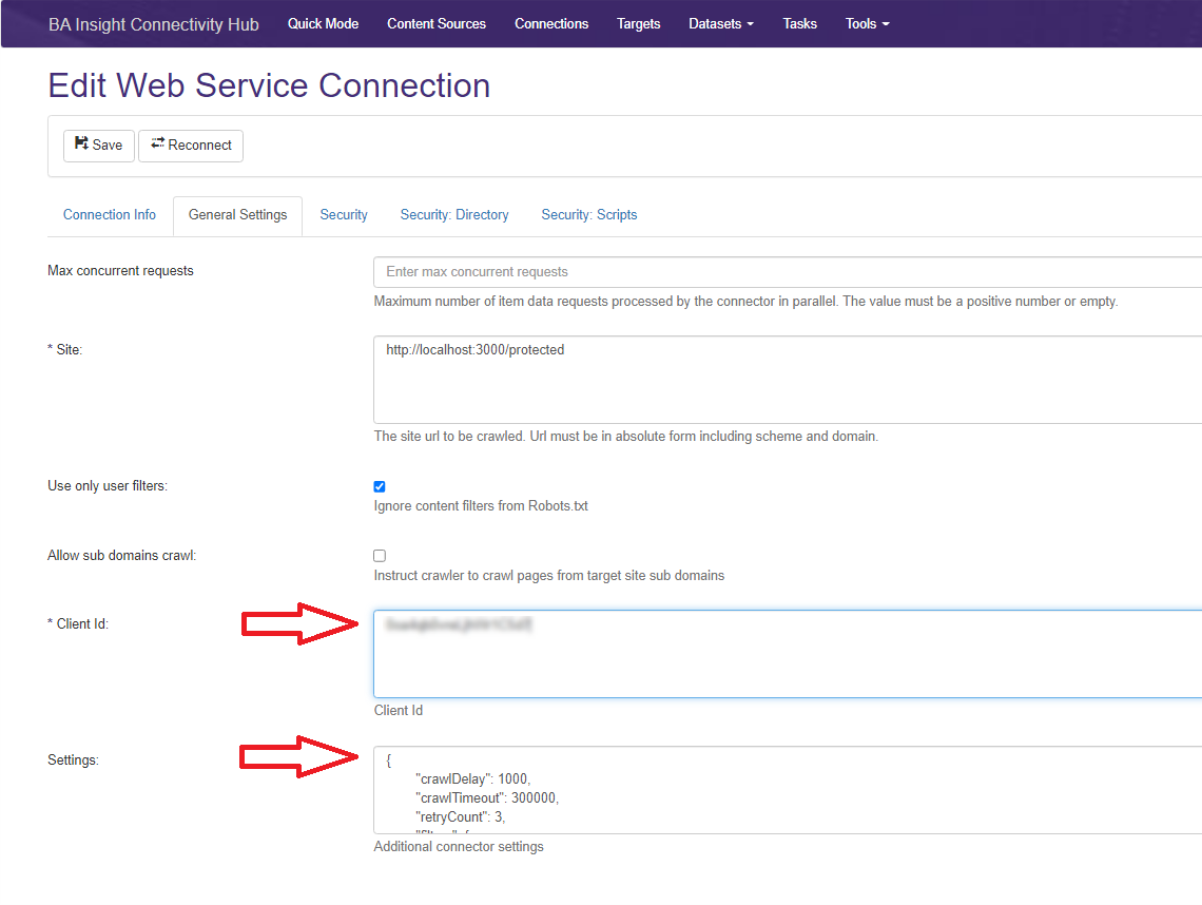
6. Go to the Web Service Connection Connection defines the how Connectivity Hub connects to your Source System (which contains your documents, graphics, etc.,). Your Connection includes identifying elements such as: URL of the BA Insight web service connector you are using, (File Share connector, SharePoint Online connector, etc.), Authentication mode, User Accounts and Credentials, Database information (for database connectors) in Connectivity Hub.
-
Site: Set the URL of the site to crawl
-
Client Id: Set your Client ID
-
Settings: Set the additional connector settings in the Settings field.
-
Example:
{
        "crawlDelay": 100,
        "crawlTimeout": 300000,
        "retryCount": 3,
        "filters": {
            "allow": [
                "/"            ],
            "disallow": [
                "*?utm_source"            ]
        },
        "supportFileExtensions": [
            "pdf"        ],

       "oAuthInitializationPage":"https://localhost:3000/oAuthInitialization?access={AccessToken}&idToken={IdToken}"
}
