ServiceNow Hub
Overview
The integration with ServiceNow is done by installing an app package into your ServiceNow system.
The SmartHub Hub for ServiceNow exposes two types of integration:
- Full search - Where SmartHub Search Center is displayed as a full page in the right-side section of the page (with the sidebar still visible).
- This will be accessible from the Enterprise Search section → SmartHub.
- Local search - Where SmartHub Search Center is displayed as part of a section on the page (with the ability to interact between SmartHub and ServiceNow).
- This will be accessible from the pages where the SmartHub Local Search component is added - see how to add Local Search to other pages in the sections below.
Prerequisites
- SmartHub must be installed and accessible using HTTPS
- This requires a trusted, valid certificate to be configured in the IIS bindings
How to Install the ServiceNow App
- To install the SmartHub ServiceNow App navigate to the SmartHub installation directory under the /integrations/snow/SmartHubApp folder and identify the BA Insight Smart Hub Application.xml file which represents the Service Now application.
- Navigate to your ServiceNow instance Administration → System Update Sets section → Retrieved Update Sets page.
- Click on Import Update Set From XML and choose to upload the Application file you identified in step 1.
- Navigate to System Update Sets section → Update sets to commit page and click on the BA Insight SmartHub update set (the status column displays Loaded).
- Click on Preview Update Set action and after the analysis is complete click on Commit Update Set action that shows up.
- Once the commit is complete you can proceed with configuring the SmartHub integration in your ServiceNow instance.
How to Configure the ServiceNow App
- Navigate to your ServiceNow instance Administration → System Properties section → SmartHub Configuration page.
- After you finish configuring the parameters, click Save and refresh the ServiceNow Admin page.
Options to Configure
| Property Name | Usage | Sample values |
|---|---|---|
| "The address to your results page that should be opened when opening a record that contains the smarthub_iframe formatter." |
|
https://smarthub.contoso.com/integrations/snow/Results.html?ribbon=false&local=true |
| "The address to your landing page that should be opened when opening the full view SmartHub search." |
|
https://smarthub.contoso.com/integrations/snow/Results.html?ribbon=false |
| "Height for the frame that opens with SmartHub page" |
|
400px |
| "Width for the frame that opens with SmartHub page." |
|
100% or 800px |
| "Comma separated list of [object].[field] that should be passed as search to SmartHub when navigating to a page that loads that record" |
|
incident.short_description,sc_request.short_description
|
| "The URL that points to the JS that will be loaded by ServiceNow to process messages coming from SmartHub interaction." |
|
https://smarthub.contoso.com/integrations/snow/modules/actions.custom.js |
How to Add Local Search to Other Pages
The application installs the Local Search component automatically on the Incidents and Requests pages.
You can add the component to more pages by following these steps:
- Navigate to yourservice.service-now.com/$studio.do. Select the SmartHub application.
- Click the Create Application File button (top left corner of the screen).
- Use the filter to find and create a UI Formatter.
- Name: smarthub_iframe
- Formatter: smarthub_iframe.xml
- Table: Select the page table where you would like the formatter to appear. This is found on any page in the Configure → Form design view.
- Name: smarthub_iframe
- Navigate back to yourservice.service-now.com.
- Navigate to a record where you want to show the Local Search integration.
- At the top, click on the menu and choose Configure → Form design.
- In the Form design page select the view you want to edit.
- In the sidebar identify the component called smarthub_iframe, under the Formattersection, and add the component to the page you want the component to be displayed on.
- The component automatically reads the settings you configured when you installed the application.
How to Update the Hub
Once the Hub is installed, it can be quickly updated with a new xml file by following the same installation steps with one minor difference:
- After previewing the new file, the user will be prompted to several errors informing him that identical files have been found in ServiceNow.
- After agreeing to replace all respective files by clicking the Accept remote update button, the user can commit the update set.

How to Modify the Hub
Once the Hub is installed, the user has the option to modify several parts of it through the ServiceNow interface:
- Go to your ServiceNow instance:
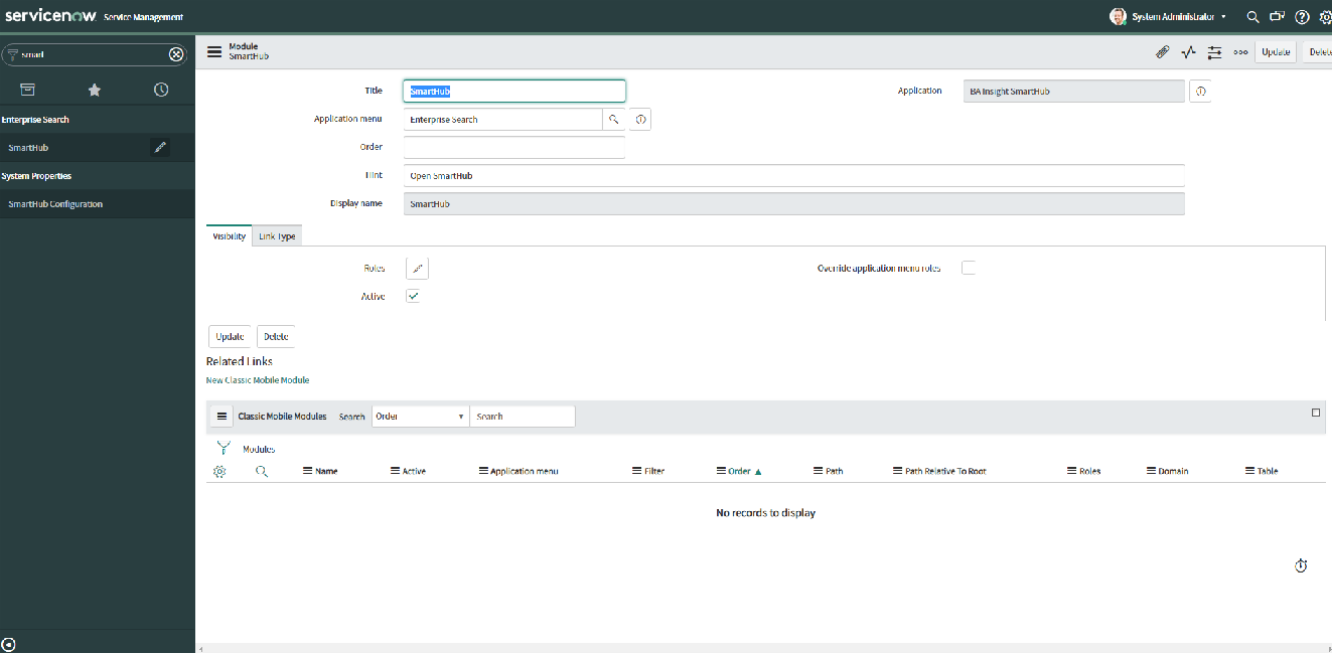
- Go to the Module page (System Definition > Modules)
- Search for the SmartHub module to open and edit it.
- Switch between the available SmartHub tabs to edit and update any information that you require through the Edit Module button.
- Names
- Descriptions
- Titles
- Hints
It is important to note that modifications revert back to their defaults whenever the app is updated.
