Provision Azure Web App
The steps below create the Azure web app.
This only creates the app service in Azure; configuring and uploading the code will occur in a later section.
Note: BA Insight does not provide recommendations on these settings.
These settings are highly dependent on your IT environment policies and use case.
For guidance contact BA Insight Support for more information.
- Login to the Azure Portal: https://portal.azure.com.
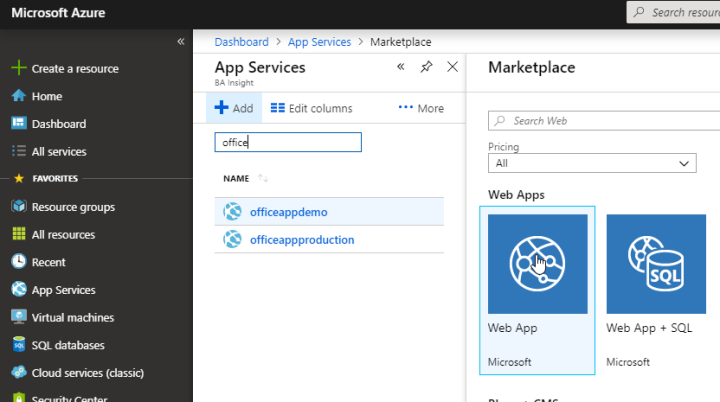
- Under "App Services" click "Add" and choose "Web App".

-
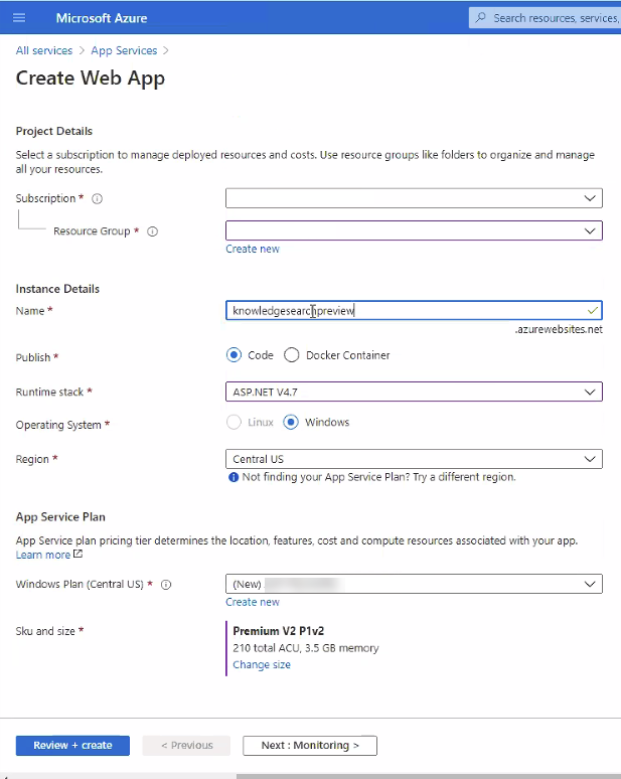
Provide the details needed for the Web App:
BA Insight does not provide recommendations on these settings.
These settings are highly dependent on your IT environment policies and use case.
For guidance contact BA Insight Support for more information.
- Subscription: Select per your Azure strategy/policy.
- Resource Group: Select per your Azure strategy/policy.
- Name: Provide a name for your app.
- Publish: "Code"
- Runetime stack: Select "ASP.NET V4.7"
- Operating System: "Windows"
- Region: Select your region.
- App Service plan: Select per your Azure strategy / policy.

- Once the Web App is created, view the "Overview" for the new web app.
- Record the URL for later use.
- Download the publish profile for later use.
