Configure Certificate Authentication
Register and Configure the Azure Application
- Go to https://portal.azure.com/ and login with Azure Global Admin user credentials.
- Click Azure Active Directory. Go to the desired directory.
- From the menu select App Registrations.
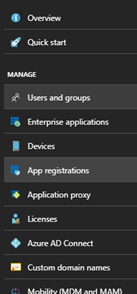
- New application registration: Click to register a new app.

- Name: Enter a name for your app.
- Application type: Ensure Web app/API is selected.
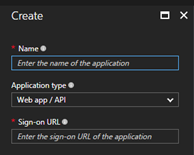
- Sign-on URL: Enter a URL of your choosing.
- (The URL is not used in the SharePoint Online Authorization mechanism, but is a required field for app registration).
- (The URL is not used in the SharePoint Online Authorization mechanism, but is a required field for app registration).
- Within the app, go to Settings.
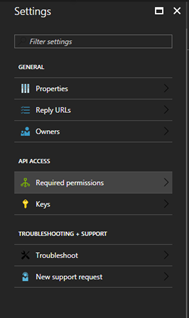
- Select API ACCESS >Required permissions.
- Click Add > Selectan API.
- SelectOffice 365 SharePoint Online.
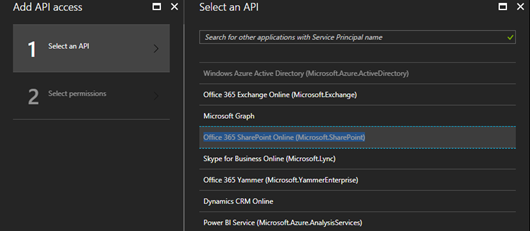
- Select Enable Access > APPLICATION PERMISSIONS:
- Click Read items in all site collections.
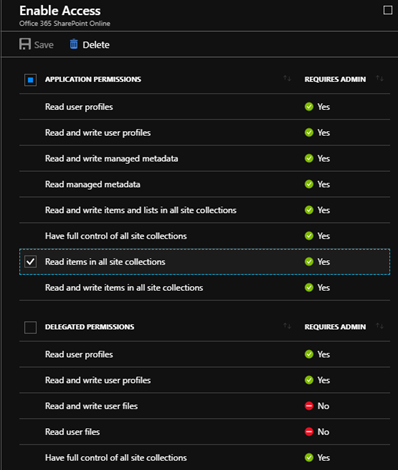
- Click Read items in all site collections.
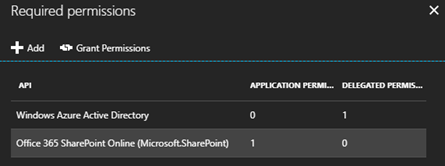
- Required Permissions > Grant Permissions: Click to grant the selected permissions.
Add the Certificate Information to the Azure App Registration
- Open the Azure app registration you created in the previous steps.
- Go to Certificates and secrets.
- Add your certificate.

Install the PFX Certificate on the Server where Smart Previews is Installed
- Run the Microsoft Management Console (MMC) as an Administrator.
- Add the Certificates Snap-in.
- Expand the tree to the Trusted Root Certification Authority.
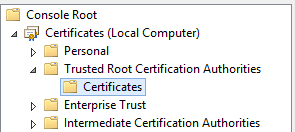
- Use the Actions menu to import your PFX certificate.
Important: The user account running the Smart Previews application pool, must have read access to the Trusted Root Certificate store on the local machine.
This user account cannot be Network Service.
Determine the Certificate Distinguished Name
- Run Microsoft Management Console (MMC) as an Administrator.
- Add the Certificates Snap-in.
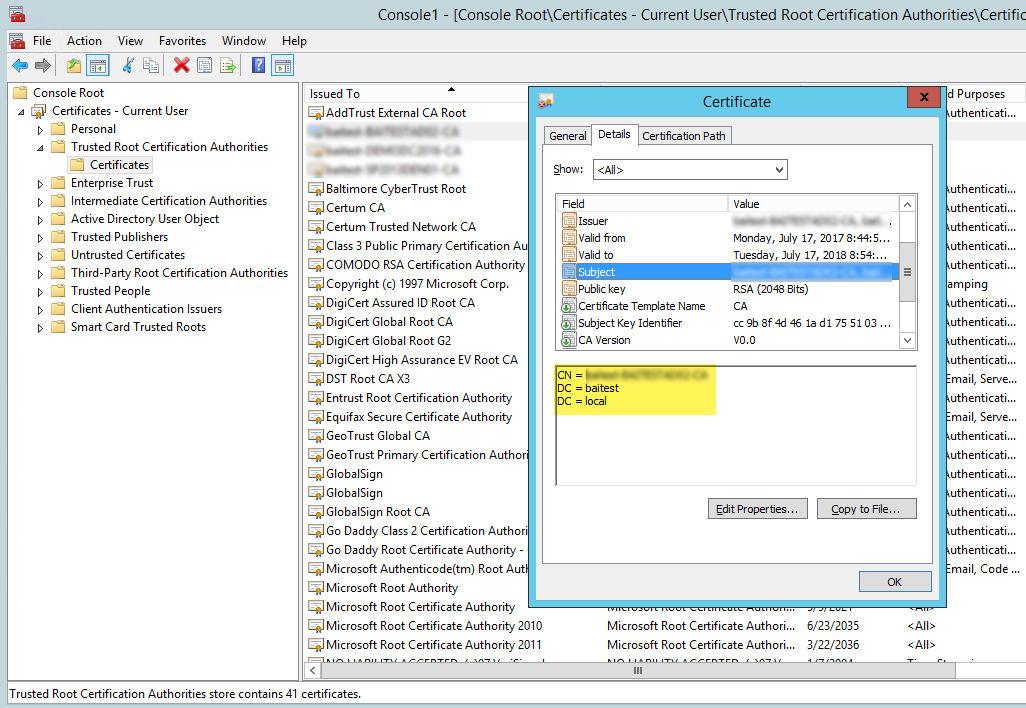
- Locate the certificate in the Trusted Root Certification Authority and double-click on the certificate name.
- From the pop-up window that appears, select Details.
- Locate and click on Subject.
- Identify in the text box below all the distinguished name components.
- Build the distinguished name based on all the components using the following rules:
- Remove spaces around equal sign ('=') in every component
- If a component value (which goes after the equal sign) contains special characters (like comma, for instance), put the value in double quotes ('"')
- Join all the components into single string, separated by comma (',') followed by space (' ') character.
Example: this set of componentsCN = contoso.comshould be transformed to the following string:
OU = Contoso, Inc
C = USCN=contoso.com, OU="Contoso, Inc", C=US
