Add the AutoClassifier On-Premise App to Your Catalog
Note: If the security model chosen from the Prerequisites is not the High Trust Model this section can be skipped.
If your targeted Site Collection does not have an App Catalog, follow steps 1 through 5 below, otherwise skip to step 6.
If you already have an App Catalog or are creating a new App Catalog, you must grant permissions to users before they can see any app added to the catalog.
- The user must also have permission to add the application.
- If you want the Site Collection Administrator to add the app, ensure you grant READ permissions to that user.
- If other users are to be allowed to add the app to the site collection, you must also specifically grant permissions to those users.
SharePoint Farm Administrator is not allowed to deploy Apps
Administrator can add to the App Catalog but can not add to a Site Collection.
On initial deployment the App adds event receivers and initiates a synchronization between SharePoint and AutoClassifier.
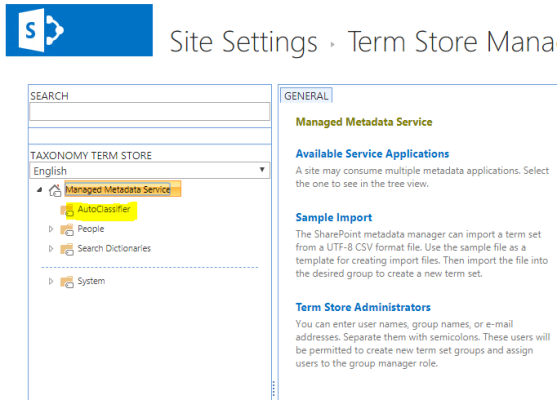
- As part of this process the user will require management permissions to the Managed Metadata Default keyword term store.
- If you want to avoid granting management permissions to the Managed Metadata store you can manually create an "AutoClassifier Group."
- This is the location new TermSets are created in when using the AutoClassifier management site.
- Log-in to Central Administration.
- Use the left side navigation, and click Apps.
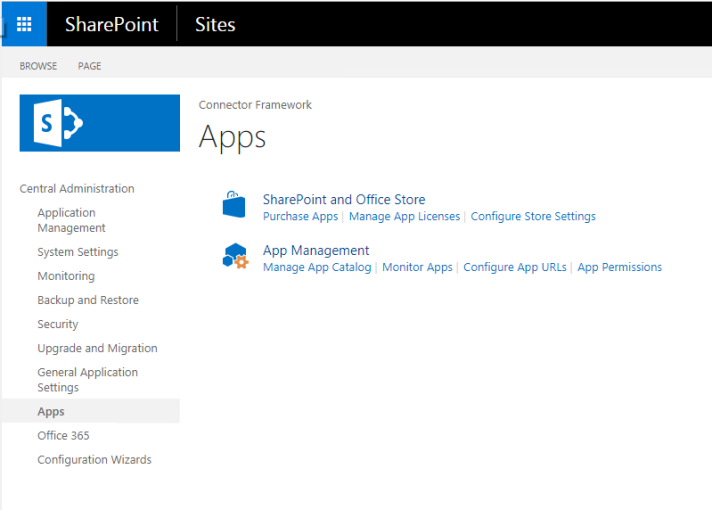
- Under Application Management, click Manage App Catalog.
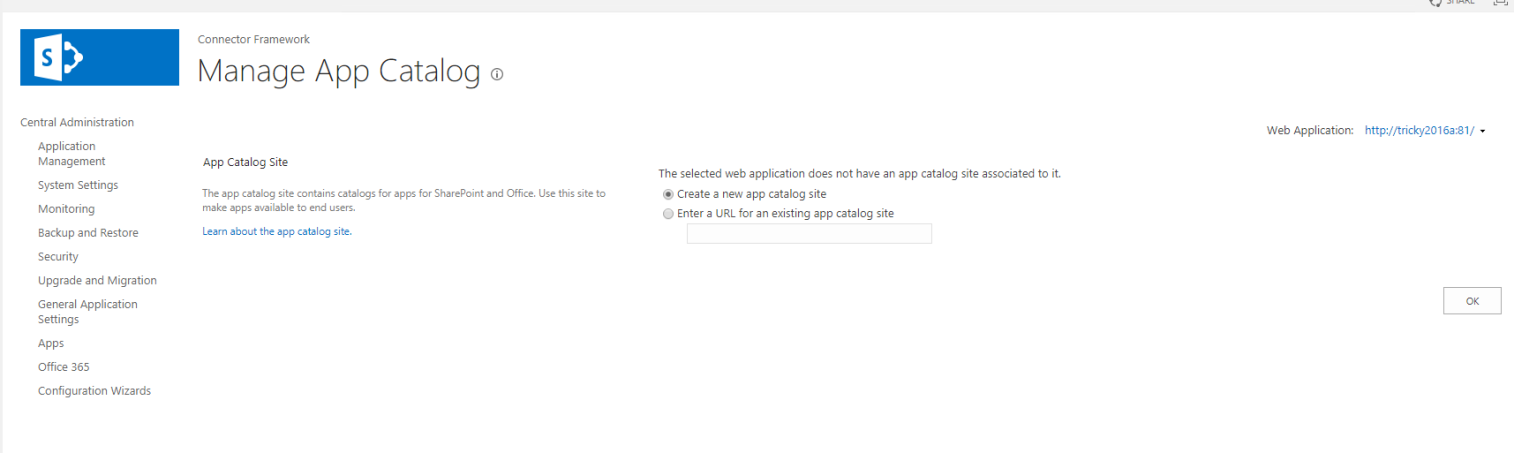
- Select the web application.
- If the web application does not have an App Catalog, create a new App Catalog or link to an existing App Catalog site.
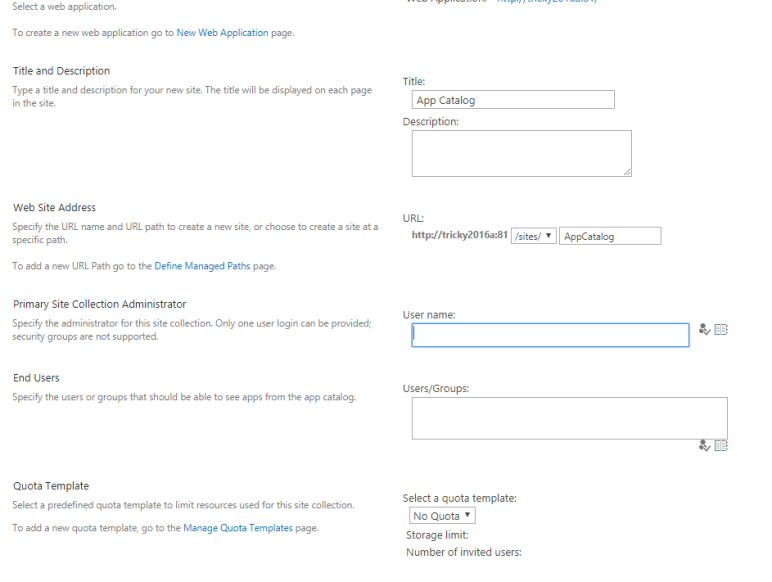
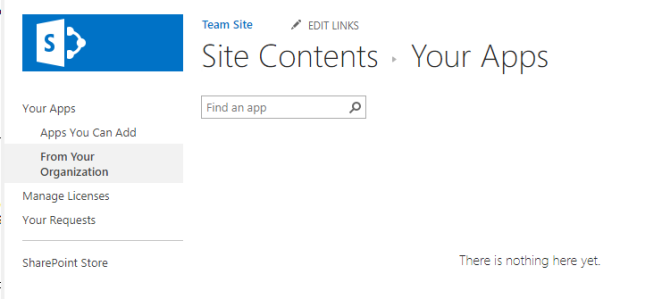
- Navigate to your Site Collection App Catalog
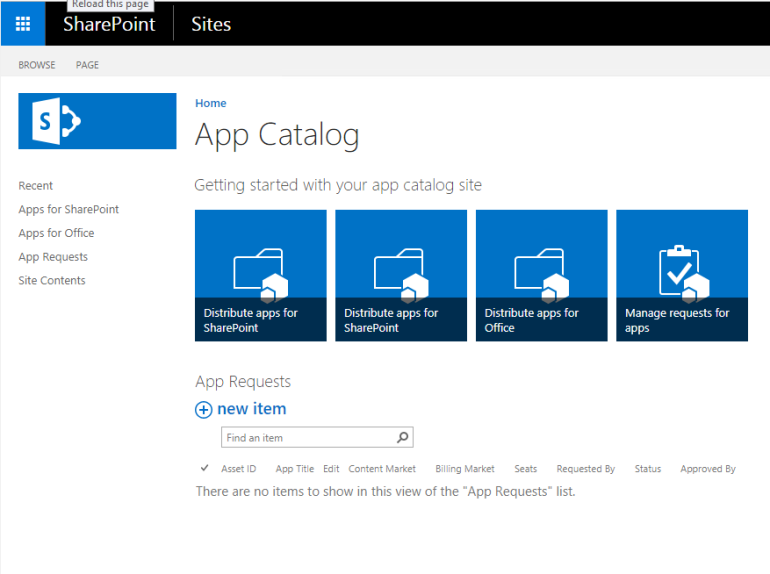
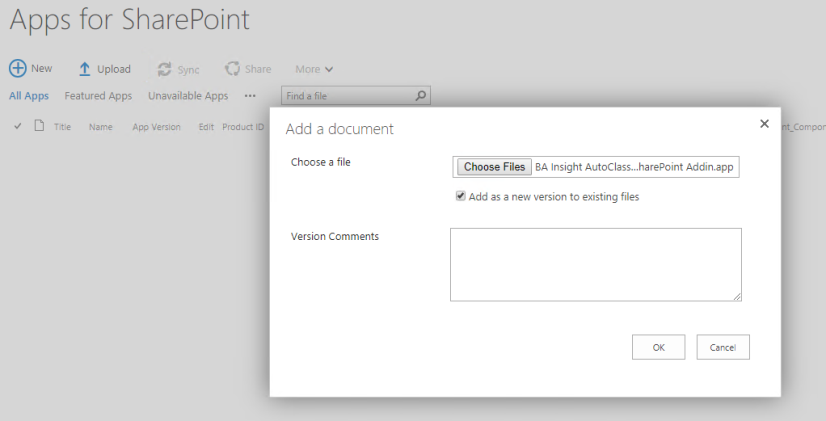
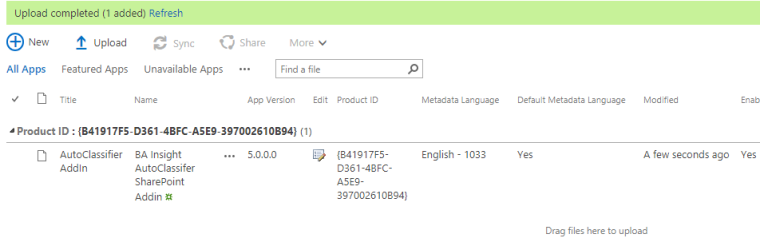
- Click "Apps for SharePoint."
- Upload your repackaged App.
- From your Site Collection Settings click "Add an App."
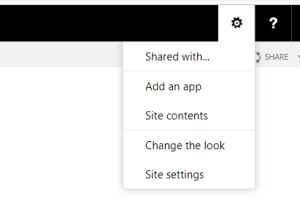
- Select "From your Organization."

If you don't see your App on your Site Collection it maybe a Language Issue with your App Catalog
Use the following TechNet article to resolve this:
- Add the App:
Troubleshooting
Many installation issues can be resolved by clicking "App Details" after failure, and reviewing installation errors.
Other issues can involve correcting invalid information.
Invalid Domain or Redirect Url Configuration
If the need arises and the App requires updating, you can update the currently registered app to correct/change the following:
- Title
- App Domain
- Redirect URL
- Open a web browser and enter a URL in the format:
<site collection url>/_layouts/15/AppInv.aspx - Enter the client ID and click Lookup.
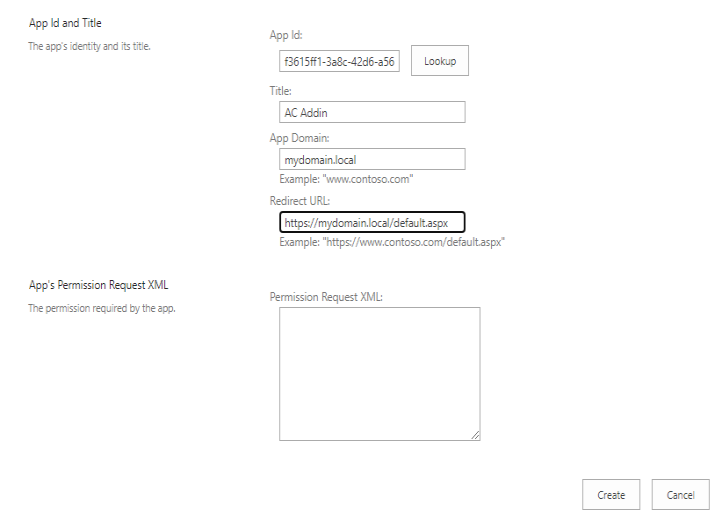
3. Make the appropriate changes and click Create.
Invalid IFrame Redirect
IFrame rendering can lead to Framesniffing.
- "Framesniffing" is an attack technique that takes advantage of browser functionality to steal data from a website.
- Web applications that allow their content to be hosted in a cross-domain IFRAME may be vulnerable to this attack.
- To mitigate such an attack, values within the page AppInv.aspx (which is part of the installation process) are specific:
- Microsoft has set the value of "X-Frame-Options" toSAMEORIGIN.
- If the AppInv.aspx page is set to DENY, problems can occur.
- This isn't always the case, as cumulative updates have been released to correct this issue.
How to Identify
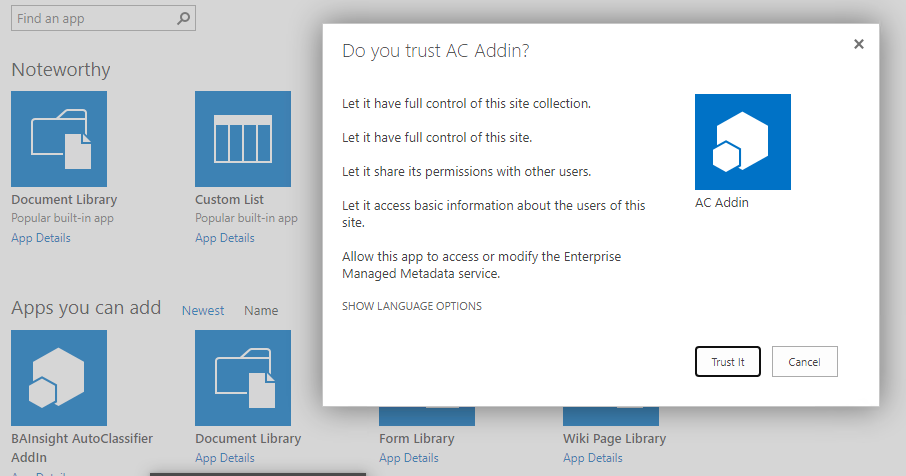
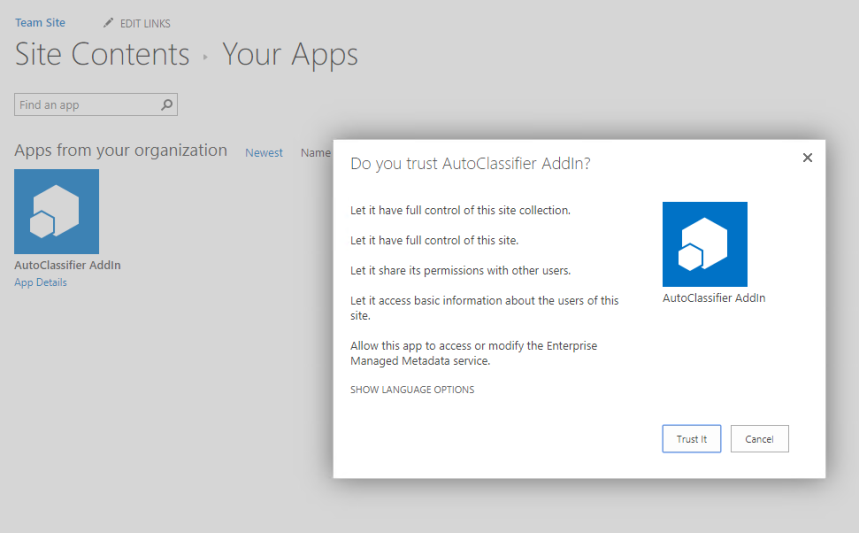
- When adding the AutoClassifier app you may be presented with a dialog similar to the one shown below:
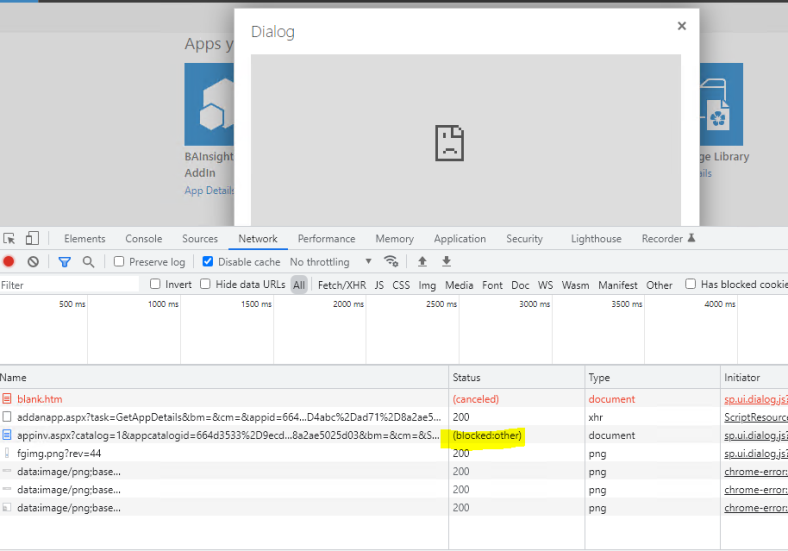
- If you are using the Chrome web browser, press the F12 key and add the app again.
- The console shows exceptions regarding X-Frame-options which will ultimately be DENIED.
- The console shows exceptions regarding X-Frame-options which will ultimately be DENIED.
Note: The addanapp.aspx page succeeded successfully, but the appinv.aspx page which renders in an iFrame, has been blocked.
- To correct this, use the instructions found in the Microsoft Support topic here: https://support.microsoft.com/en-us/topic/appinv-aspx-page-can-t-be-added-to-iframe-kb5005546-5c944028-f072-43f5-8f12-c03ba501acec
Either find the correct service pack, or use PowerShell commands to enable the appinv.aspx page to render in an IFrame.$f=get-spfarm$f.AddGenericAllowedListValue("AllowIframeAppAuthorizePageDomains","https://*.domain.local")$f.update()
Note: if running the Site on a port other than 80 the wildcard will not work w/o the port$f=get-spfarm$f.AddGenericAllowedListValue("AllowIframeAppAuthorizePageDomains","http://server.domain.local:81")$f.update()Other Useful Powershell Functions
$f=get-spfarm
View Allowed domains.
$g = $f.GetGenericAllowedListValues("AllowIframeAppAuthorizePageDomains")
$g
Remove Allowed domains
$f=get-spfarm
$f.RemoveGenericAllowedListValue("AllowIframeAppAuthorizePageDomains","http://*.domain.local")
$f.update() - Re-install the App.