How to Uninstall Connectivity Hub
Use the following procedure to uninstall Connectivity Hub from your local machine.
- Navigate to the Control Panel.
- Select Programs and Features.
- Right-click on the BA Insight Connectivity Hub entry and select Uninstall from the pop-up menu that appears.
- Accept the warning to complete the uninstall process.
How to Uninstall SmartHub and Related Components
To avoid losing any customizations, back up any SmartHub directories that contain customized files such as CustomerCustomization, Templates, Certificates, etc.
Indices/Reports
When you uninstall SmartHub, the Elasticsearch indices and Kibana reports remain intact.
How to Uninstall SmartHub
- Back up any SmartHub directories that contain customized files.
- Delete the SmartHub folder.
- If you intend to keep your current SmartHub directory and overwrite the existing SmartHub files with the v6 SmartHub files later, do the following:
- Open your currently active SmartHub directory
- Delete the files within it.
- Later, when you extract your new SmartHub files into your current directory, rename the directory or create a marker or note to indicate which version of SmartHub you have installed.
- If you intend to keep your current SmartHub directory and overwrite the existing SmartHub files with the v6 SmartHub files later, do the following:
- Delete the SmartHub website from IIS.
- Delete the app from the Application Pools.
How to Uninstall AutoClassifier
To remove the BA Insight AutoClassifier application, use the following procedure.
Procedure:
-
On the Windows machine where AutoClassifier is installed:
- Open the Add or Remove Programs dialogue from the Control panel or Windows start menu.
- Select BA Insight AutoClassifier from the list of applications
- Click the Uninstall button.
- Removal complete.
- Optional: Use the "Everything" search tool or similar to ensure that after uninstalling AutoClassifier that no DLL files related to AutoClassifier remain on your computer.
How to Uninstall Smart Previews
Uninstall Smart Previews Hybrid
- Navigate to Control Panel > Programs > Uninstall a program.
- Right-click the entry BA Insight Smart Previews Hybrid and select Uninstall.
Uninstall Smart Previews Web Resources
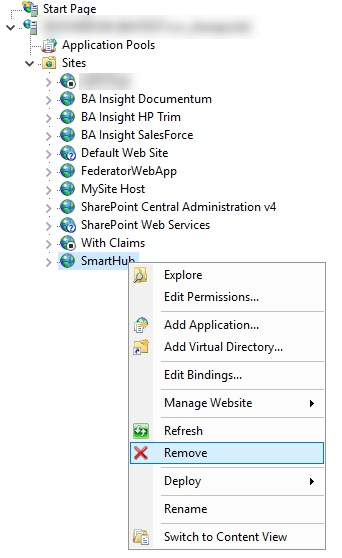
- Navigate to the IIS Manager:
- Expand Sites, and delete the
Smart Previews Web Resourcessite.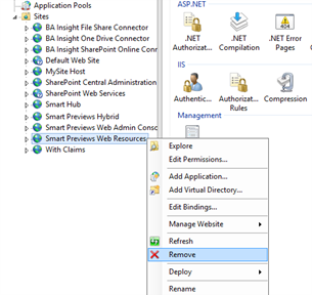
- Expand Sites, and delete the
- Select Application Pools.
- Remove the
Smart Previews Web Resourcesapplication pool.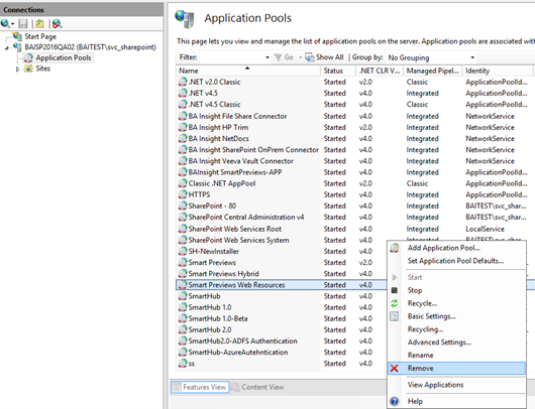
Uninstall the Smart Previews Import Server
- On the server where Smart Previews is installed, stop all the crawl operations.
- To perform this operation, go to Central Administration > Application Management > Manage service applications > Search Service Application.
- Click Content Sources.
- Right-click on each content source and stop all crawl operations.
- Navigate to the Services page on your server. Stop the following Smart Previews Services:
- Smart Previews Indexing Monitoring Service
- Smart Previews Preview Generation Service
- If Previews were generated with the SharePoint 2013/2016 perform this step, otherwise skip this step:
- On the server where the Enrichment Components are installed, run the SharePoint Management Shell as an administrator.
Remove the components from the search service application (SSA) by running the following command line:
Remove-SPEnterpriseSearchContentEnrichmentConfiguration -SearchApplication $your_default_SSA_nameEnter the SSA that is used by Smart Previews in a variable or inside quotes ("").
- Make sure that the enrichment components have been uninstalled by running the following command:
Get-SPEnterpriseSearchContentEnrichmentConfiguration -SearchApplication $your_default_SSA_name- If the enrichment components have successfully uninstalled, you will see the following warning message:
Object ContentEnrichmentConfiguration not found.
- If the enrichment components have successfully uninstalled, you will see the following warning message:
- Navigate to Control Panel > Programs, and click the Uninstall a program link.
- Select the Smart Previews Import Server and click Uninstall.
- After you perform this operation, you are no longer able to access the Web Admin console, and you cannot see the Import Server if you go to C:/Program Files(x86)/BA Insight.
Uninstall Fast Proxy and CEWS Services
Uninstall Fast Proxy Service
- Navigate to the Services page on your server. Stop the Smart Previews Fast Proxy Service.
- Navigate to the Previews Components folder.
- Open the FAST Proxy folder.
- Right-click the unregisterproxy.bat file and select "Run as administrator."
- This operation removes the Fast Proxy service from the system and this folder no longer appears in the list of Windows Services.
Uninstall CEWS Service
- Navigate to the Services page on your server. Stop the Smart Previews CEWS Service.
- Navigate to the Previews Components folder.
- Open the Previews CEWS folder.
- Right-click the unregistercews.bat file and select "Run as administrator."
- This operation removes the CEWS service from the system and this folder no longer appears in the lists of Windows Services.
Delete the Databases
-
Open Microsoft SQL Server Management Studio and manually remove the Previews databases by running the script below.
-
This operation is not automatically performed by the Smart Previews Import Server uninstall operation.
Important!
Replace the name of the databases from the script with the ones you had chosen when you installed Smart Previews.
DROP DATABASE Longitude_PreviewCacheDROP DATABASE Longitude_ConfigurationDROP DATABASE Longitude_UserProfile
-
Possible errors: If the error "Cannot drop database because it is currently in use," appears, run the following script for each of the databases:
USE master;
GO
ALTER DATABASE DatabaseName
SET SINGLE_USER
WITH ROLLBACK IMMEDIATE;
GO
DROP DATABASE DatabaseName;
Delete Smart Previews File Directories
Delete all the file directories that are associated with the Smart Previews components configuration.
These file directories are usually found in:
- C:/
- C:/BA Insight
- C:/Program Files/BA Insight
- C:/Program Files (x86)/BA Insight
- Any path that you choose to use at installation time
Remove the Smart Previews Component from SmartHub
In order to remove Smart Previews from SmartHub you must remove the Smart Previews component from all of your SmartHub Search Center pages.
Remove the Smart Previews Component from Your Search Center Page
Navigate to the directory where you have installed SmartHub and edit the Results.html page to remove the Smart Preview component:
- Find the <body> element of the HTML.
- Remove the first child using this format:
<div>
class=”CoveoSmartPreviews” data-extension-property="FileExtension"
data-supported-extensions="rtf,doc,docx,docm,dot,dotm,dotx,ppt,pptx,pptm,pps,ppsm,pdf,xls,xlsx,xlsm,xlsb,xltm,xltx,xlam,txt,odt,url,csv,zip,eml,msg,exch,gif,jpg,bmp,png,tiff,dib,jpeg,rle,wmf,ico,wpd,odg" data-smart-previews-address=”https://smartpreviewswebresourcesurl” data-open-search-panel-by-default="false" data-keep-stopwords="false" data-show-descriptive-text="false" >
</div>-
Use the following information to remove Smart Previews from your Results page.
Remove the Trust between Smart Hub and Smart Previews.
- To open the SmartHub Administration panel, launch a web browser and enter your SmartHub Admin console address in the format: https://[SmartHubAddress]/_ADMIN
- Click the link Security Settings.
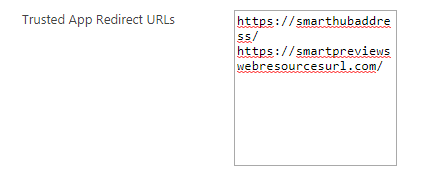
- Trusted App Redirect URLs: Remove the Smart Previews Web Resources address.
Delete the Certificate
You must remove the certificate that you created during the installation process.
This is the self-signed certificate that is used to validate or secure the requests coming from the Smart Previews Web Resources website to SmartHub website.
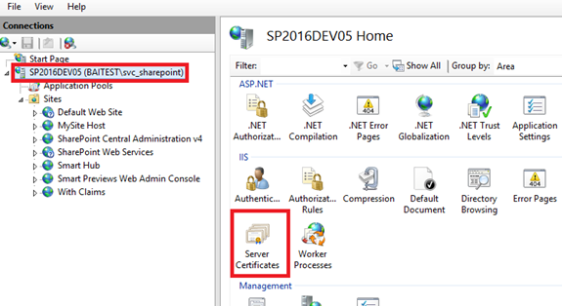
- Navigate to IIS Management. On the left side, select the server name level and double-click on the Server Certificates icon.
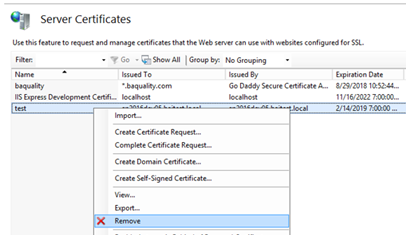
- Search for your certificate in the center section, right-click on your certificate, and click Remove from the sub-menu that opens.
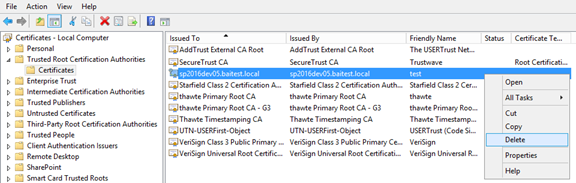
- Go to Manage computer certificates >Trusted Root Certification Authorities folder >Certificatesand locate for your certificate.
- Right-click on your certificate and click Delete from the sub-menu that opens.