Configure User Profile and Picture Providers
-
How to Configure Sources Systems for User Profile and Picture Providers
-
How to Configure User Provider Properties for SharePoint 2013/2016/19 and SharePoint Online
About User Profile and Picture Providers
-
The User Profile and User Picture are used in the following modules:
-
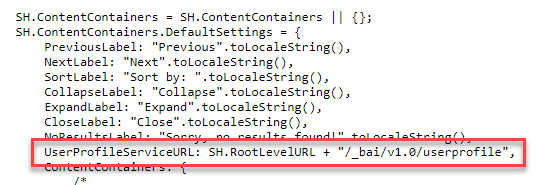
The User Provider settings are accessed from the UI Editor, "Advanced Settings edit," link: See Default Settings.
Provider Settings
Content Containers
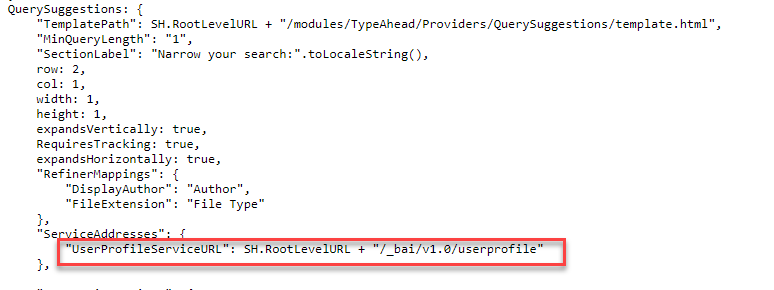
Type-Ahead
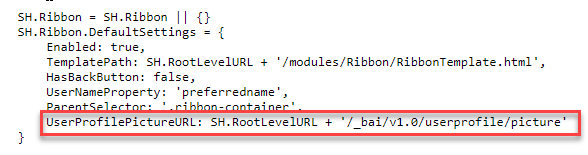
Ribbon
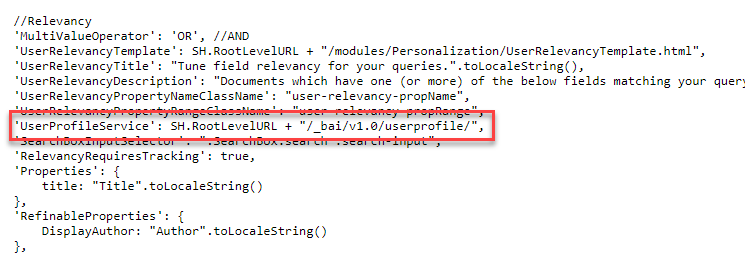
User Preferences
How to Configure Sources Systems for User Profile and Picture Providers
Note: The User Profile and User Picture provider settings are very similar, but they offer different options.
You can use different source systems for both:
- User Profile Providers (Impersonate option available)
- User Picture Providers
User Profile Provider
To configure your user profile provider use the following steps:
- Go to the SmartHub admin page at https://<SmartHubweb-app-url>/_admin
- Select User Profile Settings from the left side menu.
- Select User Profile Providers > Configure.
- The Provider properties dialogue appears.
- Provider Type: Select the Provider type from the drop-down menu.
-
- Microsoft O365
- SharePoint OnPremise
- Local Active Directory
Note: At this time, SmartHub supports only one User Profile.
How to Configure Provider Properties for Microsoft O365
Microsoft O365: Profile Provider Properties
The Microsoft O365 provider can retrieve user profile properties from SharePoint Online, Microsoft Graph, or both, depending on your configuration. Note the following:
-
If you fill in the SharePoint Online settings, the provider will pull properties from SharePoint Online.
-
If you fill in the Microsoft Graph settings, it will retrieve properties from Microsoft Graph.
-
If both are configured and a property exists in both sources but has different values, the SharePoint Online value takes precedence.
Procedure:
- In the SmartHub administration portal, Click User Profile Providers.
- Click Configure.
- In the newly opened he User Provider properties dialog, provide the following information:
- Provider type: Select Microsoft O365 from the drop-down menu.
User Profile Cache Expiration (minutes): Specify the amount of time, in minutes, to cache your user properties.
Expand the SharePoint Online settings and complete the following:
- Site Collection URL:: Specify your SharePoint site collection URL.
If Impersonate is not selected, enter the following:
Username: Specify a user who has the required permissions to retrieve the necessary user properties.
Password: Specify the user password.
Account Name Claim Prefix: Specify the prefix that is used in claims-based authentication to identify the type and source of the user's account name. For example, i:0#.w| is a common prefix for claims from a Windows Active Directory account, indicating a claims-based user under a specific identity provider. Other prefixes, such as c:0o.c|federateddirectoryclaimprovider| or i:0#.f|membership|, are used for different scenarios, such as group memberships or Office 365 users. For more information, see Claims-based identity in SharePoint in the Microsoft documentation.
Multi value delimiter: Specify the character that is used to delimit multi-value properties.
Expand the Microsoft Graph Settings and complete the following:
Directory (tenant) ID: Specify your Azure tenancy ID.
Application (client) ID: Enter the Application ID as shown in the Azure Portal App Registration page for your application.
Application (client) secret: Enter the client secret key of your Azure Application.
User properties to request from the MS Graph: Enter a comma separated list of the user properties that will be retrieved from Microsoft Graph.
Microsoft O365: User Picture Provider Properties
Note: This dialogue does NOT provide an Impersonate option.
Procedure:
- From the Administration menu select User Picture Providers > Configure.
- The User Provider Properties dialogue appears. There is NO Impersonate option in this dialogue.
-
Application (client) ID: The "Application ID" as shown in the Azure Portal App Registration page for your application.
-
Directory (tenant) ID: Specify your Azure tenancy Id
-
Application (client) secret: Enter a client secret
How to Specify the Required Permissions in Azure
Procedure:
- Log in to your Azure portal as an administrator: http://portal.azure.com.
- Go to Azure Active Directory > App registrations.
- If you previously registered an app to talk to SharePoint Online, find that app.
- If there is no such app, click New registration to register the new app.

- If there is no such app, click New registration to register the new app.
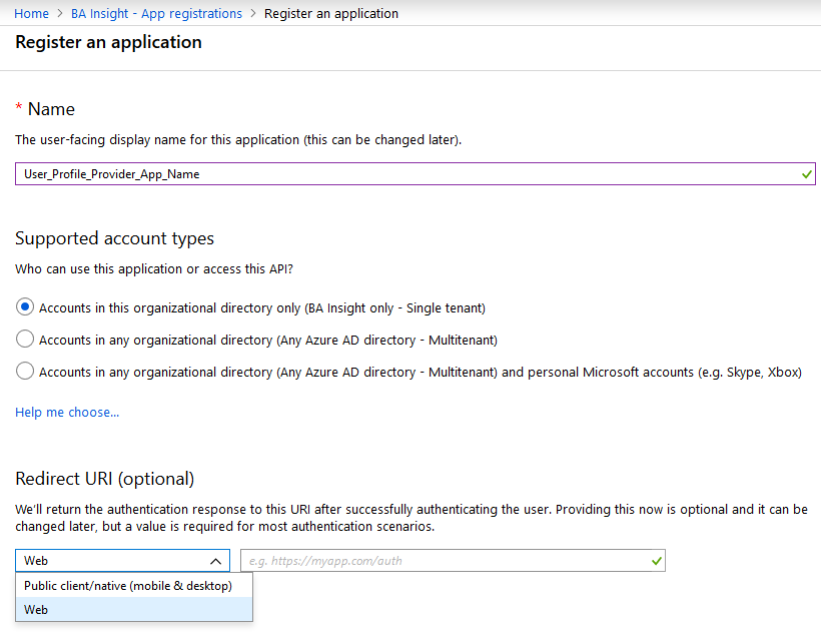
- Enter the App information:
- Name: Enter the SmartHub user profile provider app.
- Supported account types: Determines who can use the application or use the API.
- Redirect URI: Enter your SmartHub URL such as https://search.company.com.
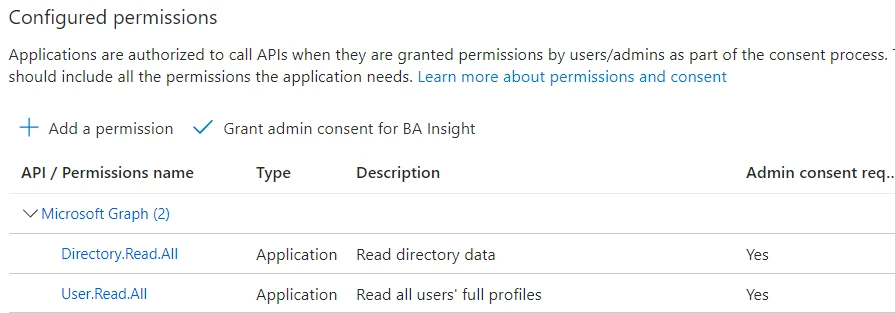
- Click Your app > API permissions > Add a permission > Select an API/Microsoft APIs > Microsoft Graph.
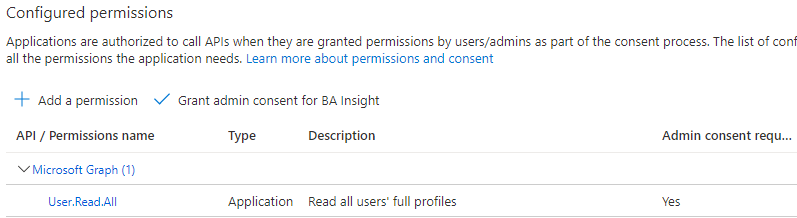
- Select the following Application permissions (your user interface may vary):
- User.Read.All: Read all users' full profiles
- User.Read.All: Read all users' full profiles
- Click Add permissions.
- You return to the App > API permissions page. Unless you are a tenant administrator, you will see a caution message at the top of the page stating that Administrator consent must be given before some or all API permissions are activated.
- API permissions without granted consent state this under the STATUS heading in the table in the center of the page.
- API permissions without granted consent state this under the STATUS heading in the table in the center of the page.
- Click the Grant Admin consent for[Organization Name] button under the Grant consent heading on the same page.
How to Configure User Provider Properties for SharePoint 2013/2016/19 and SharePoint Online
SharePoint 2016/19/SPSE: User Profile Provider Properties
- Url:
- Enter the URL of the SharePoint 2013/2016/19/SPSE site that will be used for querying.
- Username:
- Enter the user name for the account that should be used during search.
- Leave this empty if you plan to impersonate the logged in user from SmartHub.
- Password:
- Enter the password for the account.
- Impersonate:
- Click to execute search as the user logged into SmartHub.
- These results are security trimmed for each logged in user.
- Audience Url:
- Specify the internal website URL of the SharePoint 2013/2016/19 site that will be used for querying.
- Registered Issuer Name:
- Specify the
Registered Issuer Name of the Security Token Issuercreated for the High Trust App.
- Specify the
- App Client ID:
- Specify the
Client IDof the High Trust App registered in SharePoint.
- Specify the
- Tenant Authentication Realm:
- Specify the
Authentication Realm GUIDof the 2013/2016/19/SPSE SharePoint farm.
- Specify the
- Certificate path:
- Specify the relative path
- The path must start with a tilde followed by a forward slash characters (~/), to the location where the certificate (
.pfx) is stored
- Certificate pass:
- Specify the password for the certificate.
- NameID Claim name:
- Specify the name of the claim that contains the SID of the user.
- This is required to impersonate the current user during searches.
- NameID Provider (optional):
- Enter the type of the
NameIDclaim value.
- Enter the type of the
- Account Name Claim Prefix:
- Identify claims encoded with the default value.
- Multi value delimiter:
- Specify a character that will be used to delimit multi-value properties.
- Specify a character that will be used to delimit multi-value properties.
Note: When you are using Azure Active Directory for authentication the value is onprem_sid.
SharePoint 2016/19: User Picture Provider Properties
- User Profile Cache Expiration (minutes):
- Enter the number of caching minutes here.
- Username:
- Enter the name of the user who has the permissions that are required to retrieve the necessary user properties.
- Password:
- Enter the user password.
- Enter the user password.
How to Configure User Profile and Picture Provider Properties for Active Directory
Active Directory: User Profile Provider Properties
- User Profile Cache Expiration (minutes):
- Enter the number of caching minutes here.
- LDAP Configuration URL:
- Enter your LDAP URL.
- For example,
ldap://DC=contoso, DC=com
- LDAP User:
- Enter the name of the user who has the permissions that are required to retrieve the necessary user properties.
- LDAP Password:
- Enter the user password.
Active Directory: User Picture Provider Properties
Use the same properties as above, in addition:
- Photo Property in AD:
- The photo property as defined in Active Directory.
For more information see SharePoint 2010/2013: Claims Encoding.
How to Configure User Provider and Provider Properties for Azure Active Directory
Azure Active Directory: User Picture Provider Properties
Credentials used to access the Azure Active Directory and retrieve user photos
- User Profile Cache Expiration (minutes):
- Enter the number of caching minutes here.
- Azure app ID:
- Enter the ID of your Azure app
- Azure tenant:
- Enter the name of the tenant.
- Azure secret key:
- Enter the secret key defined in Azure.
The minimum permissions needed for fetching the user picture are as follows:
- Select Application permissions - User.Read.All: Read all users' full profiles
User Picture Provider General Settings
You can use different source systems for User Profile Providers and User Picture Providers.
To configure your user profile provider, use the following steps:
- Go to the Federator admin UI and click User Picture Settings > Configure.
- The User PictureConfiguration page appears.
- Application (client) ID: This is the Azure AD "Application ID" as shown in the Azure Portal App Registration page for your application.
- Directory (tenant) ID: Specify your Azure tenancy ID.
- Application (client) secret: Enter the client secret key.
UserPicturePlaceHolder in the web.config file.