You can create a priority matrix to assign promotions to groups based on eligibility and suitability, ensuring a customer receives the most appropriate deals when multiple offers are available.
Within the priority matrix window you can also:
-
Use the totals tab to display the maximum number of records available when combining the criteria and segment.
-
Use the segments tab to view a breakdown of records by priority.
-
Drag out the records within a segment to view the records in more detail.
-
Schedule the build of your matrix.
Creating a priority matrix
-
Open the create window (+ icon in main menu).
-
Under the Analysis category, select New Priority Matrix.
-
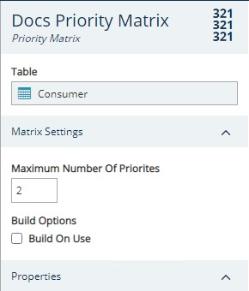
In the properties pane, set the table level.
-
Set the maximum number of priorities, i.e. number of offers available.
-
If you want the matrix to be built prior to running, ensuring the latest available data is used each time, select the Build on Use checkbox.
Alternatively, set a schedule to build your priority matrix.
-
Within the editor tab, you can add two types of query:
-
Add Segment creates columns (customer groups) within the table.
-
Add Criteria creates rows (promotions) within the table.
-
-
Rename your customer groups and promotions by double-clicking the query and typing into the text box.

-
Assign a priority (default is 0) according to the relevance of the promotion to the customer group.
Example: For a matrix with a maximum of 4 priorities where offer A is highly relevant to Group A, moderately relevant to Group B, and not relevant to Group C, priorities could be assigned as follows:
-
Group A = priority 1.
-
Group B = priority 2.
-
Group C = priority 4.

-
-
Assign customers/promotions to queries by opening the criteria window (click the orange icon at the left-hand side of the query bubble) and entering a definition for the query.
Example: Create a group for customers working in marketing or retail by:
-
Opening the criteria window.
-
Entering an expression that selects individuals in the database with either marketing or retail on the occupation field.

-
-
Open the hamburger menu in the top right corner of the pane and save the priority matrix.
-
Open the hamburger menu again and click build to construct the priority matrix.
-
Once built, you can use the priority matrix within creatives to dynamically map and assign offers.
Scheduling a priority matrix
-
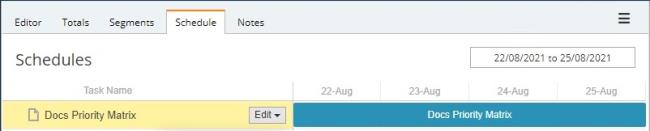
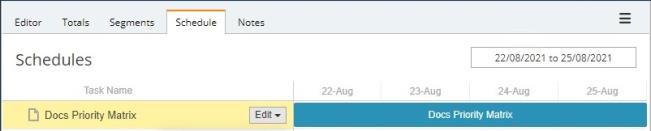
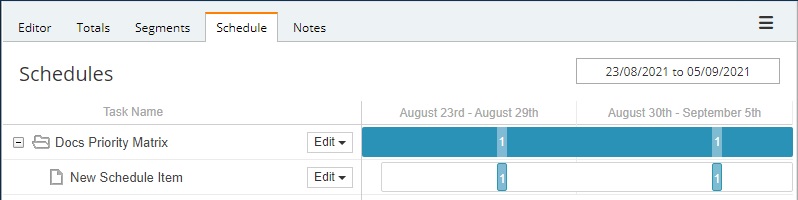
Open your priority matrix and select the Schedule tab. Your matrix will appear under the Task Name column.
-
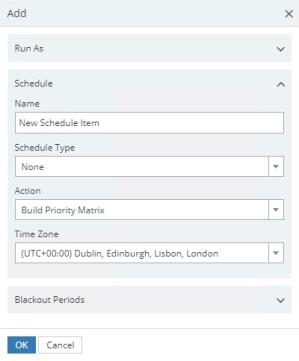
Open the Edit dropdown and select Add Schedule Item to open the schedule settings window.
-
Set the schedule to run as either a service account or a specific user.
-
Give the schedule a name and select a schedule type e.g. hourly, daily, monthly.
-
Use the blackout periods field to add times you do not want the schedule to run, e.g. don't build on Sundays because of scheduled maintenance.
-
Click OK to save your schedule. The schedule will appear beneath the priority matrix under the Task Name column. If you cannot see the schedule entries, adjust the dates on the schedule tab to cover a wider period.
-
If you need to edit or delete the schedule, open the Edit dropdown box next to the schedule item and select edit to reopen the settings window or delete to remove the scheduled build.