Security roles, teams, and ownership are key aspects of Unify that can define user access to the system and what records are viewable. Security roles and team membership are managed from the user page in the administration menu.
Security roles define what menus a user can access in Unify.
Teams define the population that a user can access.
Ownership defines who can see records created by that user.
Security roles
All aspects of Unify can be visible or hidden for the user, as is the ability to read, write or delete items. The highest security role is the Super User role. Super users have full access to the system for the purposes of editing and updating settings. The super user role is normally restricted to system builders and system managers.
To view available security roles, allocation of users to those roles, and permissions granted to those roles:
-
Log in to Unify and navigate to the administration menu.
-
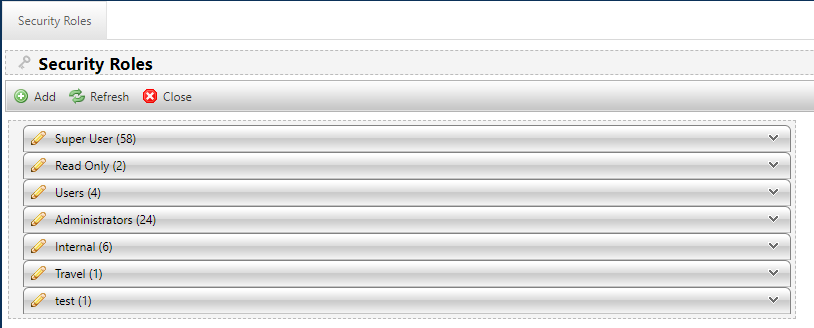
Open the security roles menu. Unify will display a table of previously configured security roles and the number of users assigned to each role.
-
Click on the arrow to the right of a security role to expand the list and view users assigned to that role.
-
Click on the pen icon to open the role details (displayed as a second table alongside the security roles table).
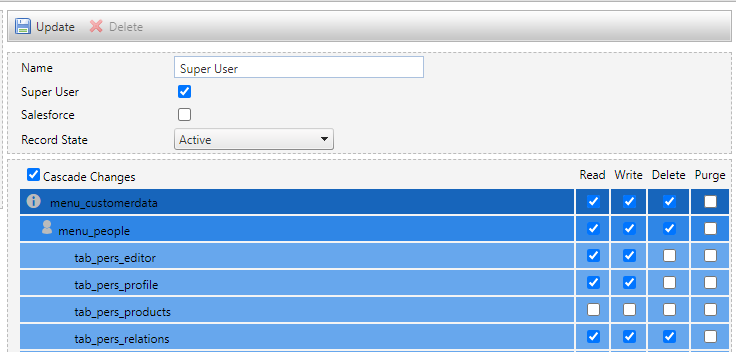
Within the role details table, you can view permissions for each menu within Unify for the selected security role. Where applicable, submenus are displayed, allowing individual submenus and tabs to be configured with different permissions.
If a new role is required to assign permissions to a group, use the Add button to configure a security role.
Teams
The permissions granted to a user when they are added to a team control what that user can do within that team.
Teams may be organized by job function, location, or any other logical grouping. When users are in the same team, they have access to each other, and also may have access to the same sets of records.
Note: All systems are set up with at least one team, usually based on the organization's name. This should be the default team – all users with rights to access all records should be in this team and all records which should be available to all users should have this team allocated in their ownership.
Create a new team
-
Select teams from the administration menu.
-
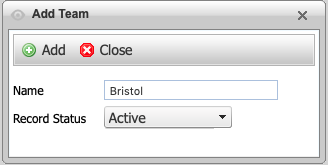
Click Add from the menu bar.
-
Give the team a name, and click Add.
Define a user's team and permissions
-
Open the teams page and find the team.
-
Select the person icon for that team to display the list of team members and permissions.
-
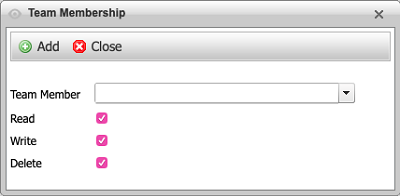
Select the plus icon in the team toolbar to add a new team member or the pencil icon next to a user to edit a member.
-
Select the user from the dropdown (adding a user only), and set the permissions for that user within that team.
-
Save your changes using the add button (new team member) or update button (existing team member). You can verify the user's team membership through their individual user page.
Note: A user can be a member of more than one team and have different permissions in different teams.
Disabling and reactivating a team
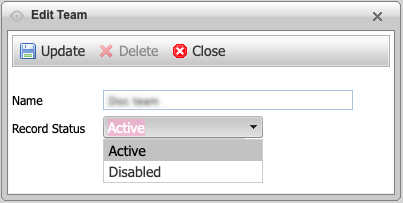
You cannot delete a team, but you can disable it. Once disabled, it can be activated again, if needed.
-
From the teams page, select the pencil icon for the team.
-
On the edit team window, change the record status.
-
Click the update button to save your changes and close the window.
Ownership
Ownership defines who can see records created by the user.
To add an owner:
-
Open the users page from the administration menu.
-
Select the username of the user you wish to edit to open that user's profile.
-
Click the add owner button to open the add ownership window.
-
Select a record owner or team from the appropriate dropdown box.
-
Click the add button to save your changes and close the window. The added user or team will now be able to see records created by that user.