The creation process has a couple of parts. First, you have to enter information to create the report and add filters. Then you can manager the sections of the report, which is choosing which sections to show or hide on the final report. You can also add attachments to the report.
Create the report
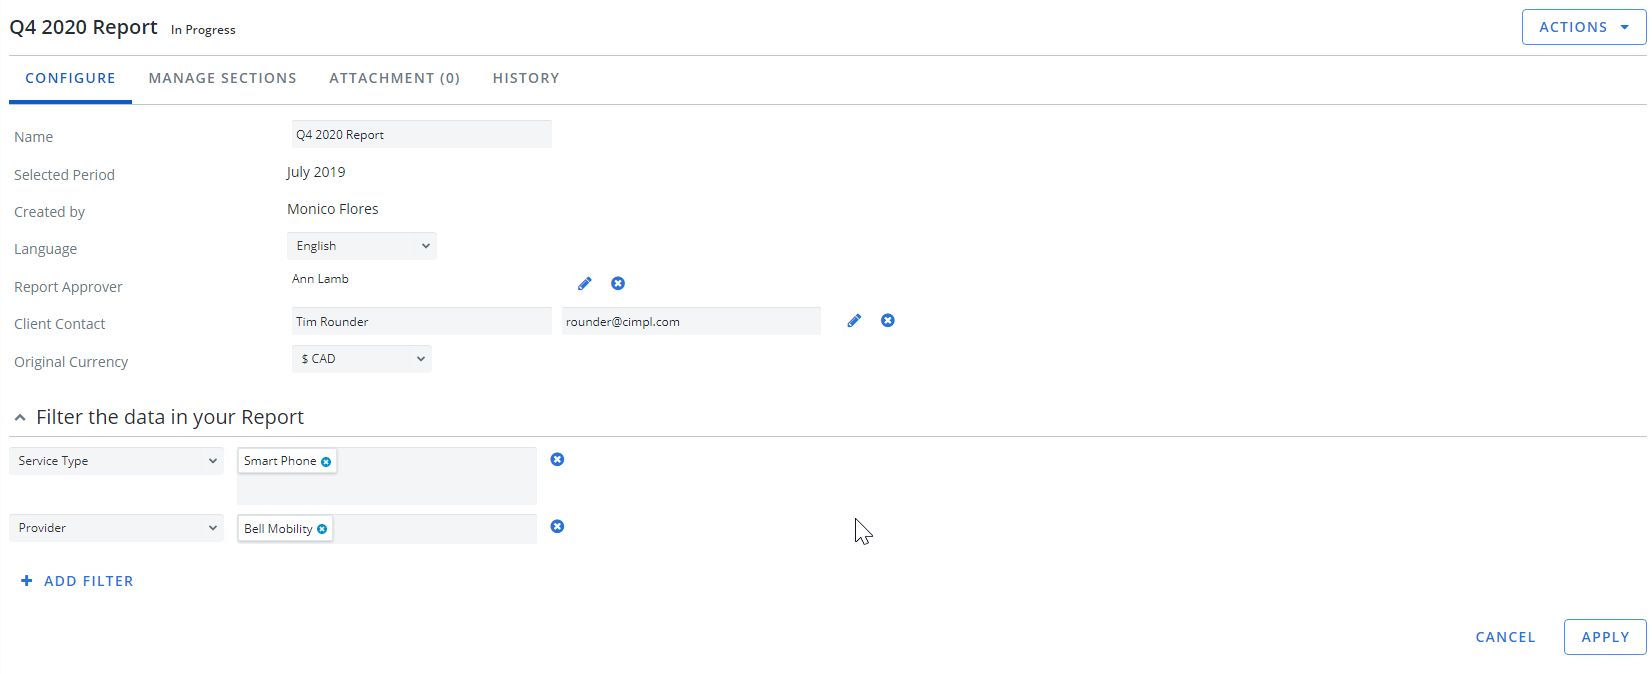
Example of the create report page. Click to enlarge.
- Go to Configuration > Dashboards and Report Management > Executive Analytics Report.
- Click New. A report record opens on the Configure tab.
-
Enter a Name. The report name needs to be different from any other report name you have used. Report names can have a maximum length of 50 characters and do not support special characters.
- Click on the calendar icon to select a time period.
- Select your preferred language using the drop-down menu.
- Select a Report Approver, click the +. A list of employees opens.
-
Select an employee. The Report Approver fields updates.
Note: Not all Cimpl platforms require Report Approval. If your organization did not configure Cimpl to require an approval request prior to completing a report, you do not see any links or prompts to select a report approver. If you would like to have "Report Approver" removed, please contact cimpl-support@uplandsoftware.com.
- Enter the name and email for your desired contact into the respective fields. (This might be an employee of your organization, or a name that you have manually entered).
- Click Apply. Your basic Executive Analytics Report is saved.
Add filters:
- Click + Add Filter.
- Select a Filter By option: Organization, Provider, Service Category, Service Type.
-
Type to search or select a filter from the dropdown.
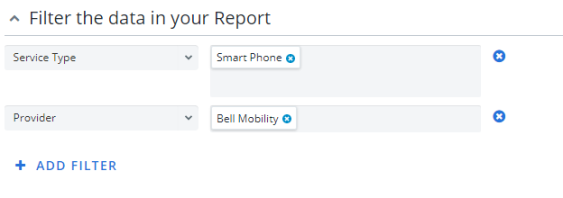
- Repeat Steps 10-12 until you've added all your filters.
-
Click Apply. Filters are saved to your report.
Note: Any filters you've selected is listed on a dedicated Report Filters page, which is automatically added to your Executive Analytics Report.
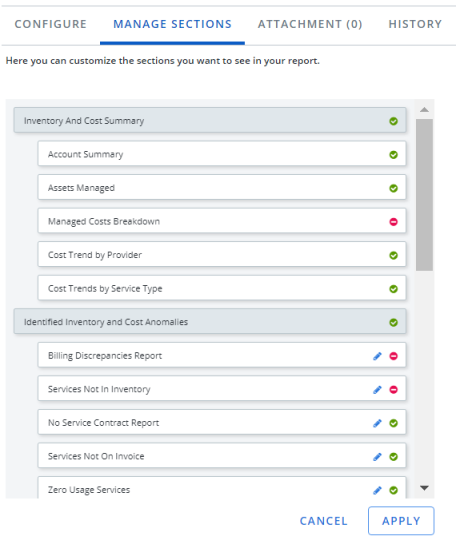
Manage sections of the Executive Analytics Report:
- Click on the Manage Sections tab.
-
Select the pages to include by clicking the green check mark or red circle icons.
- The green check mark signifies that the page is included in your report.
- The red circle signifies that the page is not included in your report.
- Pages with a pencil icon can have comments added to them.
Add Attachment:
- Click on the Attachment tab.
- Enter a File Name.
- Click Choose File.
- Select the file(s) you would like to add to your appendix.
- Click Open. The file appears on the right-hand side in a list of all files that have been uploaded.
- To delete a file that you've already uploaded, click on the X icon on the right of the file, and it is removed from the list.
Once documents are attached as appendices, they can also be downloaded.
You can download each attachment individually or collectively in a batch as a .zip file.
- To download an individual attachment, simply click on its link from within the right-hand file list. Cimpl will automatically download the file to your computer's designated download folder.
- To download all attachments at once, click Download All Files. Cimpl will automatically download the files to your computer's designated download folder.