- Click the report category. The category opens to show all the report types associated with it.
- Click on the report title. The Report opens in the left-hand pane.
- Adjust the timeline:
- Click Range Type.
Select the Range Type: Recent Months, Calendar Year, or Fiscal Year.
Note: For Fiscal Year, you must select a quarter: Q1, Q2, Q3, or Q4.
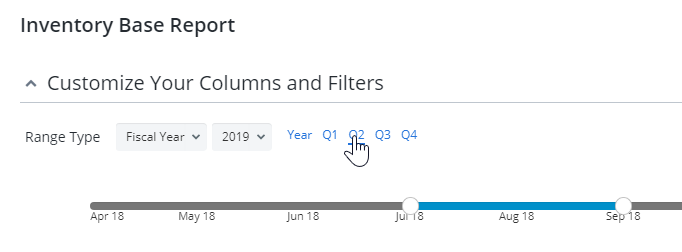
Click on the arrows on either end of the timeline. The data in all widgets updates automatically.
OR
- Click a month in the timeline to select.
-
Add or Remove columns and filters.
Note: By default, all possible parameters are included in the report.
- Click Generate in either the Data or Visual tab. The contents are previewed in the bottom portion of the screen, either as a grid on the Data tab or as graphs on the Visual tab.
Save a copy
- Scroll to the Data tab.
- Click Actions.
- Select Save Copy. A pop-up opens.
- Enter a name for the report copy.
-
Click Apply. The name of the report appears in the Report Menu under its appropriate category.
Note: When saving a copy of a report, any graphs that have been created is transferred over to the copied report. A time stamp and the word "copy" will come after the graph title when it has been copied from another report.
Change the name of a copied report
-
Click on the pencil icon next to copied report. A pop-up opens.
-
Enter a name.
Note: You can't export your report if you try to save a report with a name containing the following special characters: {, }, [, ], <, >, *, /, \, :, ?, ", or |. If you attempt use any of these characters in a file name, an error message appears blocking your action. In this event, click OK to close the error message, and then enter a file name without these characters.
-
Click Save.