Add and Manage Program Properties
In addition to the pre-defined system fields, Eclipse PPM users can add other different fields to a program. These user pre-defined fields are created and grouped under the Properties section. Eclipse offers different types of properties as well as the capability of adding an existing (pre-defined system) property. Users can also edit or delete any of the properties they added.
To add a program property
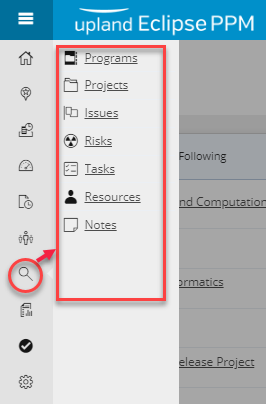
- On the left icon bar, click the Search icon
.
A submenu is displayed.

- From the displayed menu, click Programs.
The Programs page is displayed.

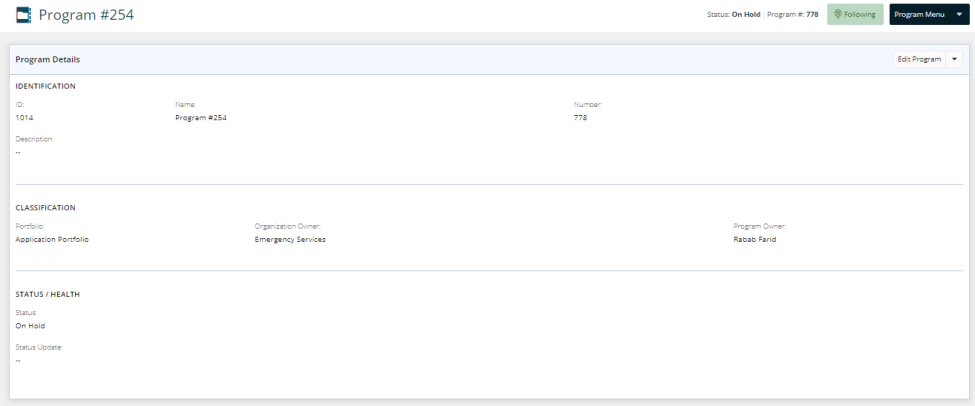
- Click the name of the required program.
The program workspace is displayed.

- At the upper-right side of the program workspace, click Program Menu.
A drop-down menu is displayed.
- On the displayed menu, click Configuration.
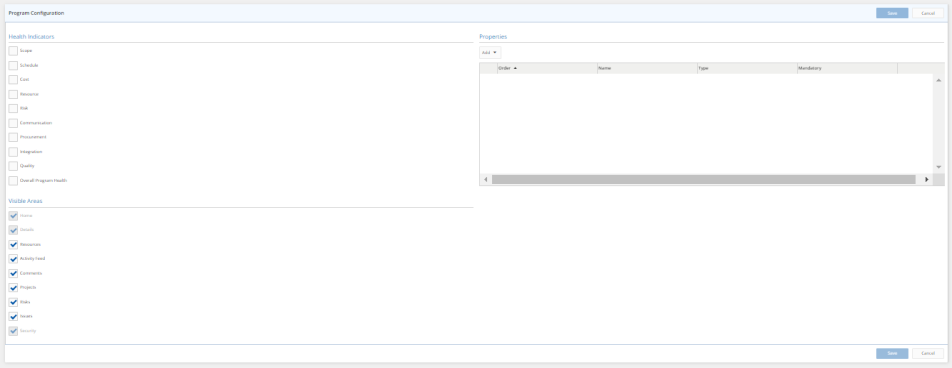
The Program Configuration page is displayed.

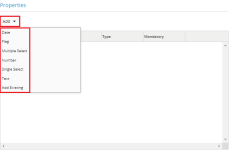
- On the Program Configuration page, under Properties, click the arrow next to Add.
A drop-down menu is displayed.
- From the displayed menu, click the name of the property that needs to be added to the program.
A dialog box, having the name of the selected property, is displayed. - Click on each of the following property names to check the data that should be added to each property.
- In the Name field, type a unique name for the newly added property.
- In the Description text box, type a description that elaborates the property's value.
- Click in the Default field, and from the displayed calendar, choose the required default date.
- In the Name field, type a unique name for the newly added property.
- In the Description text box, type a description that elaborates the property's value.
- Click in the Default field, and from the displayed list, select either Yes or No.
- In the Name field, type a unique name for the newly added property.
- In the Description text box, type a description that elaborates the property's value.
- In the Default field, type the required default number in digits.
- In the Name field, type a unique name for the newly added property.
- In the Description text box, type a description that elaborates the property's value.
- In the Default field, type the required default text.
- In the Name field, type a unique name for the newly added property.
- In the Description text box, type a description that elaborates the property's value.
- Under Values,
- In the Name field of the first row, type a unique name for value.
- Click the Default check box, if required.
- Click the Add Item icon
, to add more values, if required.
- Click Save.
The added property is displayed in the Properties grid.
- At the upper-right corner of the Program Configuration page, click Save.
A message is displayed at the upper-right corner of the page indicating that the configuration has been saved successfully.

Note: In case the required property is not displayed on the properties menu, click Add Existing, and follow the steps listed in the next section.
To add an existing property
- On the Program Configuration page, under Properties, click the arrow next to Add.
A drop-down menu is displayed.
- From the displayed menu, click Add Existing.
The Add Existing dialog box is displayed listing all the existing properties.
- Select the check box next to the required property, and then click Save.
- At the upper-right corner of the Program Configuration page, click Save.
A message is displayed at the upper-right corner of the page indicating that the configuration has been saved successfully.

To edit a program property
- On the Program Configuration page, under Properties, click the Edit icon
 next to the property you need to edit.
The relevant property dialog box is displayed. - Make the necessary changes, and then click Save.
- Before moving to another page, at the upper-right corner of the Program Configuration page, click Save.
A message is displayed at the upper-right corner of the page indicating that the configuration has been saved successfully.

To delete a program property
- On the Program Configuration page, under Properties, click the Delete icon
 next to the property you need to delete.
 - At the upper-right corner of the Program Configuration page, click Save.
A message is displayed at the upper-right corner of the page indicating that the configuration has been saved successfully.

To reorder program properties
- On the Program Configuration page, under Properties, drag and drop the property, in the required place, using the Drag & Drop icon
.
Tip: You can also use the move up  and move down
  arrows to reorganize the properties list.
- At the upper-right corner of the Program Configuration page, click Save.
A message is displayed at the upper-right corner of the page indicating that the configuration has been saved successfully.

