Update an Issue Status
Eclipse users can always update the status of any issue.
To update the status of an issue
- On the issue home page, at the upper-right corner of the Issue Details section, click the arrow next to Edit Issue.
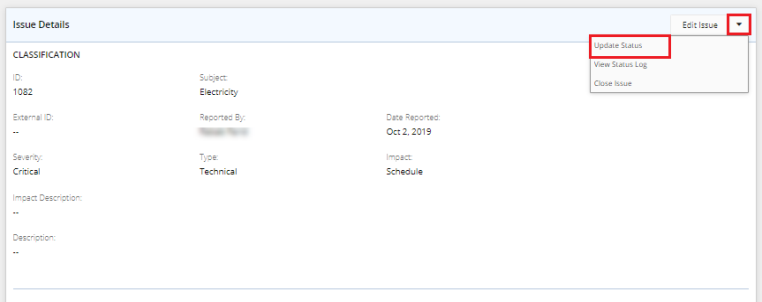
- From the displayed menu, click Update Status.
The Update Status pop-up window is displayed.
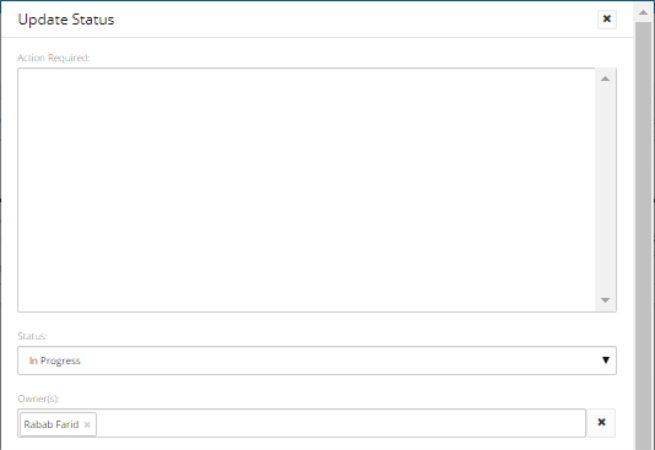
- In the Action Required text box, type the corrective action that shall be taken to fix the issue.
- Click the arrow in the Status field.
A drop-down list is displayed. - Select the state that best describes the issue.
Note: By default, the issue creator name appears in the Owner(s) field.
To replace the displayed name with another, click the Clear icon ![]() next to the field, and then click inside the box to type the name of the required owner.
next to the field, and then click inside the box to type the name of the required owner.

- Under Status Update, click the Annotate icon
 to add an annotation with the time stamp and author's name.
Note: To remove any of the added annotations, select it with your cursor, and then press the delete key.
Note: To remove all the annotations in one step, click the Clear Status Update icon  .
.
- Click in the Planned Resolution field to open the calendar, and then select the date on which it is planned to resolve the issue.
- Click in the Actual Resolution field to open the calendar, and then select the date on which the issue was resolved.
Note: In case you need to add a comment, at the bottom of the pop-up window, click Add a comment?, and then follow the steps listed in the Add and Manage Issue Comments article.
- Click Save.