Add and Manage Project Properties
Through the Project Configuration page, the user is capable of managing the properties of a project. Properties are user-defined fields used to capture project information which otherwise could not be captured using any of the existing system-defined fields. Project properties are used to accommodate each organization's project classification and reporting needs.
To add a project property
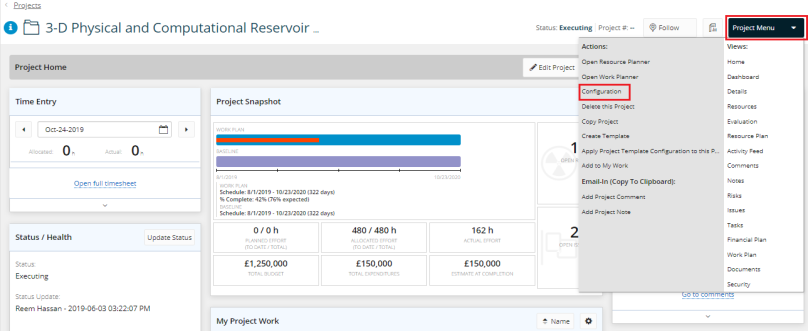
- At the upper-right side of the Project Home page, click Project Menu. A drop-down menu is displayed.
- On the displayed menu, under Actions, click Configuration. The Project Configuration page is displayed.
- On the Project Configuration page, under Properties, click the arrow next to Add. A drop-down menu is displayed.

- From the displayed menu, click the property that needs to be added to the project properties. The selected property is displayed in the Properties panel.
Note: In case the required property is not displayed on the list, click Add Existing. A list of all the available properties is displayed. Select the check box next to the required property and click Save.

- In the Name box, type a unique name for the property.
- In the Description box, type a description that elaborates the property's value.
- In the Default box, set the default value of the property.
Note: The Default section varies from one property to another.
| Property Type | Default Section |
| Date |
To set the default date for the property
|
| Flag |
To set the default value for the flag
|
| Multiple Select |
To set the value of the multiple select
To make the displayed value a default, select the Default check box next to the value. |
| Number |
To set the default value for the number
|
| Single Select |
To set the value of the single select
To make the displayed value a default, select the Default check box next to the value. |
| Text |
To set the default value of the text property
|
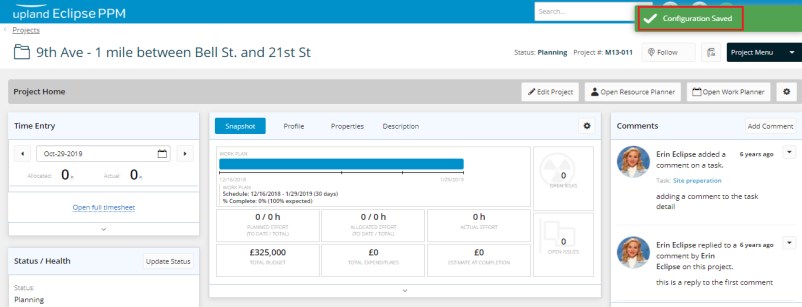
- Click Save. A message is displayed at the upper right corner of the page indicating that the configuration has been saved successfully.
To edit a project property
- At the upper-right side of the Project Home page, click Project Menu. A drop-down menu is displayed.
- On the displayed menu, under Actions, click Configuration. The Project Configuration page is displayed.
- Under Properties, click the Edit icon
 to edit the property required. A dialog box is displayed.

- Edit the property as required.
- Click Save.

To delete a project property
- At the upper-right side of the Project Home page, click Project Menu. A drop-down menu is displayed.
- On the displayed menu, under Actions, click Configuration. The Project Configuration page, is displayed.
- Under Properties, click the Delete icon
 to delete the property required.

- Click Save. A message is displayed at the upper right corner of the page indicating that the configuration has been saved successfully.
To reorder project properties
- At the upper-right side of the Project Home page, click Project Menu. A drop-down menu is displayed.
- On the displayed menu, under Actions, click Configuration. The Project Configuration page is displayed.
rop
- On the Project Configuration page, under Properties, drag and drop the indicator in the required place using the Drag & Drop icon
 .
.
Tip: You may also use the move up  and move down
  arrows to reorganize the Financial Indicators list.

- Click Save. A message is displayed at the upper right corner of the page indicating that the configuration has been saved successfully.