Manage Financial Areas of a Project
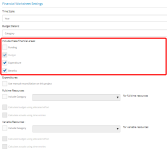
Through the Project Configuration page, the user is capable adding an removing financial areas of a project from the financial worksheet.
To add or remove financial areas of a project from the financial worksheet
- Access the Project Configuration page. For more information on accessing the Project Configuration page, click here.
- On the Project Configuration page, scroll down to the Financial Worksheet Settings panel.
- Under Include Financial areas:, select the areas that are required to be reflected in the timesheet.
Note: Upon clearing the Expenditure check box a confirmation message will be displayed. If you agree on losing the data click Yes. Accordingly the Expenditures section indicating the manual reconciliation will be dimmed below.
Note: Upon clearing the Benefits check box a confirmation message will be displayed. If you agree on losing the data click Yes.
- Click Save. A success message is displayed at the upper right corner of the page indicating that the configuration has been saved successfully.
