Create a Project
Creating a new project through Eclipse PPM is a quick and easy process. Users can simply use the blank template offered by the system or choose any of their own pre-configured organization templates as per their business needs and project specifications (size, area or type).
To create a project
- At the upper-right corner of the Eclipse Home page, click the Create sign
 .
.
A drop-down menu is displayed.

- From the displayed drop-down menu, select Project.
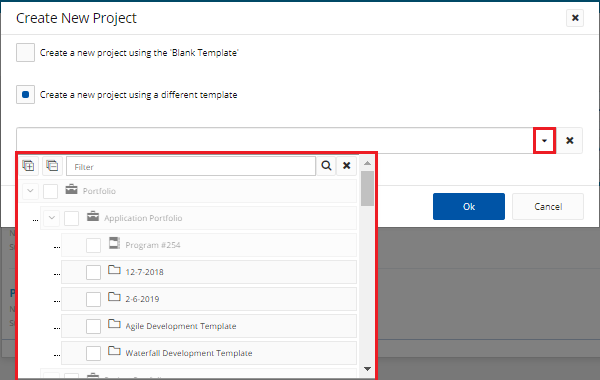
The Create New Project dialog box is displayed.

- On the Create New Project dialog box, choose whether you want to create the new project using the 'Blank Template' or a 'Different Template'.
Note: Create a new project using the Blank Template is only available as per the application settings configured by your system administrators.
- In case of choosing the second option, select the required template from the drop-down list that is displayed.

- Click Ok.
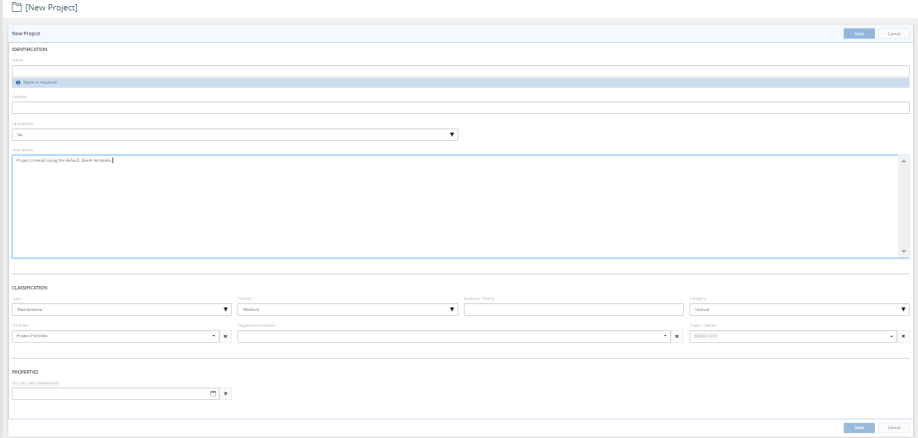
The New Project page is displayed.

- On the New Project page, under Identification, in the Name field, enter a unique name for the project.
- In the Number field, enter an identification number for the project.
Note: If auto-numbering has been enabled for the project template, the project will be assigned a unique number when saved for the first time.
- Click the arrow next to the Operations field.
A drop-down list is displayed. - Select whether the project is considered operational or not.
- In the Description field, add a description for the project.
- Under Classification, click the arrow next to the Type field.
A drop-down list is displayed. - Select the type of the project.
- Click the arrow next to Priority field.
A drop-down list is displayed. - Select the level of priority of the project.
- In the Business Priority field, add any additional information related to the priority, if required.
- Click the arrow next to Categoryfield.
A drop-down list is displayed. - Select the category under which the project is to be grouped.
- Click the arrow next to Portfolio field.
A drop-down list is displayed. - Select the portfolio under which the project is to be grouped.
Note: To remove the entered portfolio, click the (x) sign next to the Portfolio field to clear it.
- Click the arrow next to Organization Owner field.
A drop-down list is displayed. - Select the organization that owns the project.
Tip: The name of the project creator is displayed, by default, in the Project Owner field. However, you can assign another resource to be the project owner as clarified in the next step.
- Click the Project Owner box to make it editable, and then enter the name of the required resource.
Note: To delete the entered project owner, click the (x) sign next to the Project Owner box to clear it.
- Click Save.
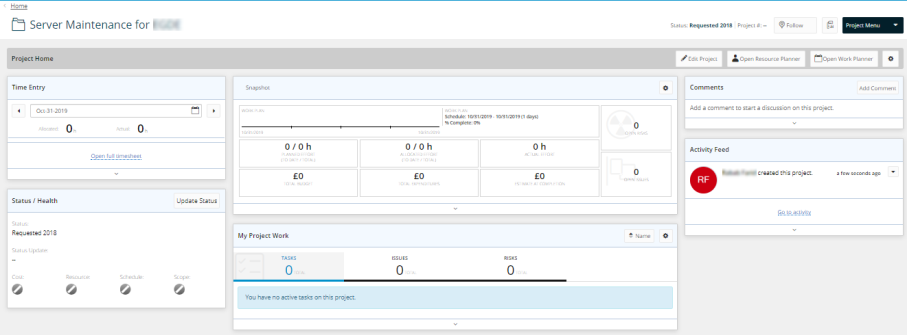
The Project Home page is displayed.
