Create a Project Filter
In addition to the default system filters available in the Projects page, Eclipse users can create their own custom filters, whether for the entire projects list or for specific projects. With the help of the Create Filter feature, users can add different filter rules, each of which with different conditions and values. Users can even create a group for interrelated rules.
To create a filter for the entire projects list
- On the left icon bar, click the Search icon
 .
.
A submenu is displayed.
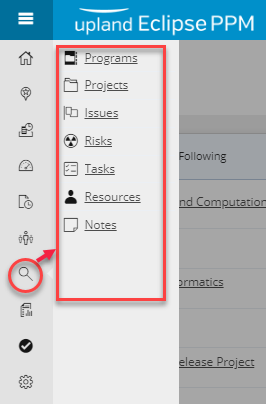
- From the displayed menu, click Projects.
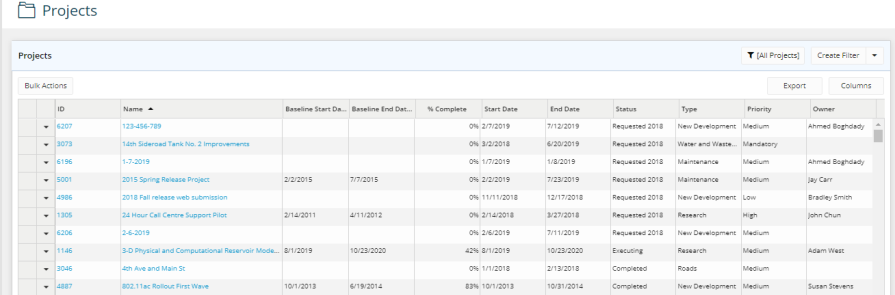
The Projects page is displayed.
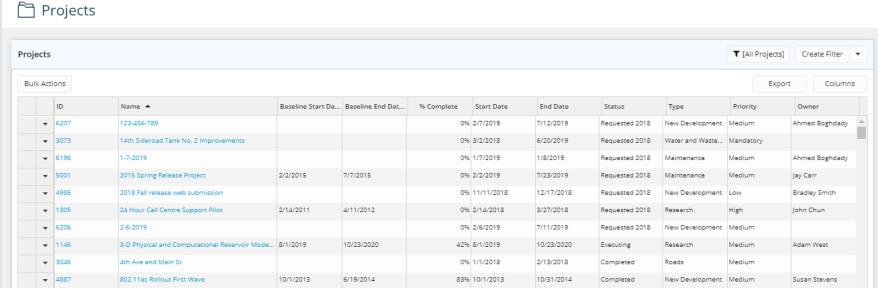
- On the Projects page, at the upper-right corner, click Create Filter.
The Project Filter page is displayed.

- On the Project Filter page, in the Name text box, type a unique name for the filter.
- To share the filter with other users on Eclipse, select the Share This Search check box.
- At the right-hand side, click Add Rule and start entering the required data as per the fields displayed.
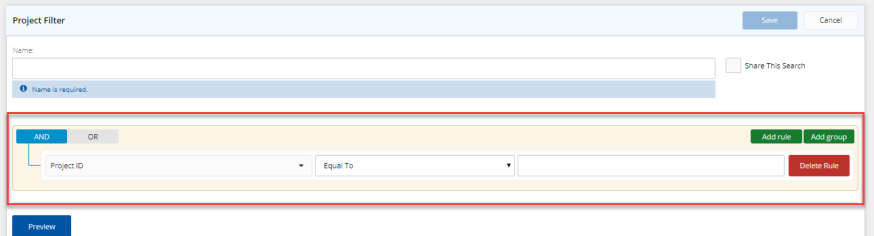
- At the left-hand side, click
- AND in case you need the filter search results to match all the added rules.
- OR in case you need the filter search results to match any of the added rules.
- Click the arrow next to the first field.
A drop-down list is displayed.
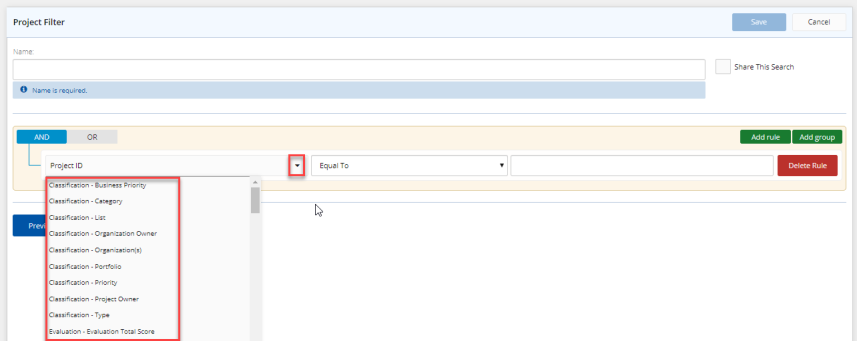
- From the displayed list, click the main filter criterion.
- Click the arrow next to the second field.
A drop-down list is displayed.
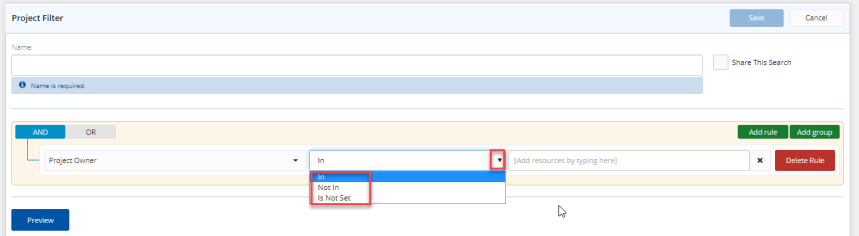
- From the displayed list, select the type of condition (for example, Equal to, Less than, In, Not in, and so on) to be applied on the main filter criterion chosen.
Note: The conditions displayed differ from one rule to another as per the main filter criterion chosen. For example, if the user chooses Business Priority or Evaluation Total Score, the displayed conditions will be Equal to, Less than, Greater than, and others. However, in case of choosing Project Owner or Type, the displayed conditions will be In, Not in, Is Not Set and so on.
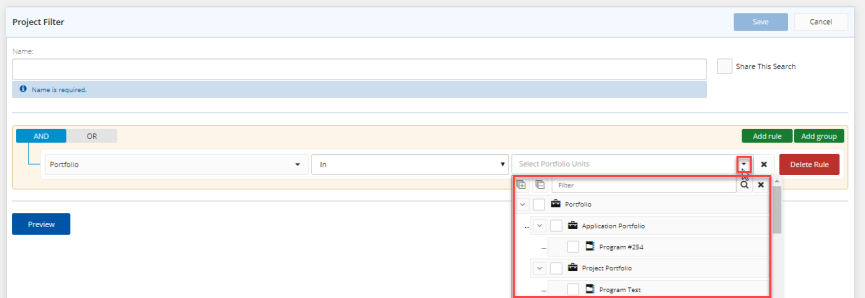
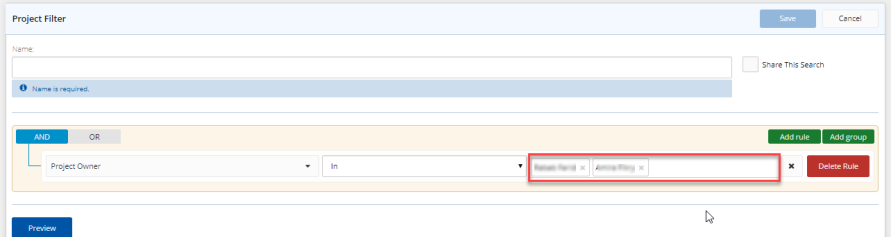
- In the value field(s),
- In case it is a drop-down list, click the drop-down arrow, and choose the required value(s).
- In case it is a text box, type the value(s) needed.
Note: To delete a rule at any time, click Delete Rule.
Note: The user may group more than one rule. To group more than one rule, at the right side, click Add Group.
Note: To delete a group, click Delete Group.
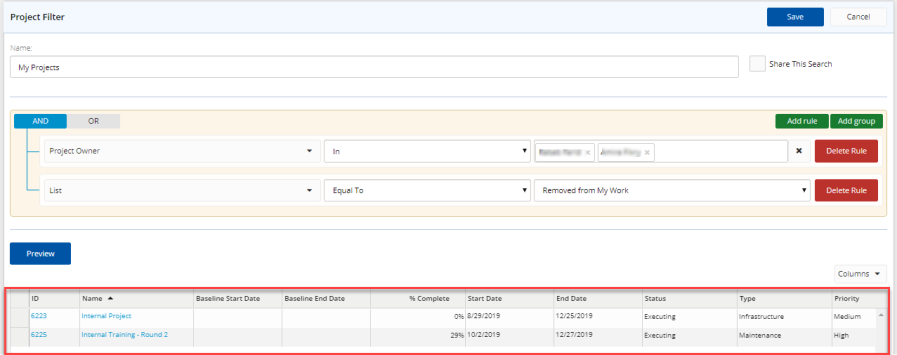
Tip: You can click Preview to see what the results page will display when using this new filter. This enables you to check whether the added rules and groups will filter the projects list in the required manner or not and make any changes before saving the filter.
- Click Save.
A success message will be displayed at the upper-right corner of the page, and the projects list page will automatically display the new filter applied.

To create a filter to display specific projects
- On the left icon bar, click the Search icon .
A submenu is displayed.
- From the displayed menu, click Projects.
The Projects page is displayed.
- At the left-hand corner of the Projects page, click Bulk Actions.
The Create Filter button appears, and a check box appears next to each row.
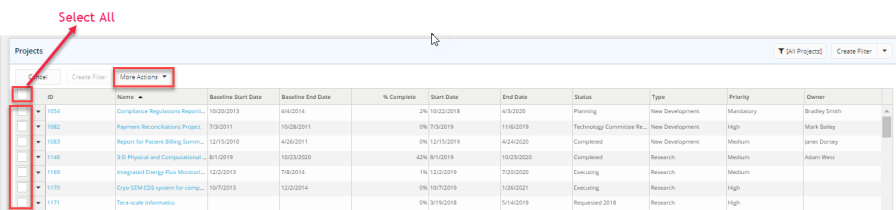
- Select the check box next to the project(s) for which you need to create a specific filter.
Tip: In case you need to create a specific filter for all the projects, you can select the Select All check box found at the beginning of the header row to take the action on all the projects at a time.
- Click Create Filter.
The New Filter dialog box is displayed.
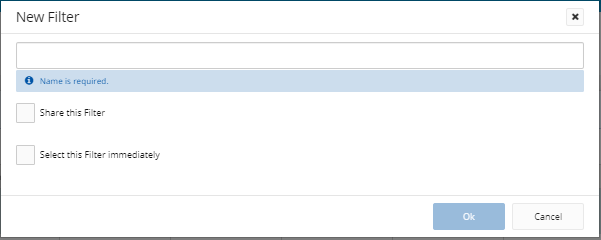
- In the text box, enter the name of the new filter.
- Select one or more of the following check boxes, as per your need:
- Share this Filter, so that other users can view and use this filter.
- Select this Filter immediately, so that the projects list is automatically filtered, as per the rules of this filter, whenever the user opens the Projects page.
- Click OK.
- At the right-hand side of the Projects page, click the Filter icon
 .
.
A drop-down list is displayed. - Scroll down till you reach the end of the list.
The name of the newly created filter appears at the bottom of the list. Once you click on it, the list will display only the projects linked to this filter.