Create/Import a New Work Plan
Creating a new project work plan can be accomplished in many ways. One of the quickest methods is to import a plan from other sources such as project templates or work plans of other projects. This method saves time and effort as the imported tasks of these sources will be listed in the same hierarchy and will preserve the same links and data.
In addition to importing other work plans, users can still create new plans using the system blank form.
To create a new work plan using the blank form
- At the upper-right corner of the project workspace, click Project Menu.
A drop-down menu is displayed.
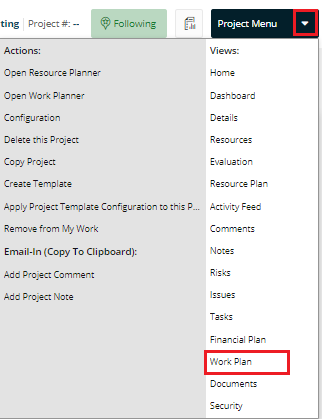
- From the displayed menu, click Work Plan.
The Project Work Plans page opens.
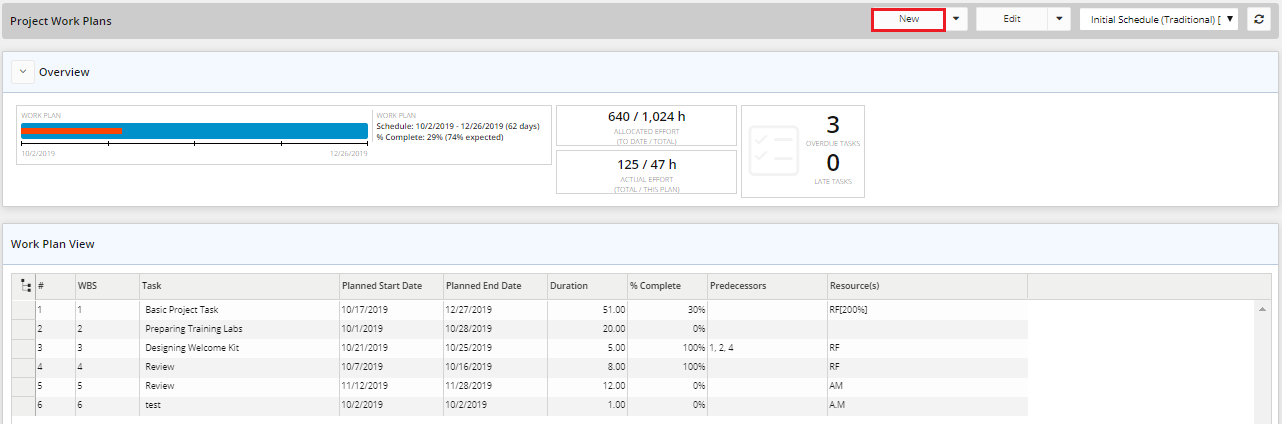
- At the upper-right corner of the Project Work Plans page, click New.
The New Work Plan dialog box is displayed.
![]()
- On the dialog box, in the Name field, type the name of the new work plan.
- Click in the Start Date field.
A calendar is displayed.
![]()
- From the displayed calendar, select the required start date.
The selected date will appear in the Start Date field. - On the dialog box, click Save.
The newly created work plan page is displayed with blank grids.
![]()
To import a plan into your project
- At the upper-right corner of the Project Work Plans page, click the arrow next to New.
A drop-down menu is displayed.
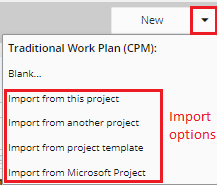
- From the displayed menu, click the name of any of the following import options, as required:
- Import from this project: to copy a previously created work plan for the same project.
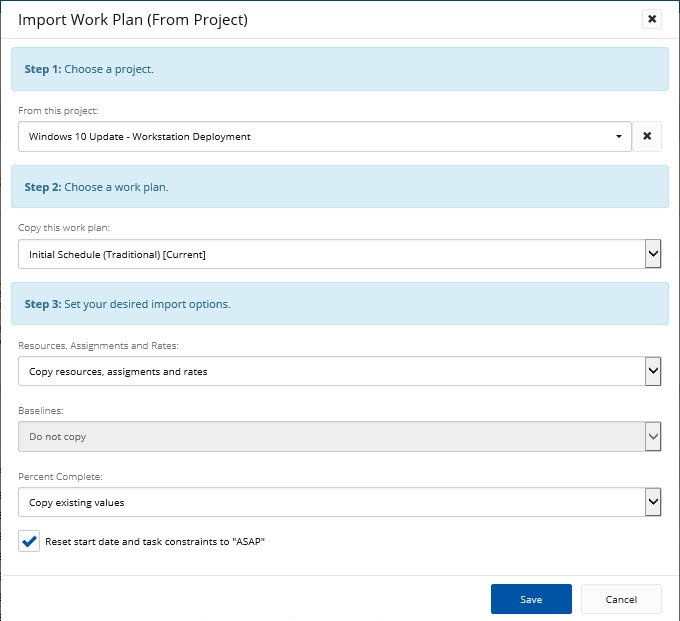
The following dialog box is displayed.

- Import from another project: to copy a previously created work plan of another project in Eclipse.
The following dialog box is displayed.
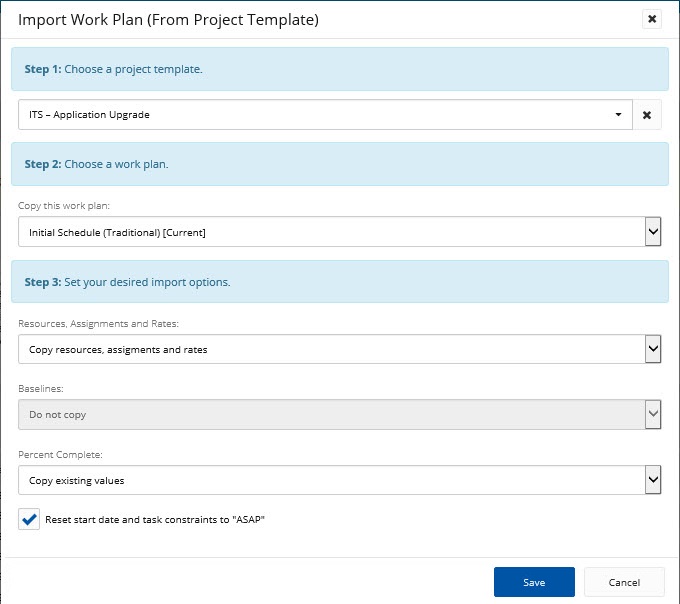
- Import from project template: to copy a blank work plan from a project template.
The following dialog box is displayed.
- Import from Microsoft Project to import a project schedule, created in Microsoft Project (versions 2013 & 2016), and saved as XML. The file can be saved as XML from the Save As options in MS Project.
The following dialog box is displayed.
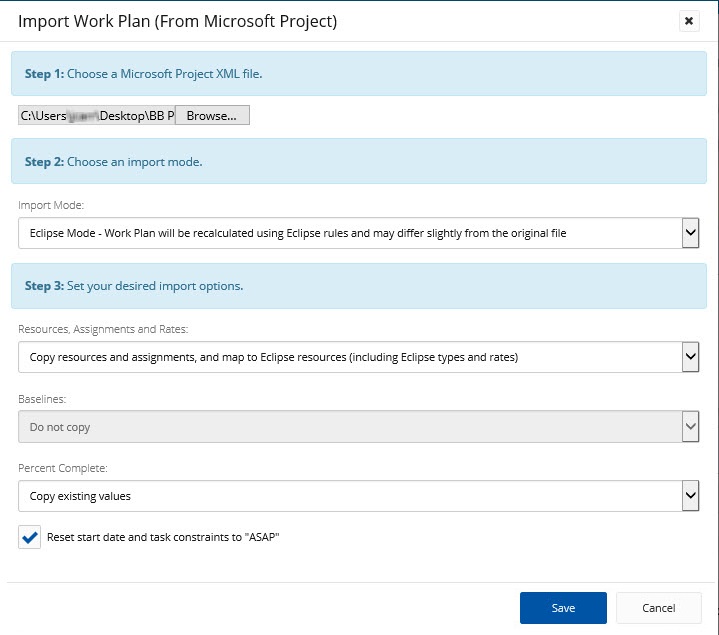
After selecting Save, the "Map Resources" window will appear. This window allows you to match the Resources in the imported file with Resources in Eclipse PPM. If the imported Resources match any Eclipse PPM Resources, the box will automatically fill with those Resources. However, you can use the drop-dowm menus to select any Resource you wish, as well as their Resource Types.

- In the relevant Import Work Plan dialog box, enter the required data as per the following tables.
| Import Work Plan (from [project name]) | Import Work Plan (From Project) |
|
|
| Import Work Plan (From Project Template) | Import Work Plan (From Microsoft Project) |
|
|
Note: When importing a work plan from a Microsoft Project, the work plan will be recalculated as per Eclipse rules and users will not be able to edit any details directly from Eclipse. They will have to update it on MSP and then synchronize with it (please refer to the Synchronize a Work Plan article).
Note: Before closing the work planner, always make sure you click Save after you take all necessary actions.