Add and Append Tasks
New Tasks can be added to a Work Plan at any time. Additionally, users can append an entire Work Plan from another Project or Template. This means that all of the Tasks from the selected Work Plan will be added to the current one, either at the bottom of the grid or before/after a specific Task.
Appending Work Plan Tasks allows users to quickly reuse existing Tasks that fit the current Work Plan, saving time and helping ensure consistency across similar Projects.
To insert a new task at the bottom of the grid
- Open the required work planner.
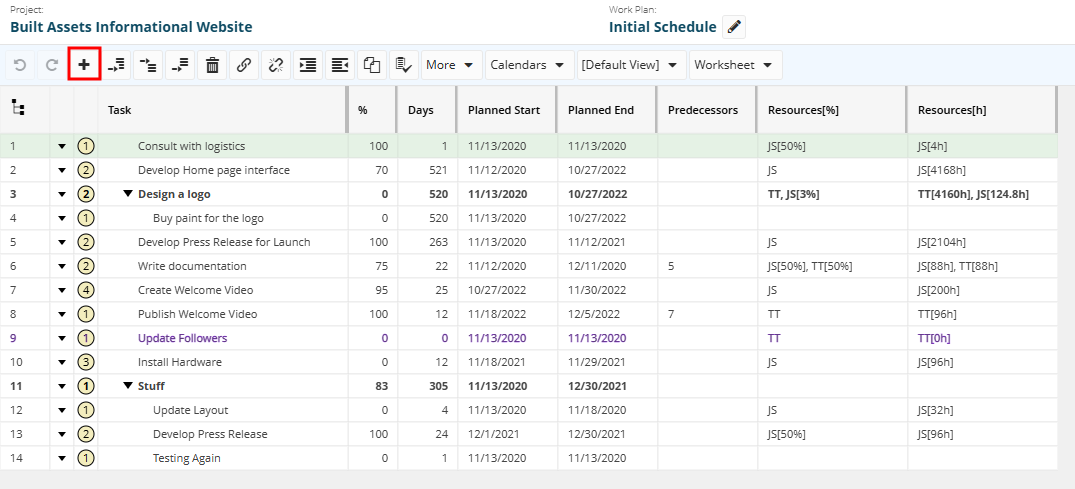
- At the top of the grid, from the actions bar, click the Add New Task icon
 .
.
A new blank row is added at the bottom of the grid.
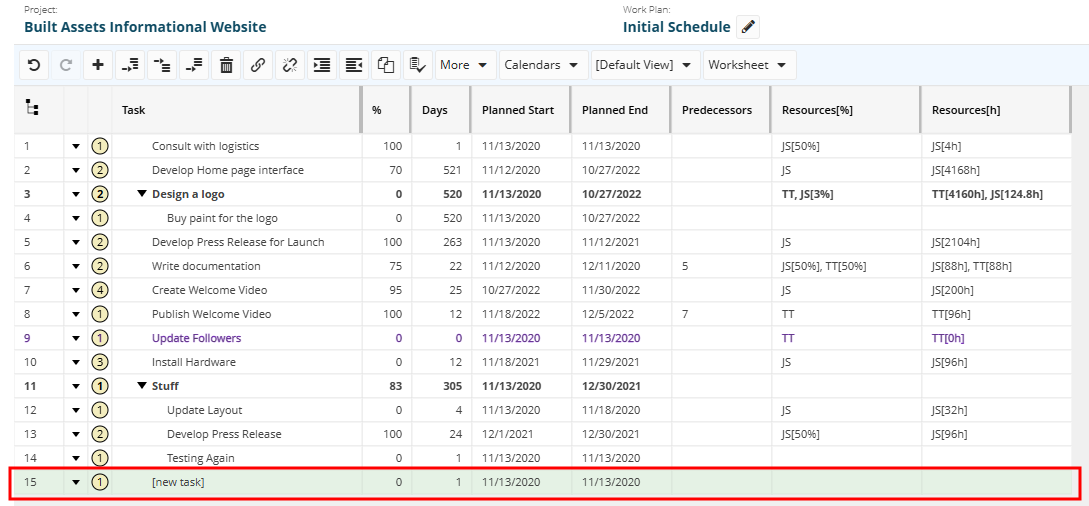
- In the Task field, enter a name for the new task.
- Make any required changes such as updating the start and end dates.
Tip: Whenever required, use the Undo  and the Redo
  icons.
Note: Tasks added directly from the project workspace (please refer to the Add and Manage Project Tasks article) are added automatically only to the 'current' work plan.
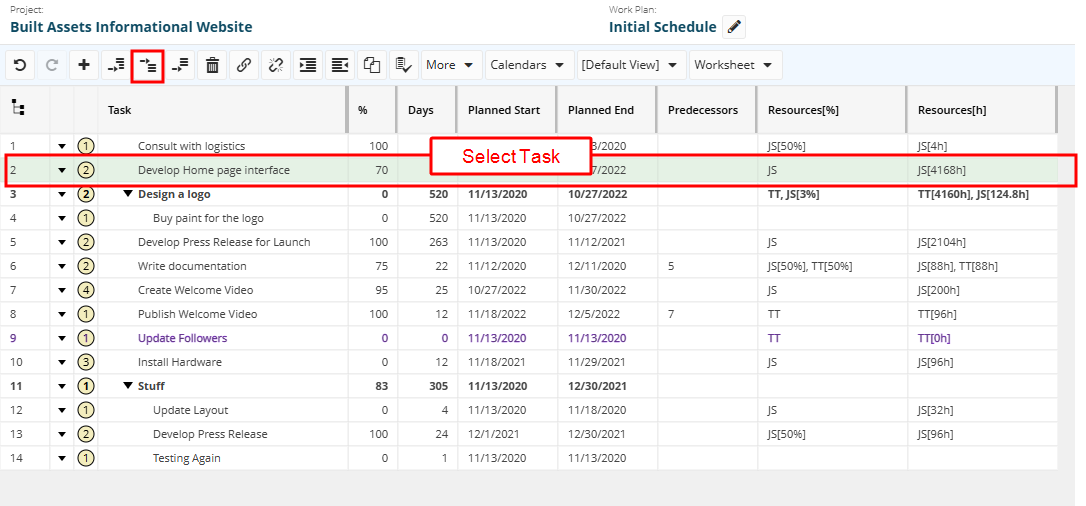
To insert a new task under another
- Open the required work planner.
- Select the task you need to add a task under.
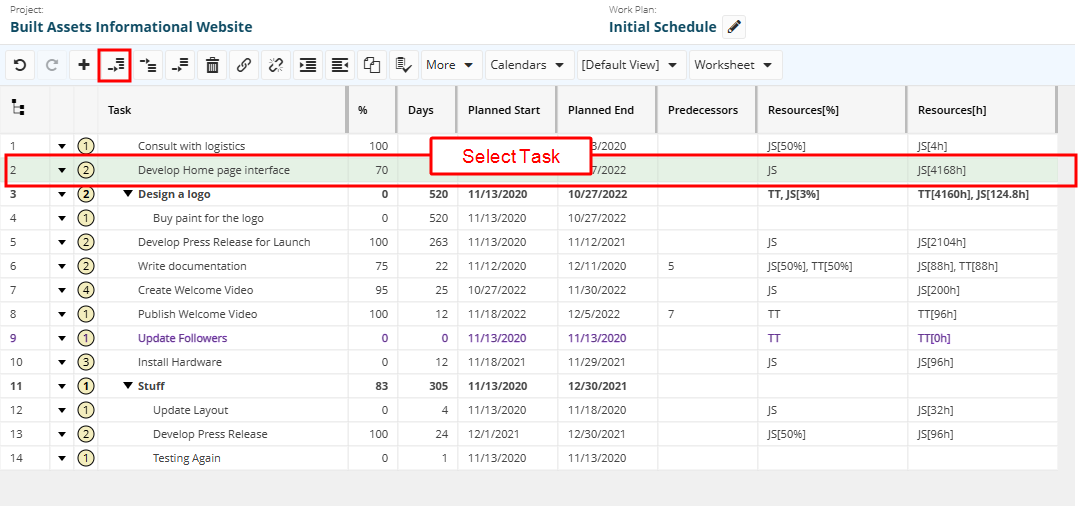
- At the top of the grid, from the actions bar, click the Insert Task Under icon
 .
.
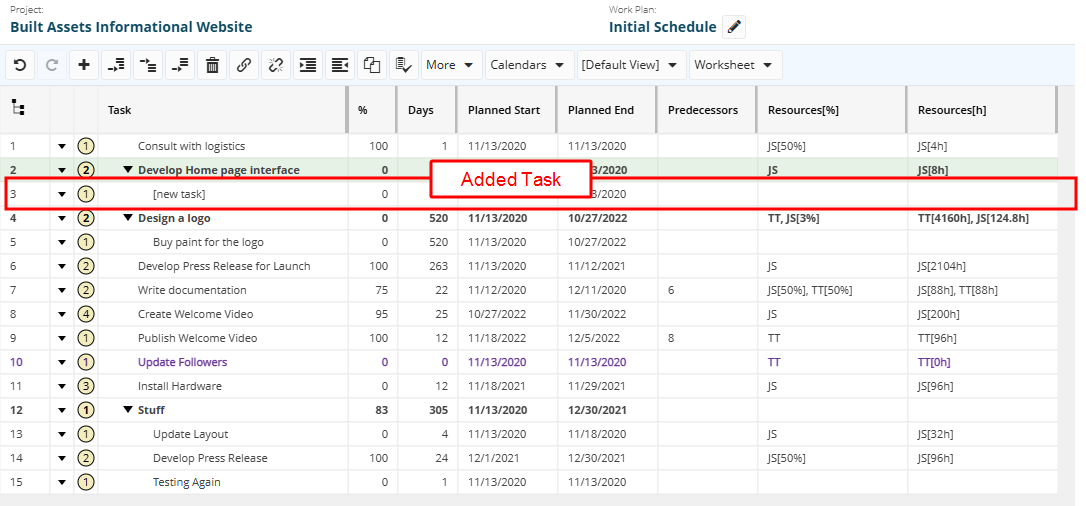
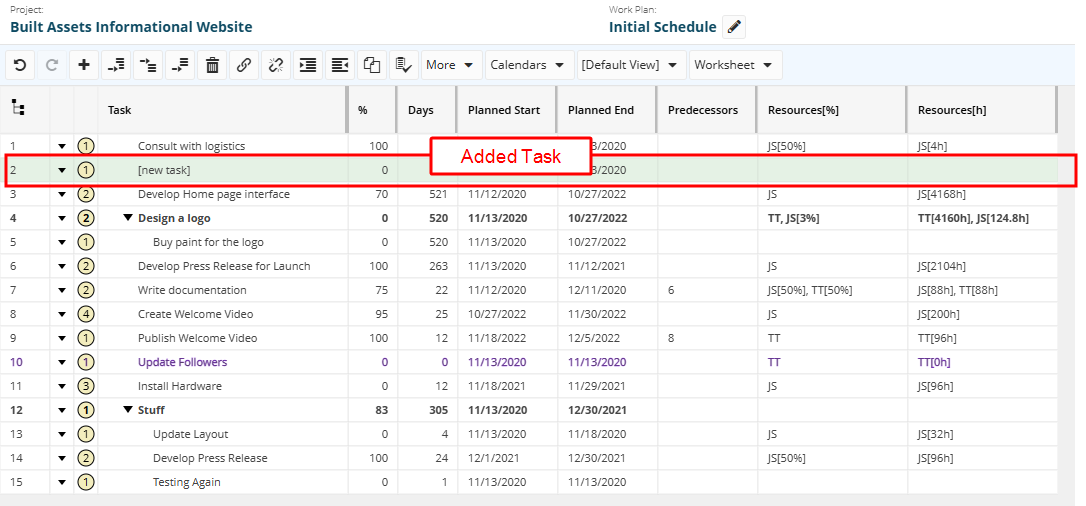
A new blank row is added under the selected task. - In the Task field, enter a name for the new task.
- Make any required changes such as updating the start and end dates.
Note: Tasks appear one indent level below that of the parent task under which they are created..
Tip: Whenever required, use the Undo and the Redo icons.
Note: Before closing the work planner, always make sure you click Save after you take all necessary actions.
To insert a new task before another
- Open the required work planner.
- Select the task you need to add a task before.
- At the top of the grid, from the actions bar, click the Insert Task Before icon
 .
.
A new blank row is added before the selected task. - In the Task field, enter a name for the new task.
- Make any required changes such as updating the start and end dates.
Note: Tasks appear on the same indent level as that of the task before which they are inserted.
Tip: Whenever required, use the Undo and the Redo icons.
Note: Before closing the work planner, always make sure you click Save after you take all necessary actions.
To insert a new task after another
- Open the required work planner.
- Select the task you need to add a task after.
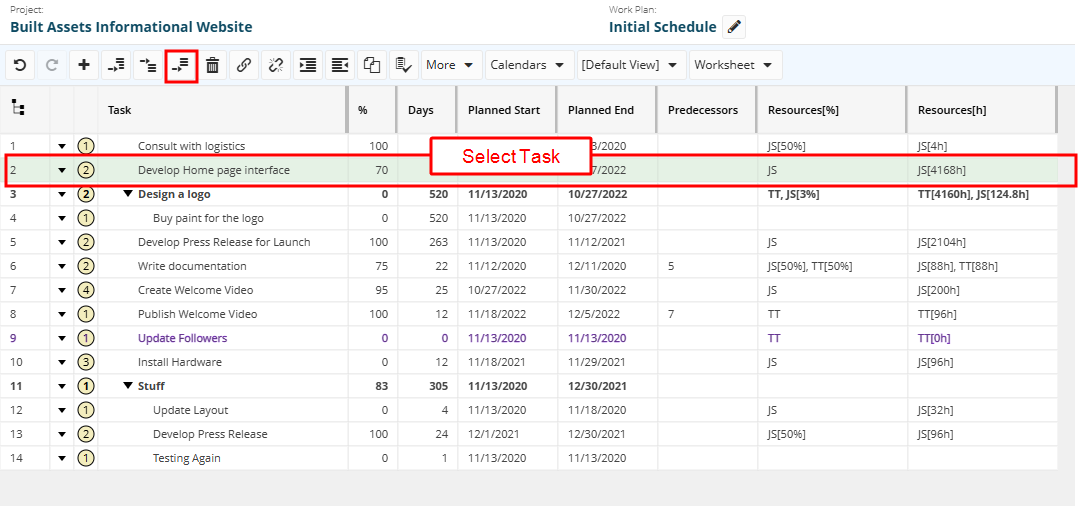
- At the top of the grid, from the actions bar, click the Insert Task After icon
 .
.
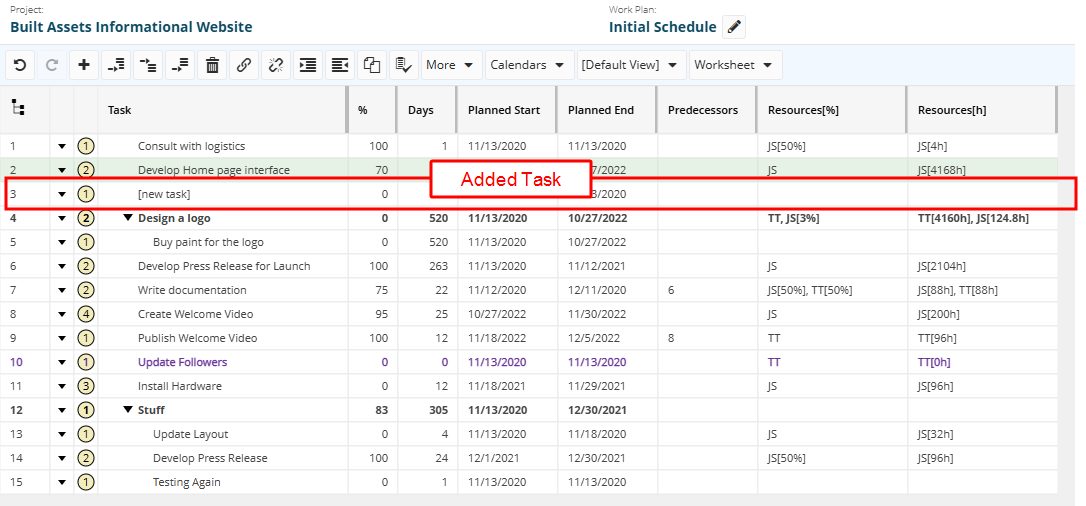
A new blank row is added after the selected task. - In the Task field, enter a name for the new task.
- Make any required changes such as updating the start and end dates.
Note: Tasks appear on the same indent level as that of the task after which they are inserted.
Tip: Whenever required, use the Undo and the Redo icons.
Note: Before closing the work planner, always make sure you click Save after you take all necessary actions.
To append a work plan from the same project or another
- Open the required work planner.
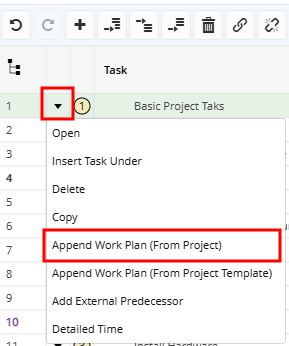
- Click the action arrow next to the task after/before which you need to append another work plan.
A drop-down menu is displayed.

- From the drop-down menu, click Append Work Plan (From Project).
The Append Work Plan (From Project) dialog box is displayed.
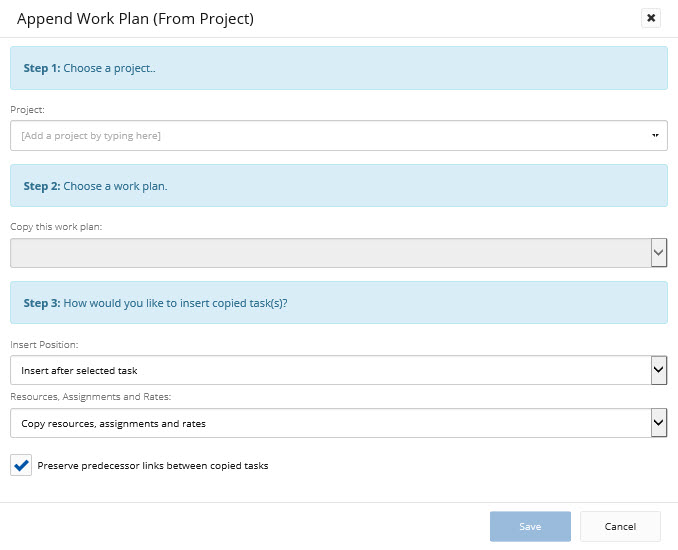
- In the Project field, type the name of the project, or part of it, from which you want to append a work plan.
A list of project names matching the entered letters is displayed.
- Click the name of the required project to select it.
- Click in the Copy this work plan field.
A drop-down list of all existing work plans in the chosen project is displayed. -
Click the name of the required plan to select it.
- Click the arrow in the Insert Position field.
A drop-down list is displayed. - From the displayed list, select whether to paste the tasks of the appended work plan before or after the selected one.
- Click in the Resources, Assignments and Rates and select whether to copy them or not, or whether to copy resources and assignments only and set rates to their default values.
- Select the Preserve predecessor links between copied tasks check box, if required.
- Click Save.
The tasks of the appended work plan are inserted in the selected position.
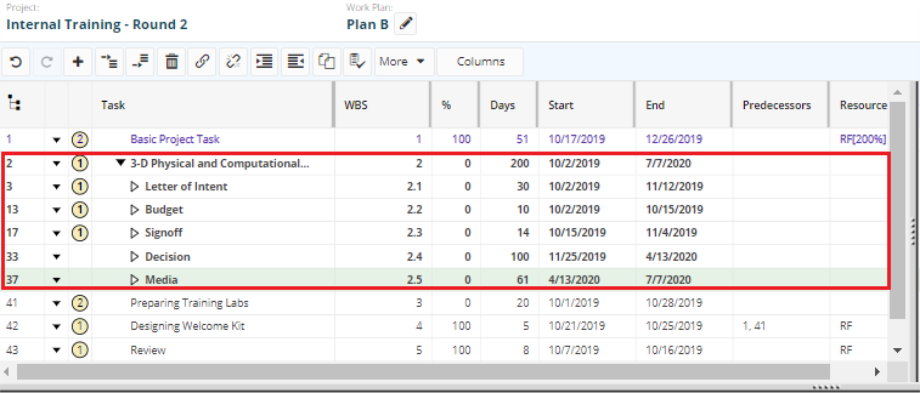
Note: Tasks appear on the same indent level as that of the task after/before which they are appended. Modifications may be required after you append other work plans depending on your project work plan.
Tip: Whenever required, use the Undo and the Redo icons.
Note: Before closing the work planner, always make sure you click Save after you take all necessary actions.
To append a work plan from a project template
- Open the required work planner.
- Click the action arrow next to the task after/before which you need to append another work plan.
A drop-down menu is displayed.
- From the drop-down menu, click Append Work Plan (From Project Template).
The Append Work Plan (From Project Template) dialog box is displayed.
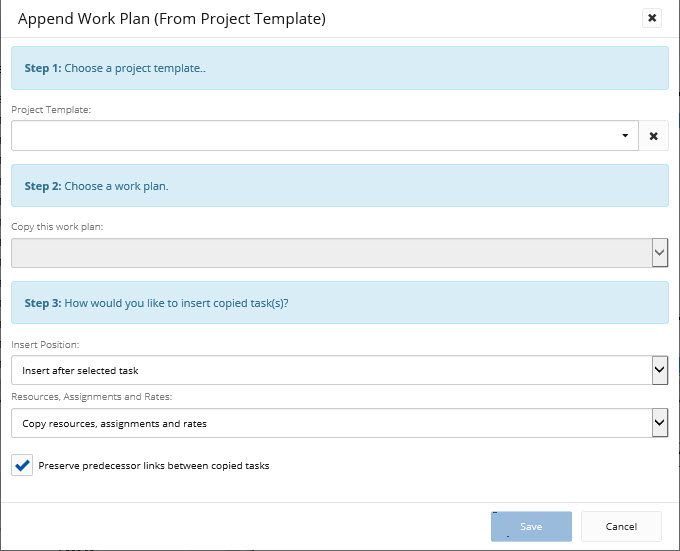
- In the Project Template field, type the name of the project template, or part of it, from which you want to append a work plan.
A list of template names matching the entered letters is displayed.
- Click the name of the required template to select it.
- Click in the Copy this work plan field.
A drop-down list of all existing work plans in the chosen project is displayed. -
Click the name of the required plan to select it.
- Click the arrow in the Insert Position field.
A drop-down list is displayed. - From the drop-down list, select whether to paste the tasks of the appended work plan before or after the selected one.
- Click in the Resources, Assignments and Rates and select whether to copy them or not, or whether to copy resources and assignments only and set rates to their default values.
- Select the Preserve predecessor links between copied tasks check box in case you want to ensure that the previously defined dependencies of the appended tasks are maintained.
- Click Save.
The tasks of the appended work plan are inserted, with their exact data, in the chosen place.
Note: Tasks appear on the same indent level as that of the task after/before which they are appended. Modifications may be required after you append other work plans depending on your project work plan.
Tip: Whenever required, use the Undo and the Redo icons.
Note: Before closing the work planner, always make sure you click Save after you take all necessary actions.