Edit Resource Allocations in Bulk
Eclipse PPM users can edit multiple assignment allocations at once directly on a Project's Work Plan. This tool can be used to edit either the allocations of multiple Resources on the Work Plan or the allocation of one Resource toward multiple Work Plan Tasks.
The function of the "Edit Allocations" feature varies depending on where it is accessed in the Work Plan:
- Resource Sheet (left): The selected Resources will have their allocations changed on the Work Plan Tasks that they are already assigned to.
-
Resource Sheet (right): The Resource will have its allocations changed on all of the selected Tasks.
-
Task Sheet: The selected Resources will have their allocations changed on the Task.
To edit the allocations of multiple Resources on their assigned Tasks using the Resource Sheet (left):
-
Open up a Project's Work Plan.
-
Select the Resources in the left-hand side of the Resource Sheet that you would like to edit allocation for:
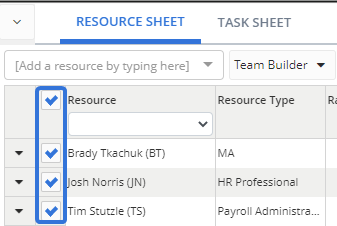
Tip: Selecting the top checkbox will select every Resource in the table.
-
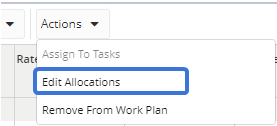
Select Edit Allocations from the "Actions" menu:
-
Decide how you would like to change the allocation of the selected Resource(s):
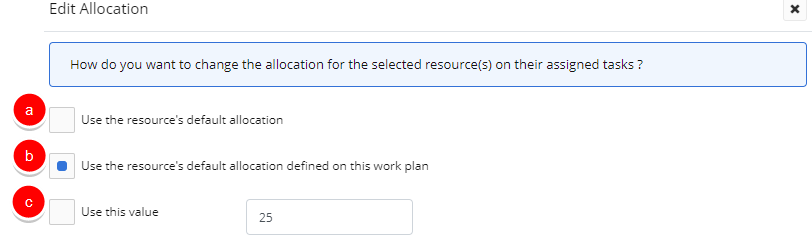
- Use the resource's default allocation: The default allocations defined on the Resource's profiles will be applied. For example, Tim Stutzle has a default allocation of 50% on his Resource profile:
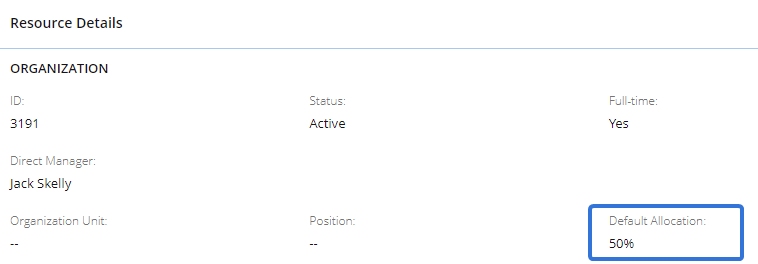
If he is being edited in the left-hand Resource Sheet, he will now have an allocation of 50% on all Tasks he is assigned to on the Work Plan:
-
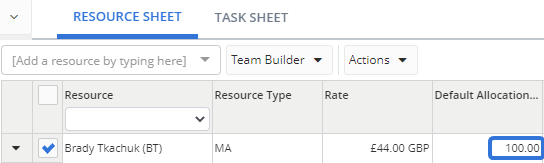
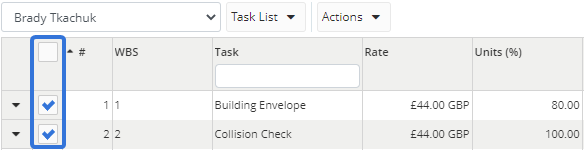
Use the resource's default allocation defined on this work plan: The default allocation for the selected Resources that is currently on the Resource Sheet will be applied to all of the Resource's Tasks on the Work Plan. For example, Brady has a default allocation of 100% on the Resource Sheet:
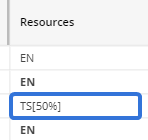
Also, he currently has allocations towards Tasks on the Work Plan that are not 100%:

If his allocation is edited in the left-hand Resource Sheet, he will have an allocation of 100% on all the selected Tasks on the Work Plan:

Please note that no percentage value beside the Resource's initials reflects a 100% allocation.
-
Use this value: A custom percentage allocation can be entered into the field and applied to the selected Resources. For example, Brady and Josh's were updated to 80% on the left-hand:

If their allocations are edited on the left-hand Resource Sheet, they will be updated to 80% on all of their assigned Tasks:

- Use the resource's default allocation: The default allocations defined on the Resource's profiles will be applied. For example, Tim Stutzle has a default allocation of 50% on his Resource profile:
-
Click the Save button.
After clicking Save, the new allocations will be updated for each selected Resource on the left-hand Resource Sheet.
To edit the allocations of a Resource's selected Tasks using the Resource Sheet (right):
-
Open up a Project's Work Plan.
-
Choose a Resource from the "Select a Resource" drop-down menu on the right-hand side of the Resource Sheet:
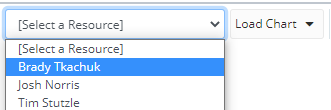
Note: If the drop-down menu next to the "Select a Resource" menu is set to "Load Chart" (as pictured above), make sure it is changed to "Task List":

-
Select which of the Resource's Tasks you would like to edit allocations for:
Tip: Selecting the top checkbox will select every Task in the table.
-
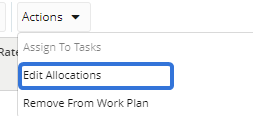
Select Edit Allocations from the "Actions" drop-down menu:
-
Decide how you would like to change the allocation towards the selected Task(s):
-
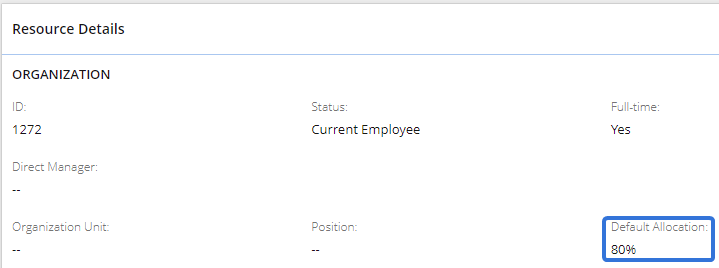
Use the resource's default allocation: The default allocations defined on the Resource's profiles will be applied. For example, Brady Tkachuk has a default allocation of 80% on his Resource profile:
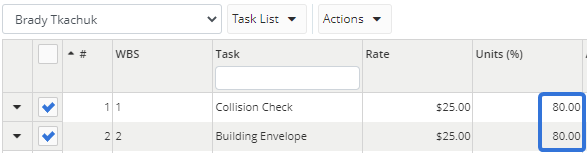
If he is being edited in the right-hand Resource Sheet, he will now have an allocation of 80% on all of the selected Tasks:
-
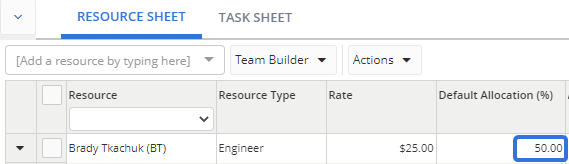
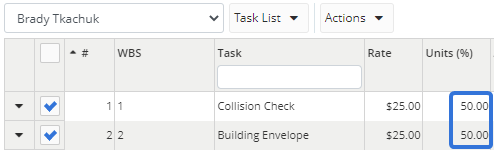
Use the resource's default allocation defined on this work plan: The Resource’s default allocation that is currently on the left-hand Resource Sheet will be applied to the selected Tasks. For example, Brady has a default allocation of 50% on the Resource Sheet:
If Brady is being edited in the right-hand Resource Sheet, he will now have an allocation of 50% on all the selected Tasks on the sheet:
-
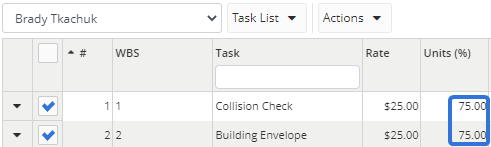
Use this value: A custom percentage allocation can be entered into the field and applied to the selected Tasks. For example, some of Brady's Tasks were selected to be updated to an allocation of 75:

All of his selected Tasks on the right-hand Resource Sheet will be changed to 75%:
-
-
Click the Save button.
After clicking Save, the new allocations will be updated for each selected Task on the right-hand Resource Sheet.
To edit the allocations of multiple Resources on a Task using the Task Sheet:
-
Open up a Project's Work Plan.
-
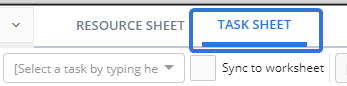
Select the Task Sheet tab:
-
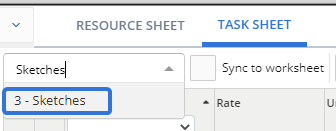
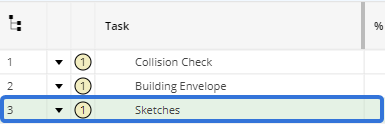
Select one of the Work Plan's Tasks by typing the name of the Task into the "Select a task...." textbox:
Note: If the "Sync to worksheet" checkbox (pictured above) is selected, you will need to select a Task by clicking on it in the worksheet:
-
Select which of the Task's Resources you would like to edit allocations for:
Tip: Selecting the top checkbox will select every Resource in the table.
-
Select Edit Allocations from the "Actions" drop-down menu:
-
Decide how you would like to change the allocation of the selected Resource(s):
-
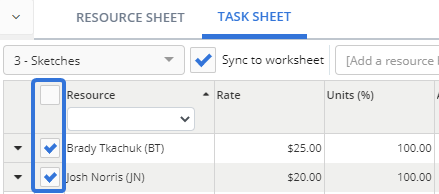
Use the resource's default allocation: The default allocations defined on the Resources' profiles will be applied to the Task. For example, Brady has a default allocation of 80% on his Resource profile:
Josh has a default allocation of 50% on his profile. If they are both selected on the Task Sheet, the default allocations from their profiles will reflect on the Task:
-
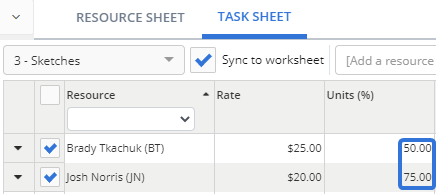
Use the resource's default allocation defined on this work plan: The Resource’s default allocation that is currently on the left-hand Resource Sheet will be applied to the selected Task. For example, Brady has a default allocation of 50% and Josh has a default allocation of 75% on the Resource Sheet:
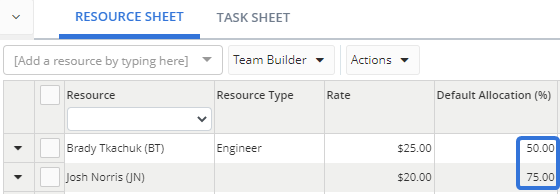
If they have been selected on the Task Sheet, their new allocations on the Task will reflect their default allocations from the Resource Sheet:
-
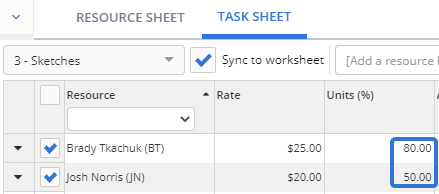
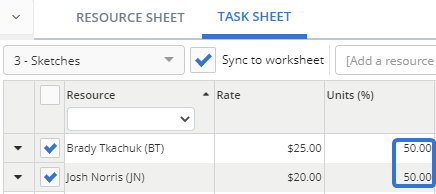
Use this value: A custom percentage allocation can be entered into the field and applied to the selected Resources. For example, Brady and Josh were both selected to have an allocation of 50:

Their allocations towards the Task will now both be 50%:
-
-
Click the Save button.
After clicking Save, the new allocations will be updated for each selected Resource on the Task Sheet.