Link/Unlink Tasks (Task Dependencies)
Through the Work Planner, users can simply manage the links between tasks. Linking tasks defines the dependencies between them. In other words, users can define which task starts after another. With the linking tasks functionality, you do not have to manually update your schedule whenever there are required changes. For example, if the deadline of a predecessor is pushed back or brought forward, the start and end dates of the linked task(s) will also be changed.
Note: When changes to the external predecessor occur, they must be accepted before they are applied to a task.
This page covers the following topics:
To link to an external predecessor
- Open the required Work Planner.
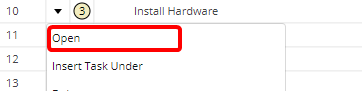
- Click the action arrow next to the task which you need to link to another external task (i.e., task from another project).
A drop-down menu is displayed.
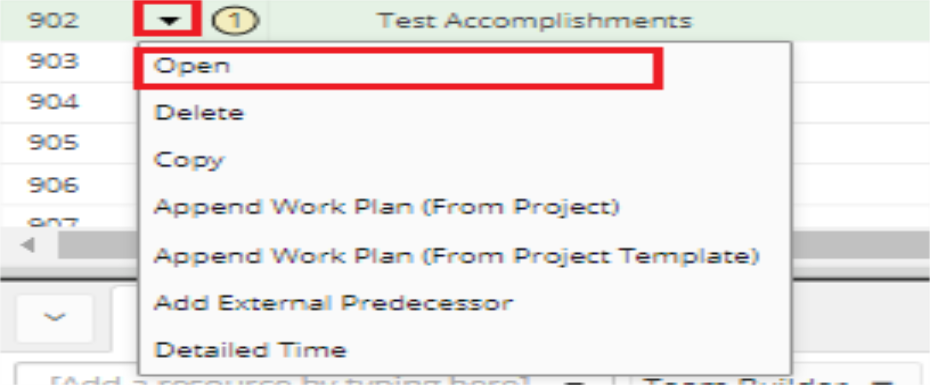
- From the drop-down menu, click Open.
The Task dialog box is displayed.

- Open the Predecessors tab.
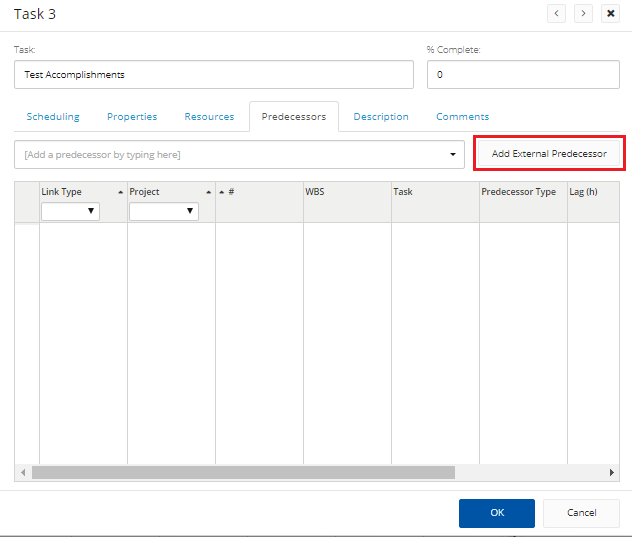
- Click the Add External Predecessor button.
The Add External Predecessor dialog box is displayed.
Tip: The previous steps allow you to check the current internal and external predecessors linked to the task, before taking any further actions.
For a quick add of an external predecessor, you can display the actions drop-down menu of the required task, and then click Add External Predecessor to open the Add External Predecessor dialog box.
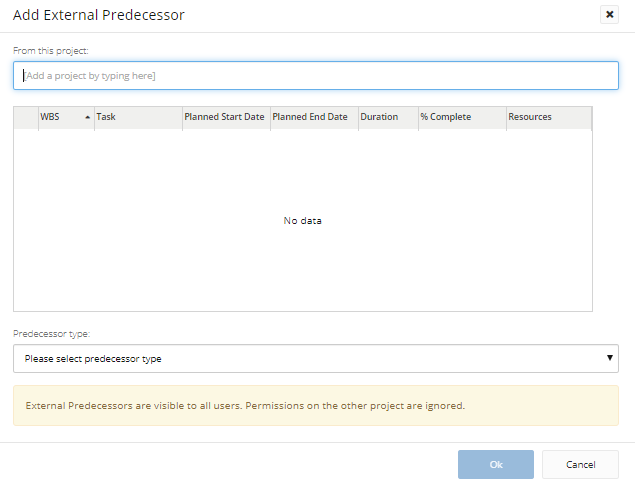
- In the From this project field, enter the name of the project (or part of it) from which you need to select an external predecessor.
A drop-down list of project names appears.
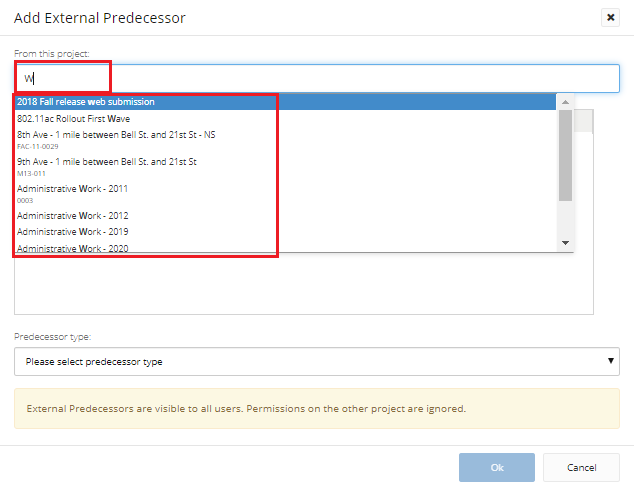
- From the drop-down list, click the name of the required project.
The tasks of the selected project appear in the grid.
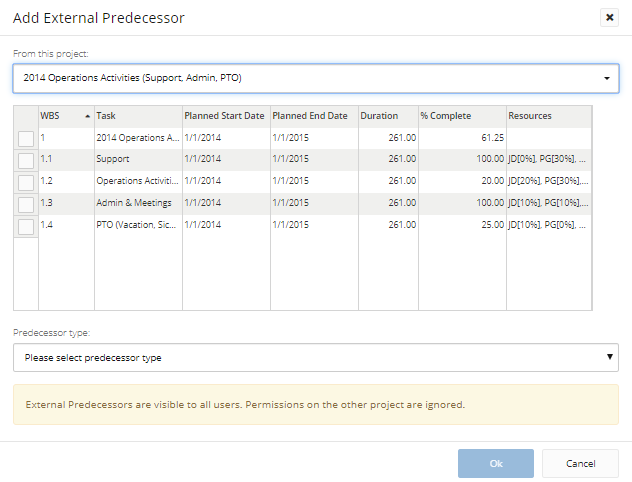
- Select the radio button next to the task to be linked as the external predecessor.
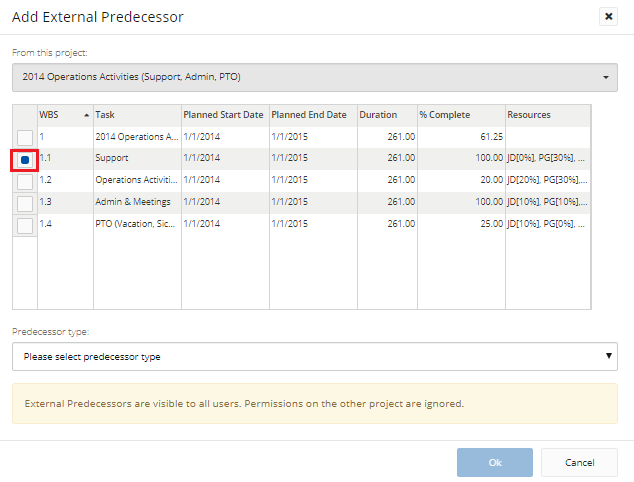
- The details of the external predecessor appear in the grid.
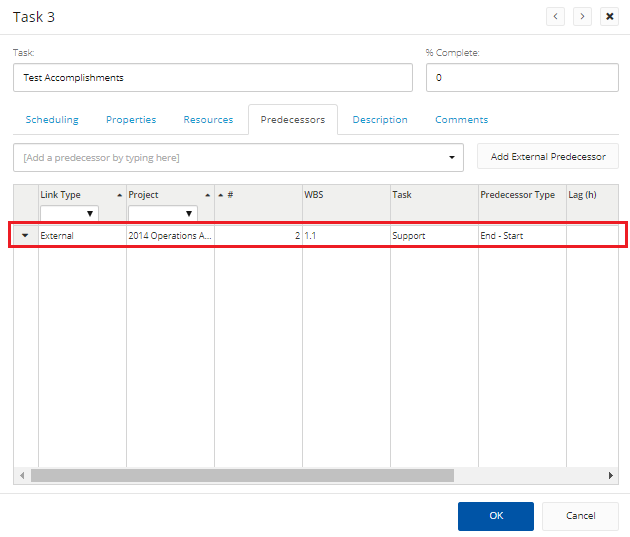
- In the row of the added external predecessor,
- Click in the Predecessor Type field of the added task, and then choose either End-Start or Start-Start to specify the required type of link.
-
In the Lag(h) field, enter the lag time in hours.
Note: Lag time is the amount of wait time between two tasks. This field represents the hours between the predecessor task and the successor task.
- Click OK.
Accepting or Rejecting External Predecessor Changes
If one of a task's external predecessors has changed, an indicator icon  will appear in the "Last Applied" column on the Predecessor tab. This indicates that the external predecessor has been changed since the last time you accepted changes:

Once a task's external predecessor has been changed, Eclipse PPM users have the option to either apply the changes to the task or ignore them.
To accept or ignore external predecessor changes:
-
Open the required Work Planner.
-
Click on a task's black arrow
 to open its drop-down menu.
 -
Select Open:
-
Select the "Predecessors" tab.
-
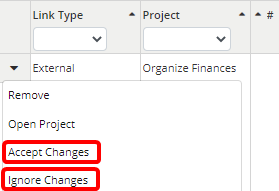
Select the black arrow
of the external predecessor with changes. -
Select Accept Changes to apply the new changes from the external predecessor to your task
OR
Select Ignore Changes to ignore the changes from the external predecessor.
Note: Both of these options will only appear for external predecessors that have been changed since the last time any changes were applied from it.
-
Click the OK button.
Note: Clicking the Cancel button or the X button will discard any changes.
After clicking OK, the changes from the external predecessor will either be accepted or ignored.
To link to an internal predecessor
- Open the required Work Planner.
- Click the action arrow next to the task which you need to link to another internal task (i.e., task in the same work plan).
A drop-down menu is displayed.

- From the drop-down menu, click Open.
The Task dialog box is displayed.
- Open the Predecessors tab.
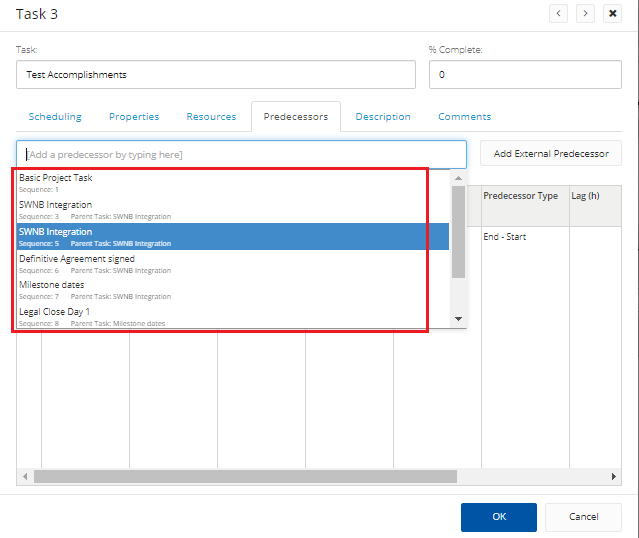
- Click in the Add a predecessor by typing here field.
A drop-down list of all internal tasks is displayed. - From the drop-down list, click the name of the task you need to add as the internal predecessor.
- The details of the internal predecessor appear in the grid.
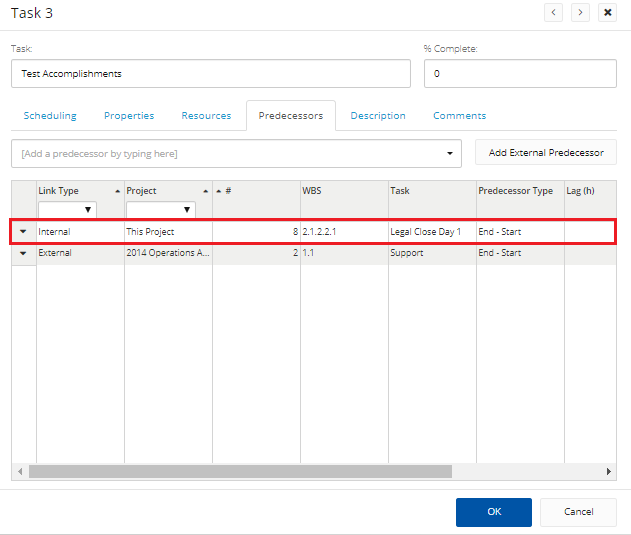
- In the row of the added internal predecessor,
- Click in the Predecessor Type field of the added task, and then choose either End-Start or Start-Start to specify the required type of link.
- In the Lag(h) field, enter the lag time ion hours.
- Click OK.
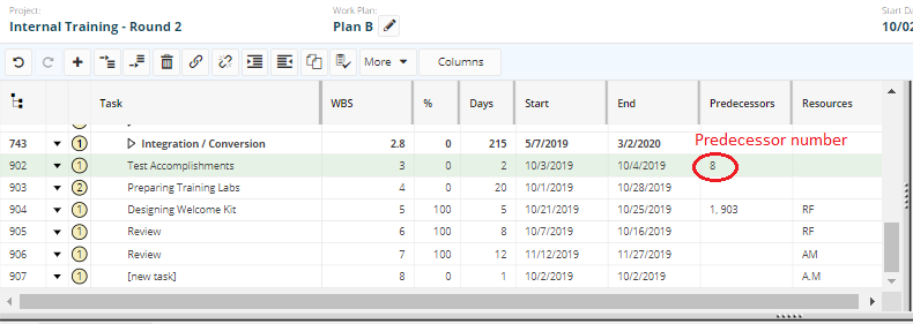
The task number of the predecessor appears in the Predecessors field in the row of the selected task.
To link more than 2 tasks at a time
- Open the required work planner.
- Press the CTRL key and start selecting the row of each task you need to link together.
Note: Remember to keep the CTRL key pressed until you finish selecting all the tasks to be linked.
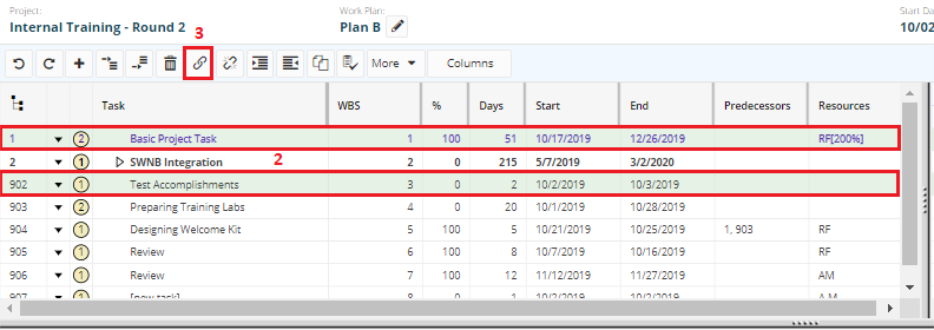
- Click the Link Tasks icon
 found in the actions bar at the top of the grid.
- The dependency order of the selected tasks (i.e., which is the predecessor of the other) is set, automatically, as per the order of these tasks in the grid. For example, the first task will be the predecessor of the second and the second will be the predecessor of the third and so on. The relation between them will be set automatically as End-Start.
- The task number of the predecessor appears in the Predecessors field next to each task.
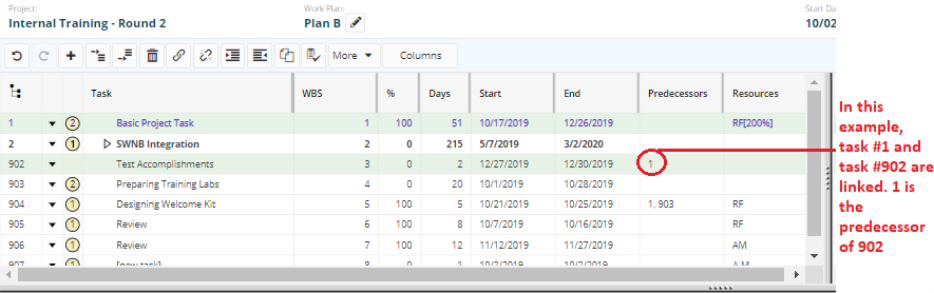
Tip: You can always change the dependency order (i.e., the predecessor of a task) by clicking inside the Predecessors field, as shown in the next figure, and then replace the task number of the current predecessor with the number of the new predecessor.
Tip: To edit any of the details of the linked tasks, please refer to the Edit Task Details article.
Tip: Whenever required, use the Undo  and the Redo
  icons.
Note: Before closing the work planner, always make sure you click Save after you take all necessary actions.
To unlink tasks
- Open the required work planner.
- Press the CTRL key and start selecting the row of each task you need to unlink.
Note: Remember to keep the CTRL key pressed until you finish selecting all the required tasks.

- Click the Unlink Tasks icon
 found in the actions bar at the top of the grid.
The predecessor number disappears.

Tip: Whenever required, use the Undo and the Redo icons.
Tip: Another way of unlinking tasks is to remove the predecessor number manually.
Note: Before closing the work planner, always make sure you click Save after you take all necessary actions.