-
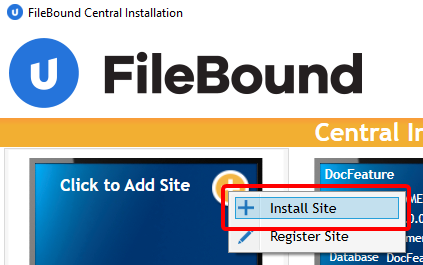
Click the + button next to Click to Add Site, then select Install Site.

- Type the authorization code in the box, then click Next.
Note: Contact FileBound Support or your Customer Success Manager if you do not have an authorization code.
- Select the FileBound version you want to install, then click Next.
If the version of a FileBound is previously installed, Yes appears under the Downloaded column for that version.
Tip: You can view the release notes for a version by double-clicking the link under the Release Notes column.

- Ensure all the prerequisites listed are available on the system, then click Next.
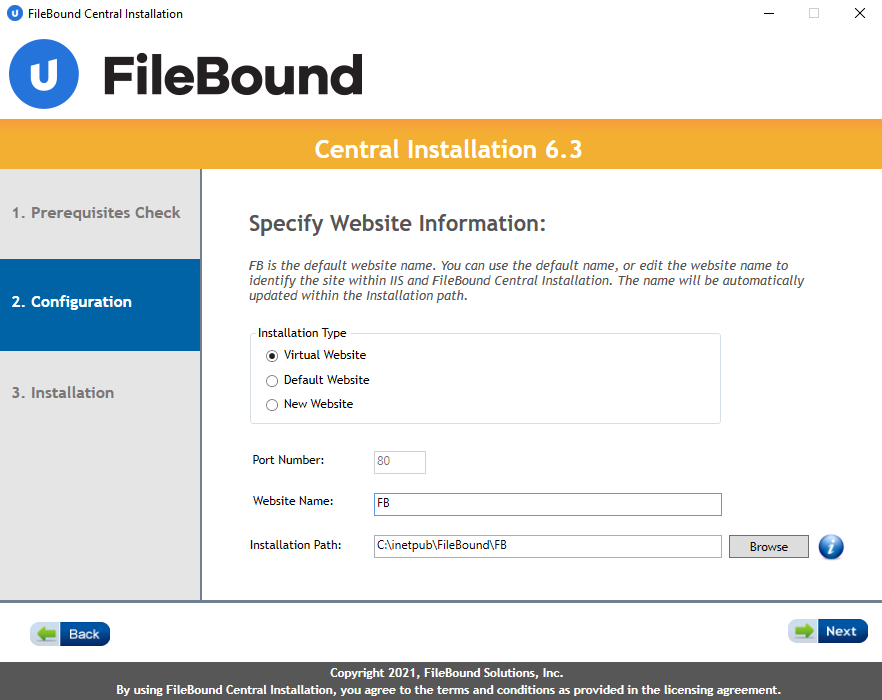
- Select an Installation Type. The following options are available:
- Virtual Website: Adds a virtual website.
- Default Website: Adds a default website.
- New Website: Adds a new website.
- Type a name for the site in the Website Name box.
- Click Browse to specify a location for the installation.
- In the Browse For Folder dialog box, select a location where you want install the FileBound site, then click OK.
- Click Next.

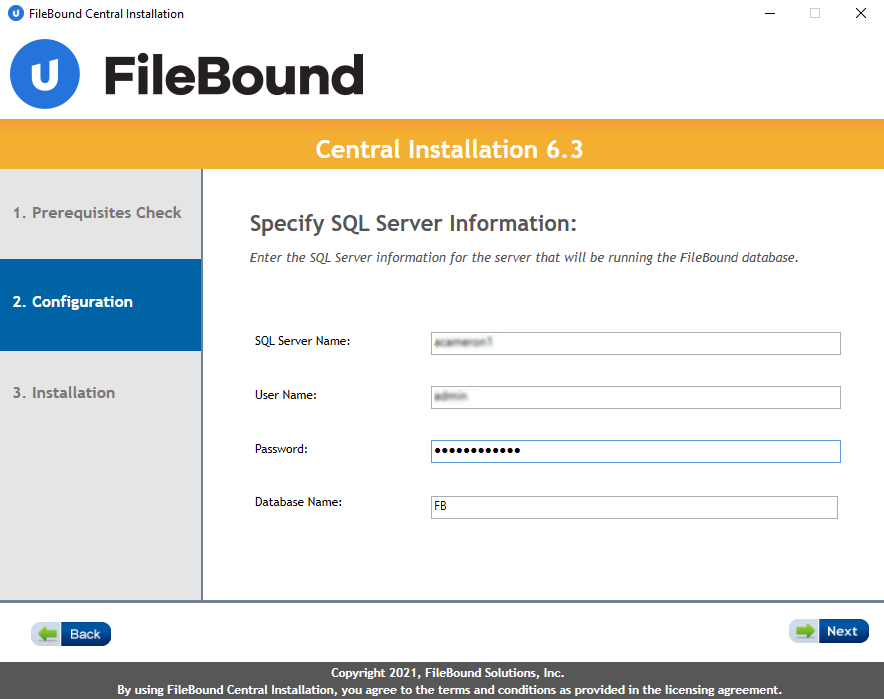
- Type the name of the server in the SQL Server Name box.
- Type the user name for the SQL server in the User Name box.
- Type the password for the SQL server in the Password box.
- Type the name of the database in the Database Name box.
- Click Next.

-
Select Yes, to use SSL on the FileBound website, then click Next.
Tip: If the FileBound server will be accessible to the Internet, it is recommended that Secure Socket Layer (SSL) be used on the FileBound website.
- Click Browseto specify a location to store all the documents and images that are uploaded to FileBound.
- In the Browse For Folder dialog box, select a document storage location, then click OK.
- Click Next.
- Verify the information provided for the installation, then click Next.
- Click Next to start the installation process. The required FileBound version will be downloaded, if it was not downloaded earlier.
- Click Next to return to the main screen after the installation is complete.