COLD overlays assist in viewing documents that include pre-printed forms, such as invoices, customer bills, shipping and receiving documents, and reports.
If you are printing onto specialty paper with a pre-printed background such as a check, an overlay allows you to "re-create" the printed check without scanning it. By storing the information that is printed onto the check as a text file, an overlay allows you to combine a scan of the blank pre-printed image with the text that is printed and view it digitally without rescanning the printed check.
Once an overlay has been created, you can configure its text spacing and display properties. You can view documents with the overlay applied in a Viewer.
Note: Overlays only apply to documents in text (*.txt) format.
Topics include:
Add an overlay
- On the Navigation menu, click Administration, then click Projects.
- Click Edit next to the project you want to add an overlay for.
- Select COLD Overlays from the Configuration list.
-
Click Add.

-
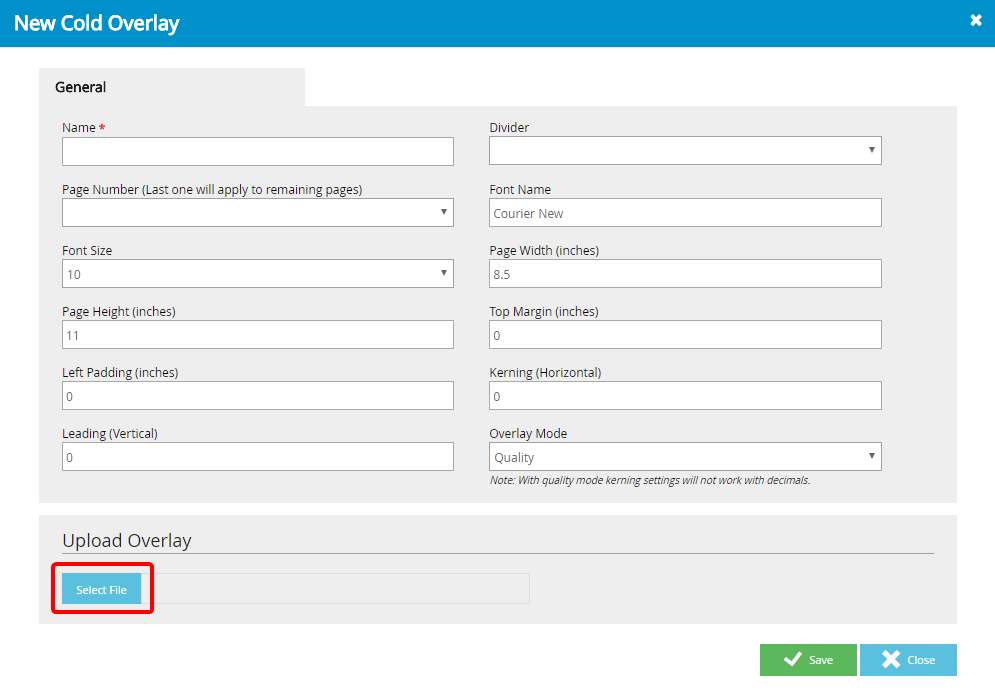
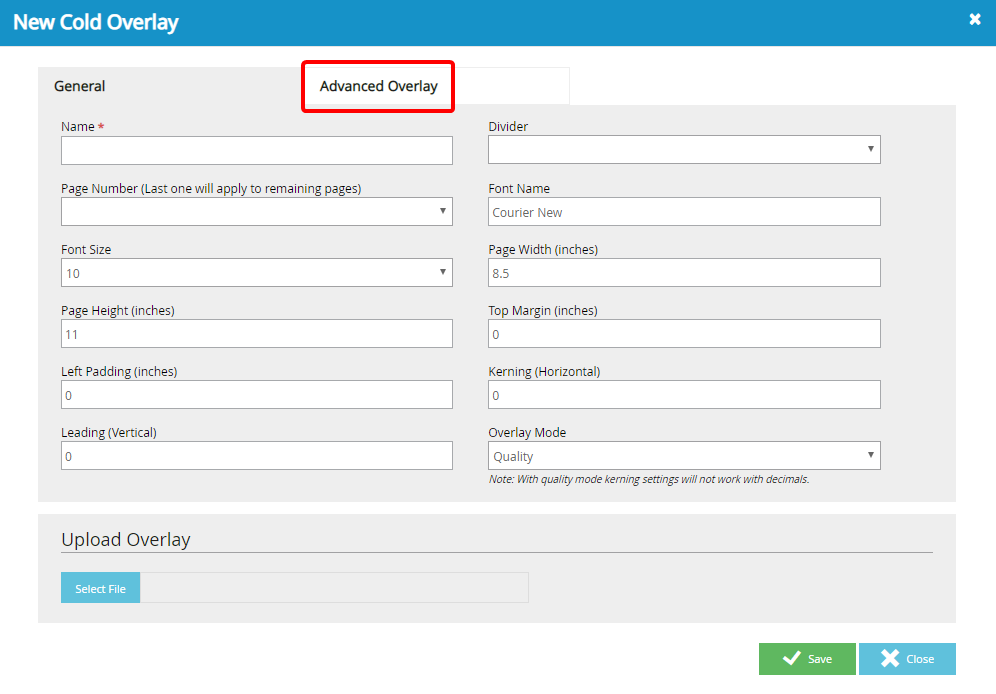
In the New Cold Overlay dialog box, configure the overlay on the General tab. You can add an advanced overlay created by in an external overlay designer using the Advanced Overlay tab. See Add an advanced overlay for more information.

Name: A name for the overlay.
Dividers: The overlay will be applied to all the documents within the selected divider.
Page Number: Designates the page that the overlay should start to be applied. The overlay will apply to all of the following pages unless a new overlay is created for subsequent page numbers.
Font Name: The name of the font to be used in the overlay.
Tip: To view the text files properly, it is recommended to use mono-spaced fonts such as Couriers, Monaco, and Prestige Elite.
Font Size: The size of the font to be used in the overlay.
Page Width: The width of the overlay. The default width of the overlay is 8.5 inches.
Page Height: The height of the overlay. The default height of the overlay is 11 inches.
Top Margin: The top margin for the overlay.
Left Padding: The left padding size of the overlay. The default value for the left padding size is 2 inches.
Kerning: The horizontal spacing between two letters of the overlay.
Leading: The vertical spacing between lines of the overlay.
Overlay Mode: Determines how the spacing between two letters will be adjusted. The following options are available:
- Quality: Applies default spacing between two letters.If this option is selected, the value specified in the Kerning box is not applied.
- Kerning: Uses the value specified in the Kerning box to adjust the horizontal space between two letters.
-
Click Select File.

-
In the Open dialog box, select the JPEG file you want to use as the overlay, then click Open.
Note: Overlay provides background to the text files. To set the text on the overlay properly, the basic text spacing adjustment and page setup must be done within the text file.
- Click Save.
Add an advanced overlay
The Advanced Overlay tab allows Administrators to implement overlays that were created in an external overlay designer.
- On the Navigation menu, click Administration, then click Projects.
- Click Edit next to the project you want to add an overlay for.
- Select COLD Overlays from the Configuration list.
-
Click Add.

-
In the New Cold Overlay dialog box, click the Advanced Overlay tab.

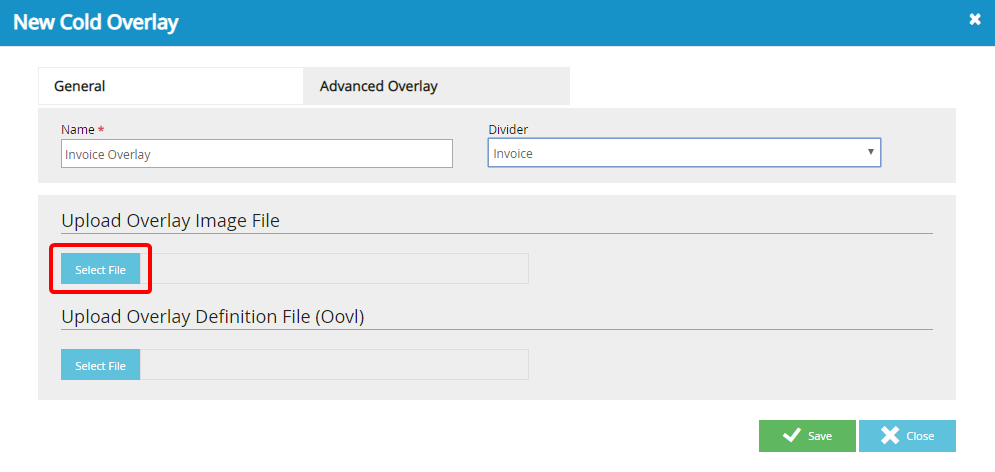
- Enter a name for the overlay in the Name box.
- Select a divider from the Divider list to apply the overlay to all documents in the divider.
-
In the Upload Overlay Image File section, click Select File.

- In the Open dialog box, select the JPEG file you want to use as the overlay, then click Open.
-
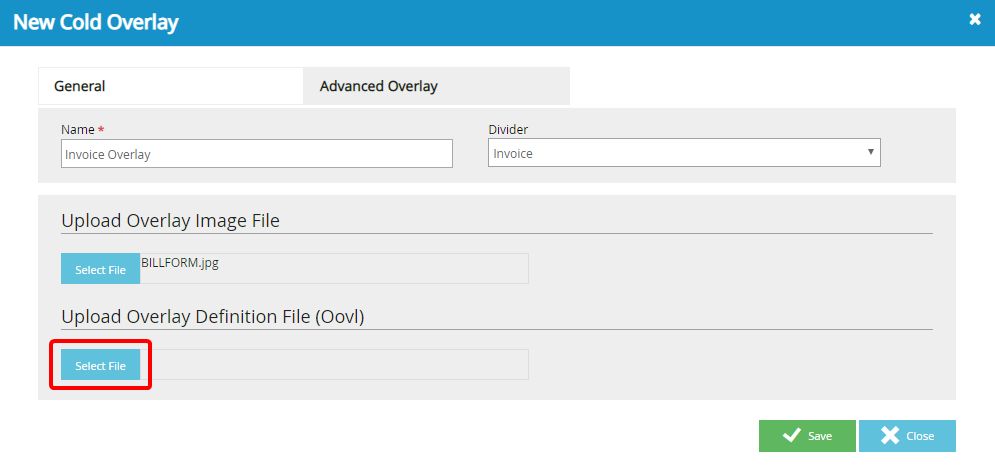
In the Upload Overlay Definition File (Oovl) section, click Select File.

- In the Open dialog box, select the definition file from the external overlay designer (.oovl), then click Open.
- Click Save.
Edit an overlay
- On the Navigation menu, click Administration, then click Projects.
- Click Edit next to the project you want to edit an overlay for.
- Select COLD Overlays from the Configuration list.
-
Click Edit next to the overlay you want to edit.

- Edit the overlay as necessary, then click Save.
Delete an overlay
- On the Navigation menu, click Administration, then click Projects.
- Click Edit next to the project you want to delete an overlay from.
- Select COLD Overlays from the Configuration list.
-
Click Delete next to the overlay you want to delete.

- Click Delete to confirm the deletion.
Delete multiple overlays
-
Click Delete.

-
Select the check box next to the overlay(s) you want to delete, then click Delete.

- Click Delete to confirm the deletion.