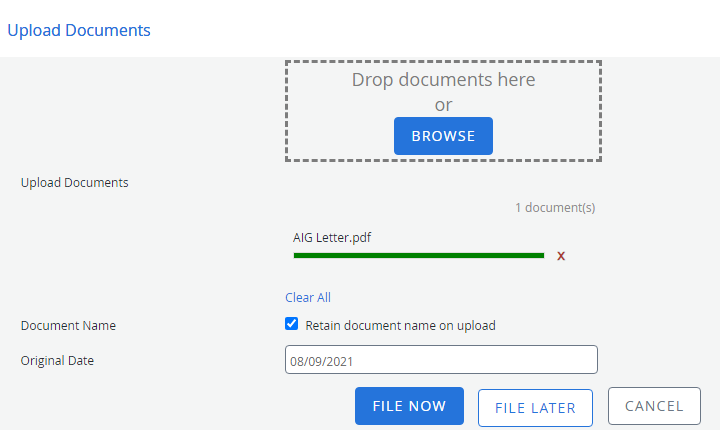
In FileBound, you can add files or files with documents. Content can be uploaded in multiple ways. The Add Content page is one of the methods that is used to add content into FileBound.
There are three options available when adding content directly into FileBound:
- File Entry: Creates a new file in the selected project.
- Scan Documents: Allows you to scan documents and save them to a file.
- Upload Documents: Allows you to select the documents that will be added to the file. The documents can be indexed right away or held in the Indexing Queue for later indexing.
You must belong to a group that has permissions enabled by a System Administrator to perform these tasks.
Add a file
A file, in FileBound, is a searchable container for various types of related documents. From the Add Content page, you can easily add new files to a project.
- On the Navigation menu, click Add Content, then click File Entry.
- Select a project from the Project list.
- The index fields for the selected project will display. Specify index field values.
-
Select the Remember Fields check box, to have the system remember values for the next entry. This option works when you click Save and Add Another.
-
Select an option for Options. The following options are available:
 File Entry
Creates a new file that contains no documents.
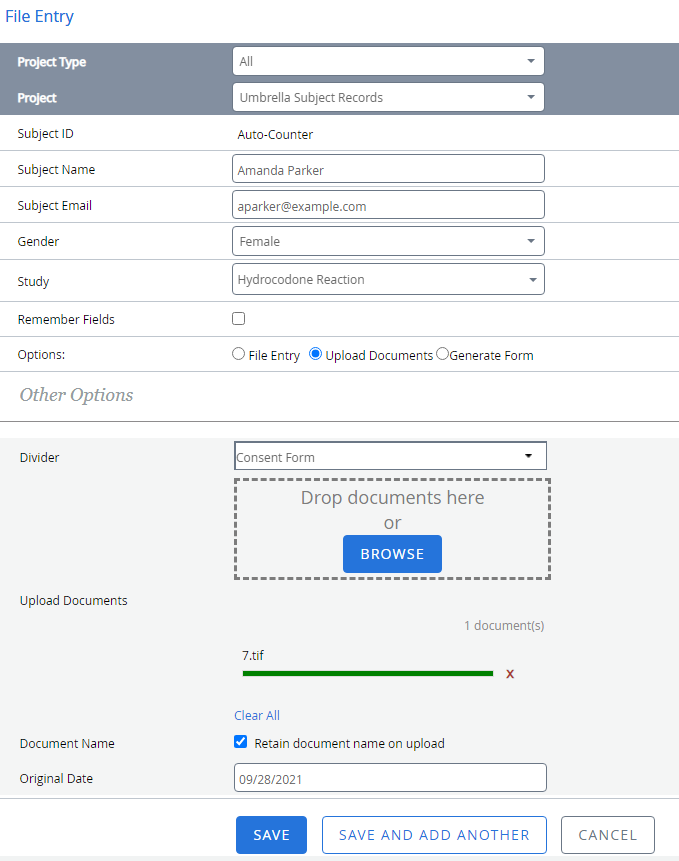
 Upload Documents
If you select this option, an Other Options section will display.
- If separators are enabled for the project, select a separator that you want to place the uploaded document in from the Separator drop-down list.
- Select a divider that you want to place the uploaded document in from the Divider drop-down list.
- Click Browse to select the documents you want to upload or move documents to the Upload Documents area using a drag-and-drop operation.
- Select the Retain document name on upload check box, to keep the name of the document the same. If this check box is disabled, the document name will be a page number; such as Page0001.
- Modify the Original Date if needed.
 Generate Form
Generates a form with the values specified for the index fields.
If you select this option, an Other Options section will display.
- Select the form you want to generate for the file from the Select Form list.
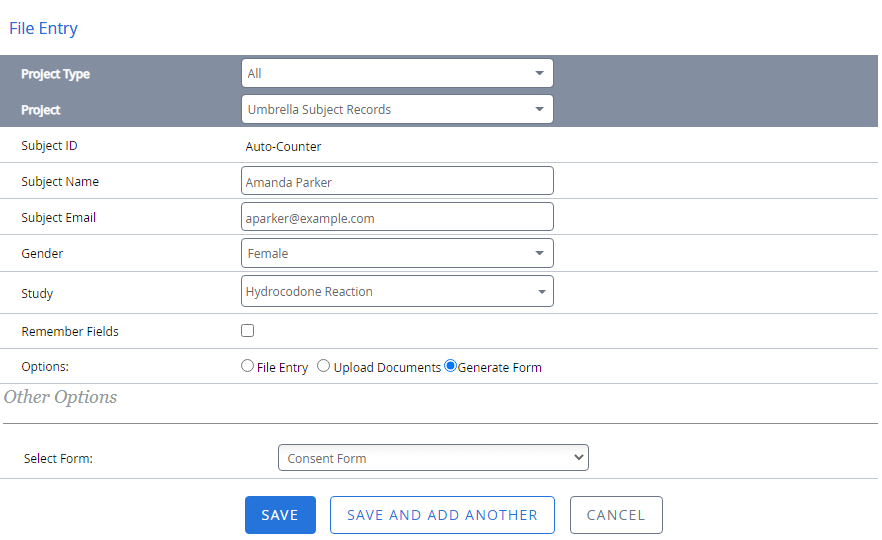
- Click Save or click Save and Add Another, to save the box entry and add another entry.
Scan documents into FileBound
In FileBound, you can add content in multiple ways. One of these methods is to scan documents directly into FileBound. You can scan documents with or without the dialog box that allows you to modify scanner settings.
Note: Scanning functionality requires the Windows Viewer plug-in to be installed.
Scan With Dialog
Scanning with dialog allows you to configure scanner settings prior to scanning documents.
- Place the document(s) you want to scan in your scanner.
- On the Navigation menu, click Add Content, then click Scan Documents.
-
If you do not have the Windows Viewer installed and this is your first time scanning, click Get Scan Viewer Launcher to download and install the Scan Viewer Launcher. Otherwise, click Start Scanning.
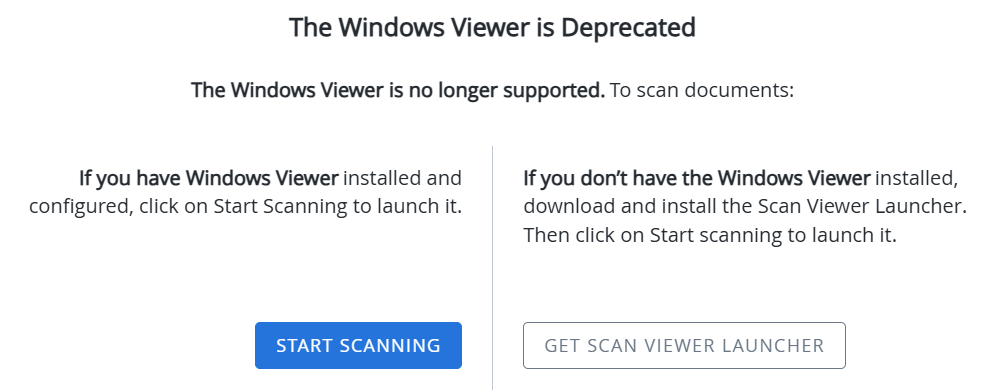
-
In the Scanning Viewer window, select the Scan With Dialog option from the Scan Page(s) menu.

- Make required changes to the scanner settings in the scanner settings dialog.
- Click OK to scan pages.
-
Click Save Batch.
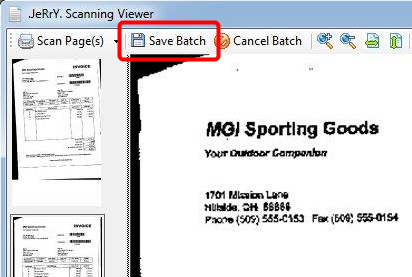
Scan Without Dialog
When you scan without dialog, pages will be scanned using the existing scanner settings.
-
Place the document(s) you want to scan in your scanner.
-
On the Navigation menu, click Add Content, then click Scan Documents.
-
If you do not have the Windows Viewer installed and this is your first time scanning, click Get Scan Viewer Launcher to download and install the Scan Viewer Launcher. Otherwise, click Start Scanning.

-
Select the Scan Without Dialog option from the Scan Page(s) menu and the scanner will start scanning pages.

-
Click Save Batch.

Upload documents into FileBound
- On the Navigation menu, click Add Content, then click Upload Documents.
- Drag and drop documents on the Upload Documents section or click Browse to select the documents you want to upload.
- Select the Retain document name on upload check box to keep the name of the document. If this check box is not selected, the document name will be a page number; such as Page0001.
- The Original Date defaults to today's date. Edit this field if necessary.
-
Click File Now to add index field values for the document or click File Later to upload the document to the Indexing Queue.
