File tracking
File Tracking allows users to track which physical file is checked out, who has requested the file, and when the file was checked in. It also allows for an audit trail of who has the physical file. Under the Tracking tab, you can check-out and / or check-in the file to a user as per the requirement. You can view which user checked-out the file, the date, and the reason for check-out. Check out is a useful for keeping track of the user details who owns the physical files. This information is displayed in the File Tracking report.
Topics include:
Check out a file
- Open the File Detail page.
- Click Tracking, then select Check Out File.
- Select the users that you want to check out the file to from the Checkout To drop-down list.
- Select the user checking out the file from the Check Out by drop-down list.
![]()
- Select a reason for check out from the Reason drop-down list.
- Select a date to destruct the file in the Destruction Date field.
Note: The destruction date can be set at any point throughout the life cycle of the physical file.
- Click Check Out File(s).
The check out history is updated under the Tracking tab.
![]()
Request a file
If a file is currently checked out, you can leave a request for the file so that you can receive it once it’s been checked in. You can request a hard copy, a digital copy, or a fax of a file. Only one file can be requested at a time. You can view the requested file under the Requests Pending section in the File Detail page. This information is displayed in the File Tracking report.
- Open the File Detail page.
- Click Tracking, then select Request File.
- Select the date that you need the file in the Date / Time Needed field.
- Select the reason for request from the Reason drop-down list.
- Select the check box next to the format(s) in which you would like to receive the file in.
- Type the number of pages in the Pages Requested box.
-
Click Request File(s).
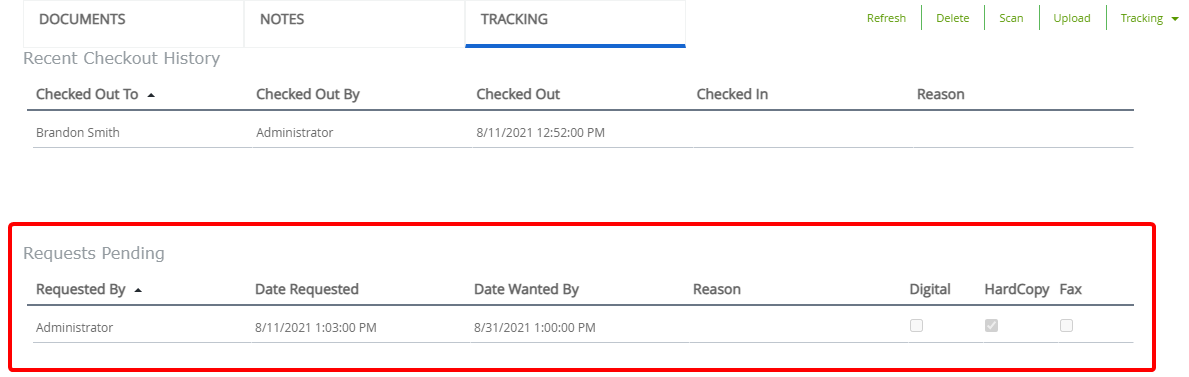
The request shows in the Request Pending section under the Tracking tab.

Transfer a file
Once a file is checked out, you can transfer it to another user in the same group.
Example: For example, User A wants to look at a physical invoice, they would check that file out through the system and take the invoice. If the invoice needs to be transferred to User B for review, User A can transfer the same invoice file to User B using the file transfer option in FileBound.
- Open the File Detail page.
- Click Tracking, then select Transfer File.
-
Select the users that you want to check out the file to from the Checkout To drop-down list.
-
Select the user checking out the file from the Check Out by drop-down list.
-
Select a reason for check out from the Reason drop-down list.
-
Select a date to destruct the file in the Destruction Date field.
![]()
Note: The destruction date can be set at any point throughout the life cycle of the physical file.
- Click Check Out Files.
The check out history is updated under the Tracking tab.
