Fixed plug-ins are provided along with FileBound installation. The System Administrator can add plug-ins at project level. The functionality offered by a plug-in is limited to the project within which the plug-in is created or enabled.
To Add a plug-in for a project.
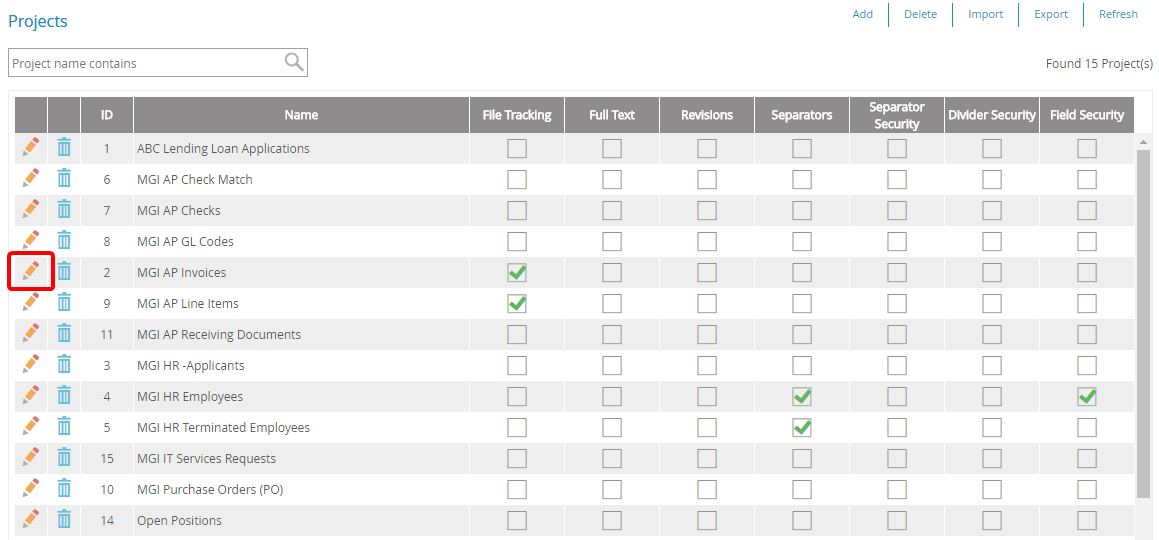
- Navigate to the Projects page in the Main Options.
- Click the Edit icon
 adjacent to the project you want to edit.
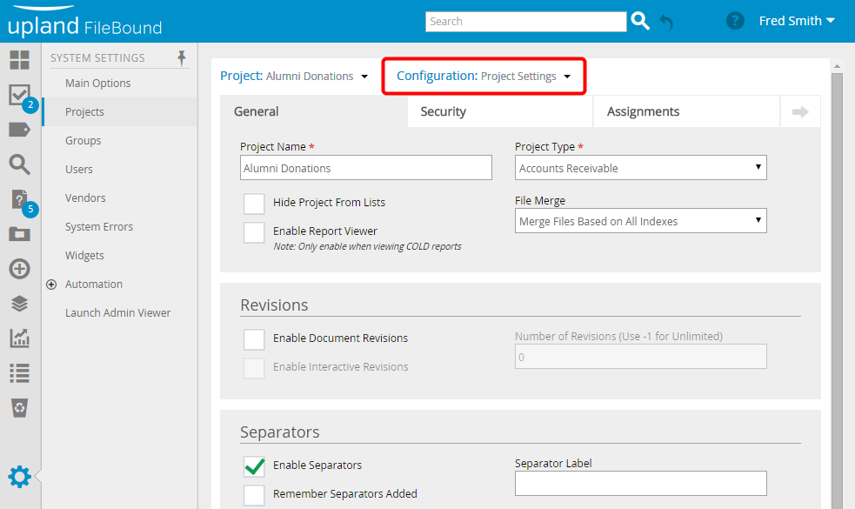
 - Select Plug-ins in the Configuration list.
- Click Add.
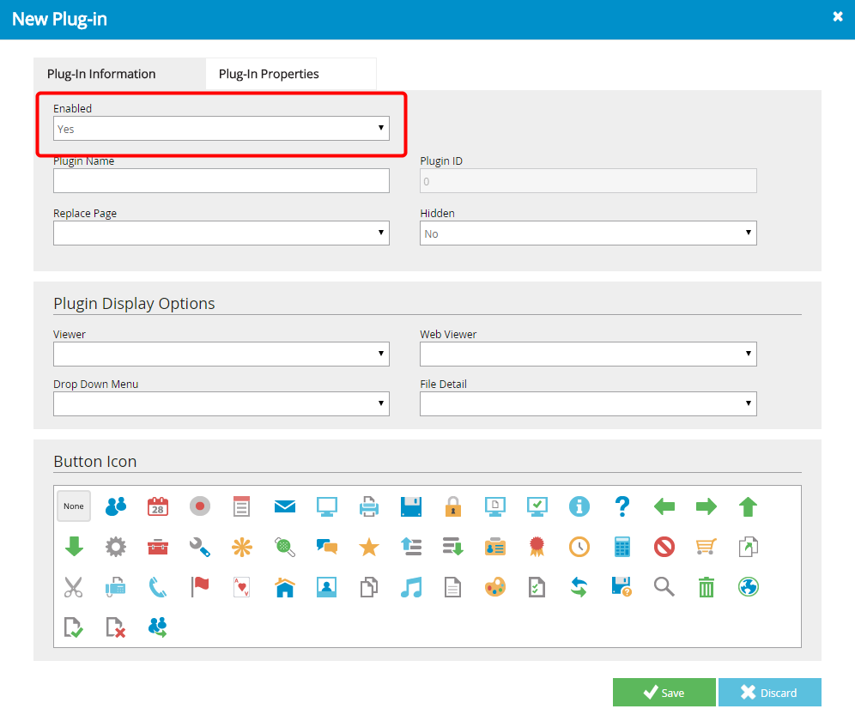
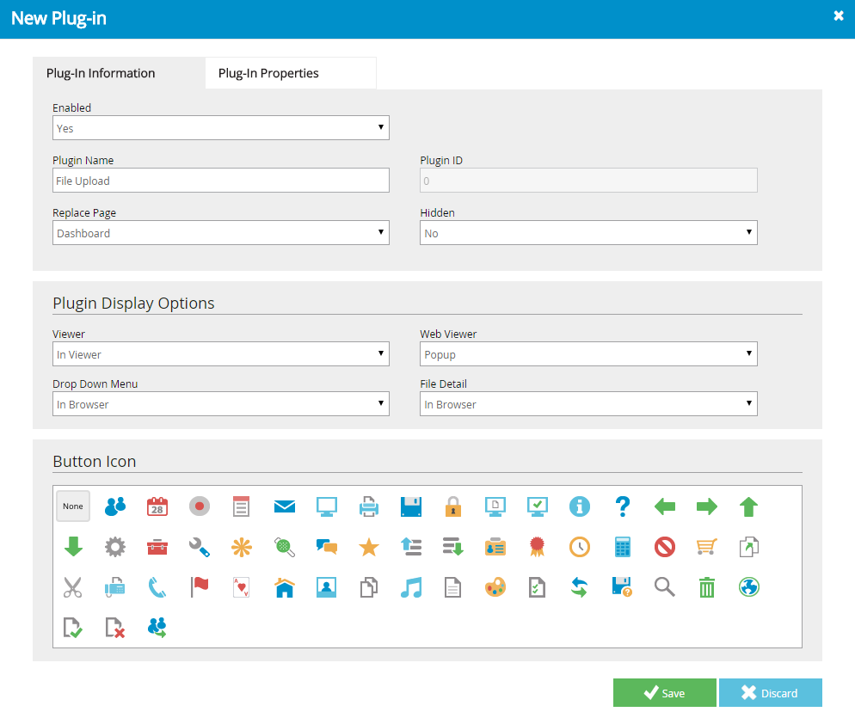
- Select an option in the Enabled list.
- Type a name for the plug-in in the Plugin Name box.
- Select an option in the Replace Page list.
The project configuration page is displayed.
The New Plug-in dialog box is displayed.

You can select Yes from the list to enable the plug-in or No to disable the plug-in.
By default, Yes is selected from the Enabled list.
The plug-in ID is automatically assigned by the system when you click Save.
Some plug-ins are designed to be accessible within the plug-ins pane in the document viewers. If the plug-in you are adding is to appear within this area set this to "Visible".
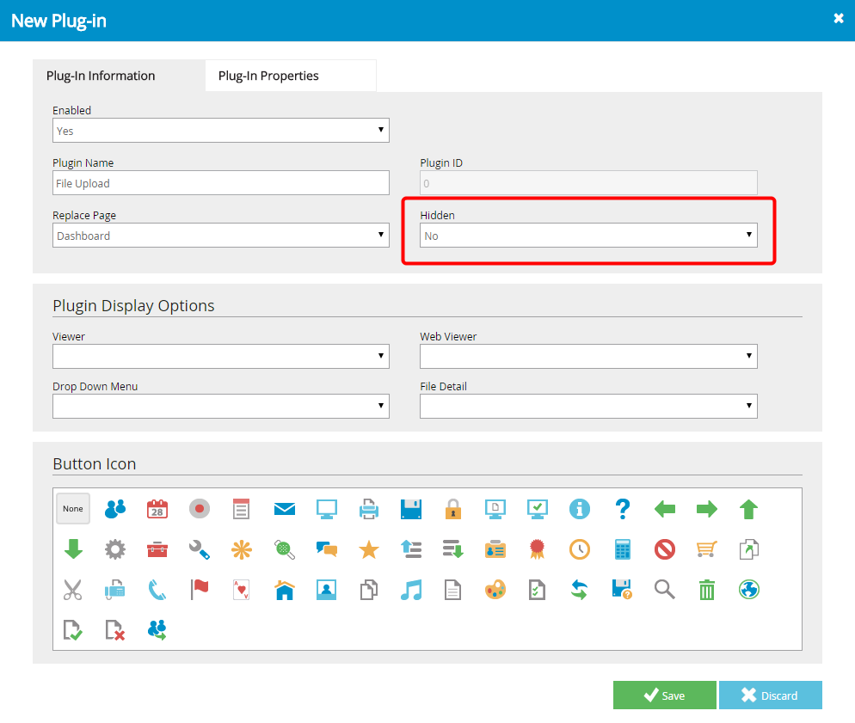
- Select an option in the Hidden list.
You can select No to make the plug-in visible or select Yes to hide the plug-in.
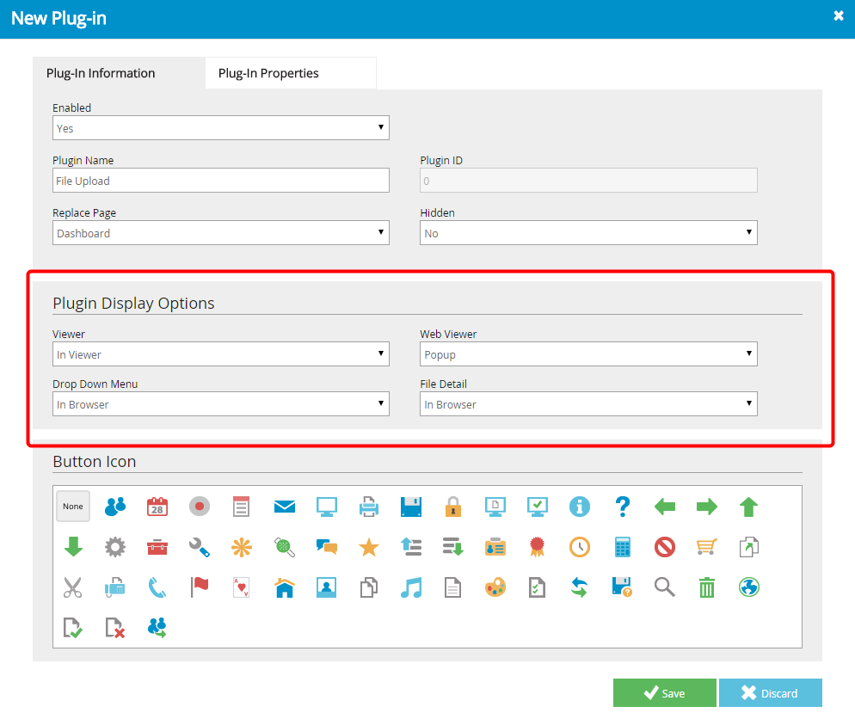
In the Plug-in Display Options section, FileBound provides an option for the plug-in to be displayed. You can specify how the plug-in will be displayed at specific locations of FileBound.
- Select how the plug-in can be viewed within the Viewer in the Viewer list.
- In Browser - This option allows the plug-in to open in a new tab within a browser.
- In Viewer - This option allows the plug-in to open within the Viewer.
- Passive Popup - This option allows the plug-in to open in a separate pop-up window that appears on top of the window where the plug-in was activated.
- Forced Popup - This option allows the plug-in to open within the Viewer. When the viewer loads it automatically opens a pop-up window displaying the plug-in.
The Viewer list has the following options:
- Select how the plug-in can be viewed with the Web Viewer from the Web Viewer list.
The Web Viewer list provides the following options:
- Popup - This option allows the plug-in to open in a separate pop-up window that appears on top of the window where the plug-in was activated.
- Select how the plug-in is displayed on the File Details page in the File Detail list.
The File Detail list provides the following options:
- In Browser - This option allows the plug-in to opens in a new tab within a browser.
- Popup - This option allows the plug-in to open in a separate pop-up window that appears on the top of the window where the plug-in was activated.
- You can specify an icon to be displayed for the plug-in button.
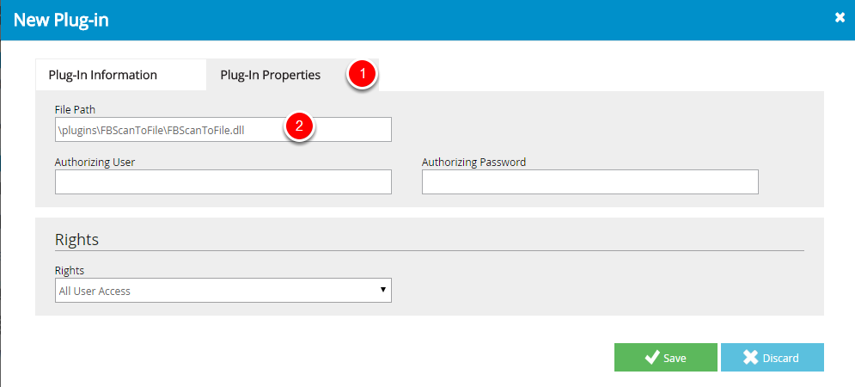
- Click the Plug-In Properties tab.
- Type the location or path of the plug-in file in the File Path box.
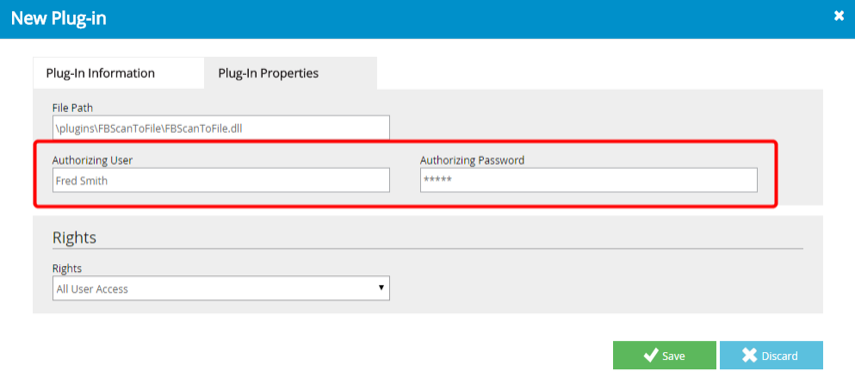
- For some specific plug-ins, you may be required to provide authorized user name and password to use the plug-in.
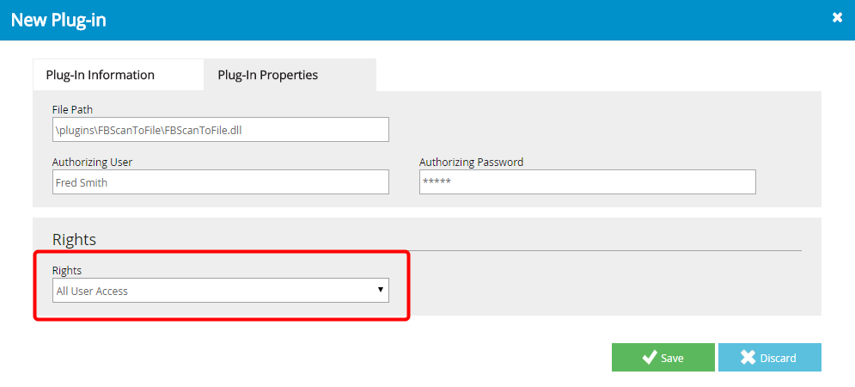
- You can specify the users who can access the plug-in.
- Select the users who can access the plug-in in the Rights list.
Select the icon you want to set for the plug-in from the Button Icon section.
The selected icon is displayed with the plug-in name.
The button for the plug-in does not have an icon, if the option button None is selected.
The following users can be selected:
- All User Access - access to all the FileBound users.
- Admin Only Access - access to System Administrators and Project Administrators.
- Group Level Access - access to selected groups.
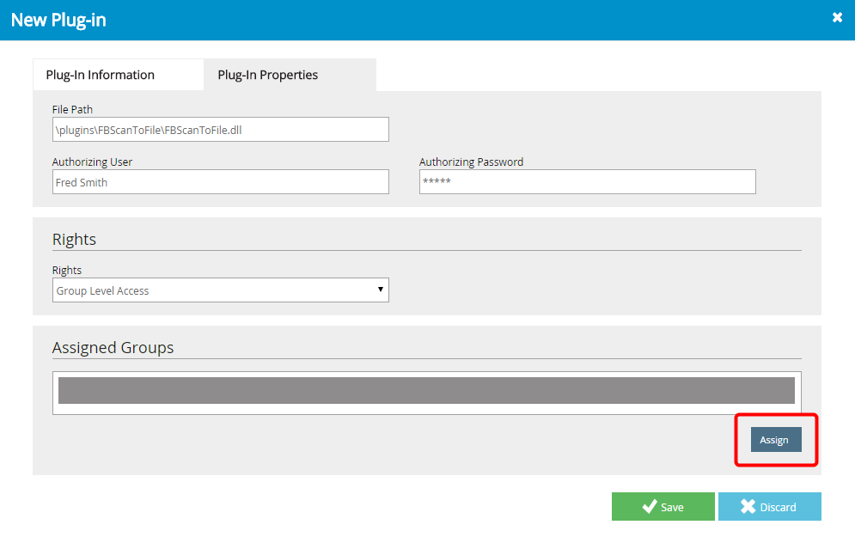
If you have selected group level access, then you are required to select one or more groups from Project Groups.
- Specify one or more project groups, if you have set group level access from the Rights list.
- Click Assign within the Assigned Groups section.
The Assign Groups dialog is displayed.
- Click Save.
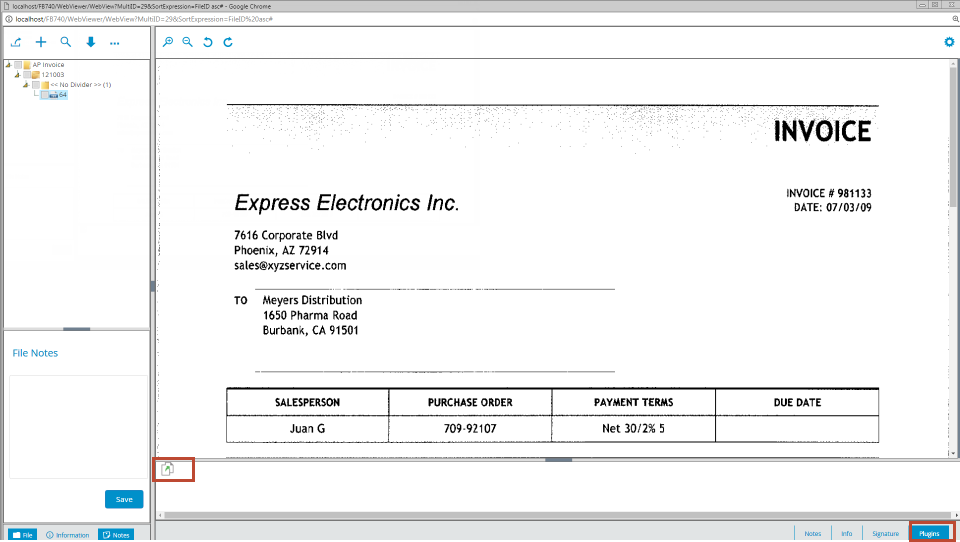
The Plug-in details are saved and the Plug-ins tab is visible in File Details page.

The Plug-in section is also enabled in the Web Viewer.
Menu