You can add documents to a file from the Web Viewer.
-
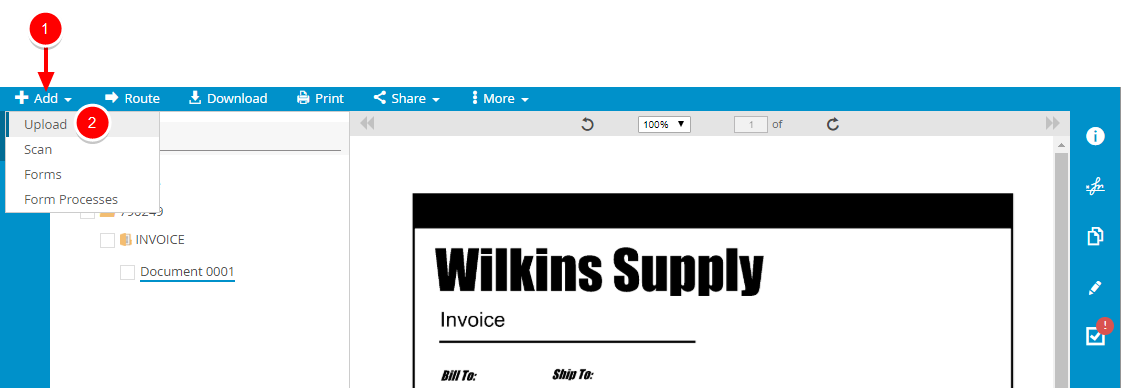
On the File Toolbar, click Add, then click Upload.

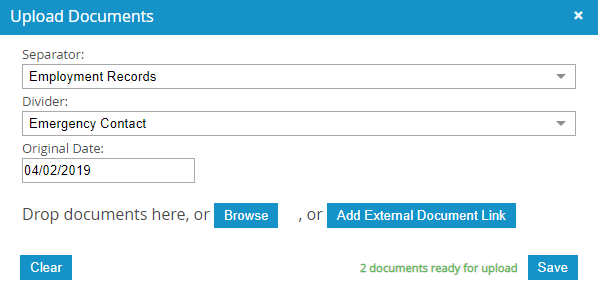
- In the Upload Documents dialog box, if separators are enabled for the project, select a separator that you want to place the uploaded document in from the Separator list.
-
Select a divider that you want to place the uploaded document in from the Divider list.
Note: The default separator/divider can be selected from the Separator and Divider lists regardless of group rights; however, a user who does not have access to the default separator or divider will not be able to view documents that have been uploaded to them. - Modify the Original Date if needed.
- Click Browse to locate the document(s) you want to upload or move the document(s) to the upload area using a drag-and-drop operation.
-
Click Save.

Add an External Document Link
An external document link can be added to FileBound to reference documents in external locations, such as Google Drive™ or SharePoint® Online.
-
On the File Toolbar, click Add, then click Upload.

- In the Upload Documents dialog box, if separators are enabled for the project, select a separator that you want to place the external document link in from the Separator list.
-
Select a divider that you want to place the external document link in from the Divider list.
Note: The default separator/divider can be selected from the Separator and Divider lists regardless of group rights; however, a user who does not have access to the default separator or divider will not be able to view documents that have been uploaded to them. - Modify the Original Date if needed.
-
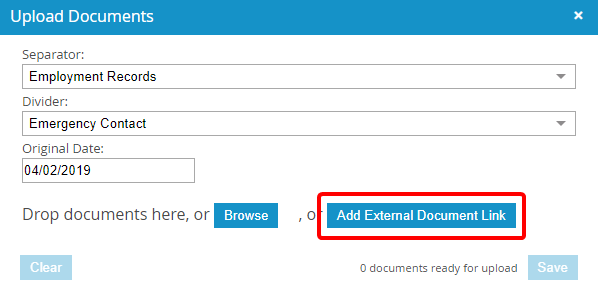
Click Add External Document Link.

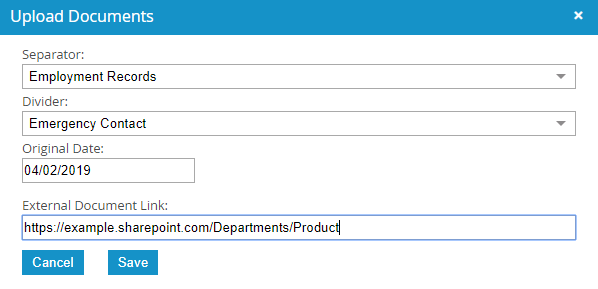
- Type the URL for the external document in the External Document Link field.
-
Click Save.

The URL is stored as a document in the File Tree; however, the actual document is not stored in FileBound. Users can access the document by clicking the External Document Link hyperlink.

Menu