Assign Users to Connected Apps
Note: This section is only relevant if using Salesforce as your CRM. Dynamics 365 users will have been assigned the required access in the pre-deployment and deployment sections. Proceed to the next step.
Following your managed package installation, the InGenius apex package will have installed two connected apps:
-
InGenius Admin — Allows admins to configure InGenius managed groups, view user licenses, and manage telephony settings.
Note: Only Salesforce System Administrators and users with the custom "InGenius_Administrator" permission set can access the Admin App.
-
InGenius Connected App — A connected app providing authorization and authentication for the InGenius application.
Connected Apps Configuration
After the two connected apps have been installed, they will need to be configured to properly authenticate users and assign user access. Follow the steps below:
Configure the InGenius Admin App
-
From Setup, enter App Manager into the Quick Find Box.
-
Select the App Manager from the list of options.
-
Find the "InGenius Admin" in the list, click the dropdown arrow, and select Manage.
-
At the top center of the "InGenius Admin" page, click the Edit Policies button.
-
Under "Basic Information", verify that the Start URL field is filled in with:
-
"/apex/UplandIG__AdminStart"
-
-
Under "OAuth Policies", change Permitted Users to "Admin approved users are pre-authorized"
Note: If you encounter the following pop up warning, click OK to continue.

-
Click Save to complete your configuration.
Assign Users to InGenius Admin App
System administrators will require access to the InGenius Admin App. To assign access, follow the steps below:
-
From Setup, enter App Manager into the Quick Find Box.
-
Select the App Manager from the list of options.
-
Find the "InGenius Admin App" in the list, click the dropdown arrow, and select Manage.
-
Under Profiles, click the Manage Profiles button.
-
Select any applicable profiles with the System Administrator role, then click Save.
Note: Only profiles with the System Administrator role or who have been assigned to an "InGenius_Administrator" permission set, which is automatically created when installing the InGenius apex packages, can be assigned to and access the InGenius Admin App. To grant a user access to the Admin App without a System Administrator role, assign them to a created "InGenius_Administrator" permission set instead.
Configure the InGenius Connected App
Caution: For the InGenius Connected App to properly authenticate users, you must set Permitted Users to "Admin-approved users are pre-authorized", and then assign user access.
-
From Setup, enter App Manager into the Quick Find Box.
-
Select the App Manager from the list of options.
-
Find the "InGenius Connected App" in the list, click the dropdown arrow, and select Manage.
-
At the top center of the "InGenius Connected App" page, click the Edit Policies button.
-
Under "OAuth Policies", change Permitted Users to "Admin approved users are pre-authorized"
Note: If you encounter the following pop up warning, click OK to continue.
-
Check the box for "Enable Single Logout" and fill the single logout URL with:
-
"https://app.ingenius.com/authenticator/dispatch-log-out.html"
-
-
Click Save to complete your configuration.
Assign Users to InGenius Connected App
Both standard users and system administrators who use InGenius will need access to the InGenius Connected App for authentication. Follow the steps below to assign user access:
-
From Setup, enter App Manager into the Quick Find Box.
-
Select the App Manager from the list of options.
-
Find the "InGenius Connected App" in the list, click the dropdown arrow, and select Manage.
-
Under Profiles, click the Manage Profiles button.
-
Select the profiles that should have access (Standard User, System Administrator), then click Save.
For more information on managing connected apps in Salesforce, including how to assign user access, refer to the official documentation page.
Configure the InGenius Telephony Popup App
To ensure compatibility with Google's third-party-storage change, an additional InGenius app must be assigned to your users and then hidden from appearing as it is not meant to be directly interfaced.
-
From Setup, enter App Manager into the Quick Find Box.
-
Select the App Manager from the list of options.
-
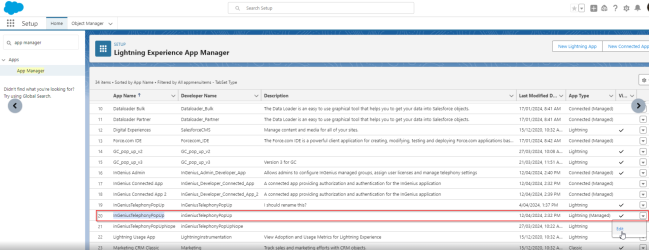
Find the "InGeniusTelephonyPopUp" app in the list, click the dropdown arrow, and select Edit.
-
Select User Profiles from the left navigation menu.
-
From the Available Profiles list, select Standard User and System Administrator, then click Save.
-
Return to the Quick Find box and enter App Menu, select it from the list of options.
-
From the list of available apps, find InGeniusTelephonyPopUp and select 'Hide in App Launcher'.


